
Why does riding a snowmobile seem as natural as breathing for some people, while others struggle just to keep control?
Have you ever said or heard statements like these:
“I always have a ski in the air.”
“It won’t turn at all.”
“It’s too hard on my arms.”
“I feel as if I’m getting launched over every bump!”
I often talk with other riders, and I’m always surprised by how differently they describe the handling of the same snowmobile. But what could be causing this?
The answer doesn’t lie only in riding technique. It also depends on many small details that are often invisible to the eye.
Let’s take a look at how simple tweaks can make a big difference on your next ride.
Rider Ergonomics: Position and Comfort on the Snowmobile
Over time, I’ve noticed that most riders don’t fully understand the adjustments available on their sled. Many prefer not to touch anything, afraid they’ll make things worse. They try to adapt their riding style instead.
When you sit behind the wheel of a car for the first time, would you accept having your knees jammed under the steering wheel and your head brushing the roof? Probably not. You take the time to adjust the seat, wheel, and mirrors. Proper posture and visibility ensure you ride comfortably—and safely.
You know what? It’s exactly the same with your snowmobile.
Basic Snowmobile Adjustments: Where to Start
First, remember that factory settings are only an average. They’re a baseline, not a final setup.
Take a few minutes to open your owner’s manual—yes, that little book nobody reads and that ends up in a drawer somewhere. It’ll help you quickly understand the available adjustments.
1. Adjusting the Controls and Handlebar
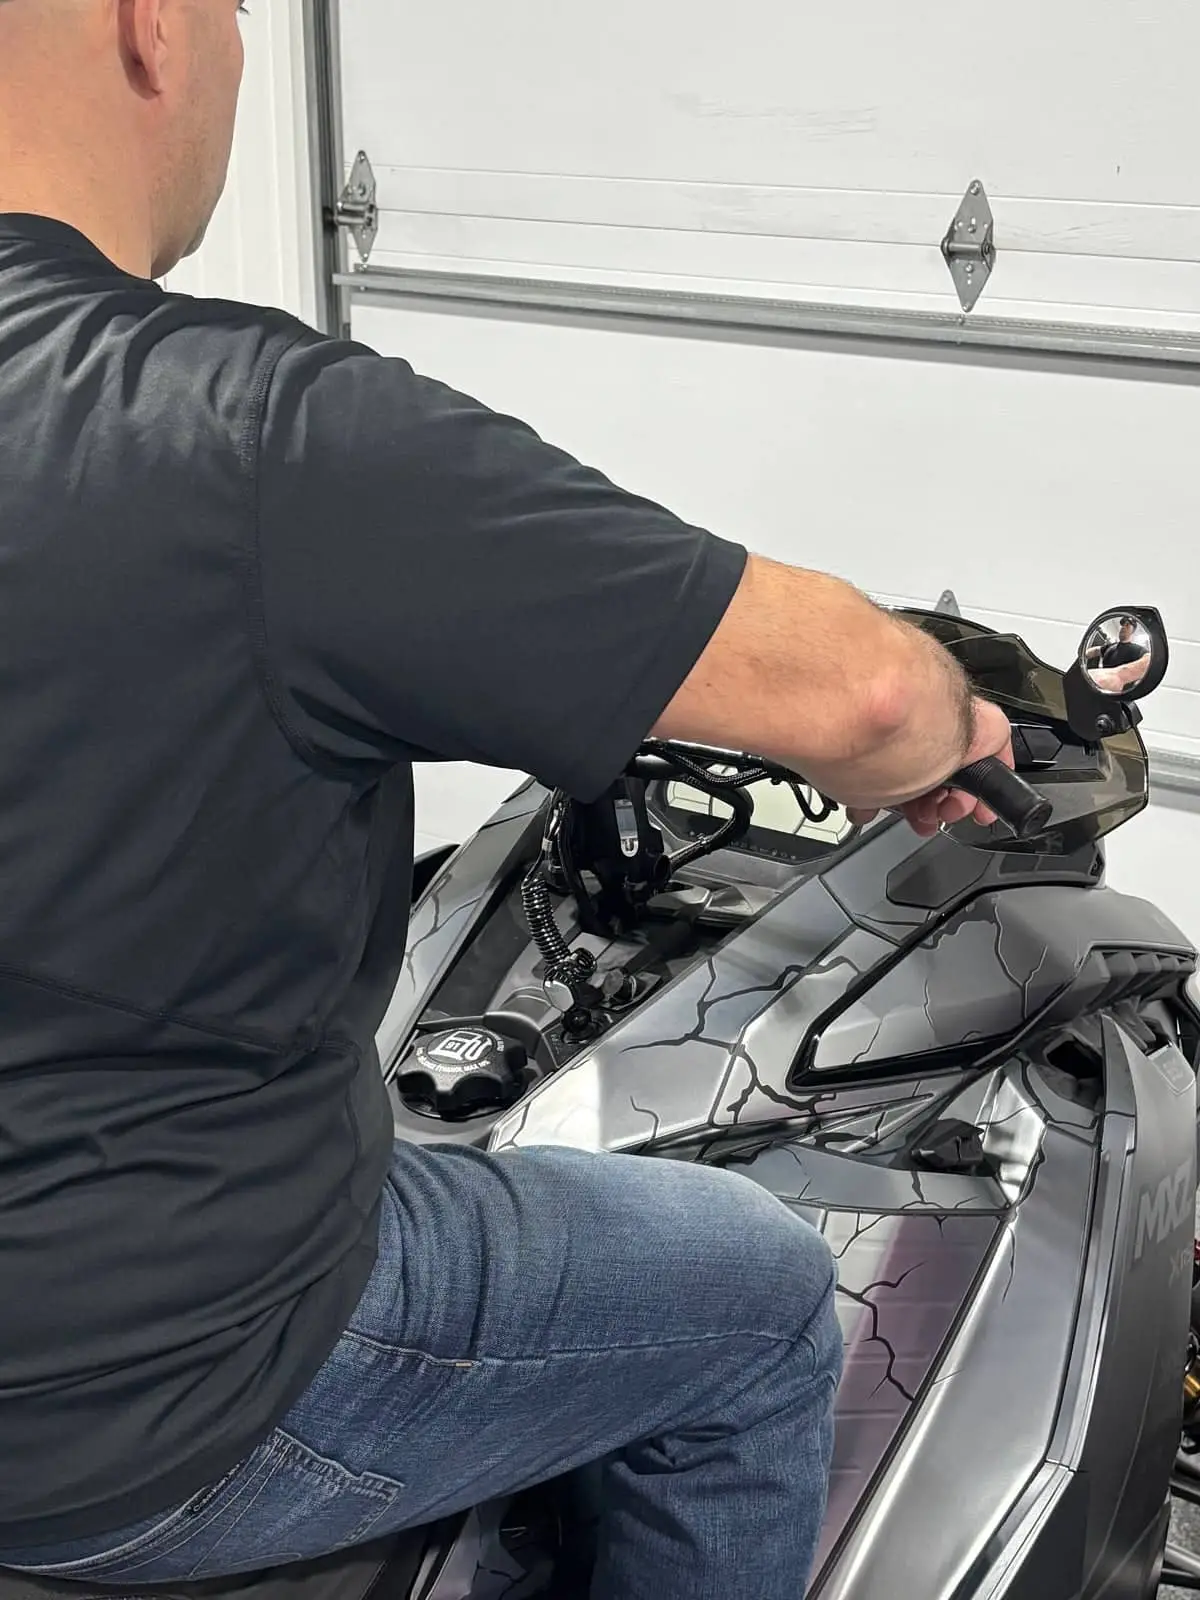
The ideal posture is a straight back with your elbows relatively high and slightly bent. This gives maximum power with minimum effort. The easiest way to achieve it is by adjusting your handlebar angle. A low bar close to the body may feel comfortable, but it can also cause shoulder pain and fatigue. Loosen the mounting bolts slightly and test different angles. Don’t forget to do the same with the throttle, left-hand switch, and brake lever. A proper setup allows smoother movement.
Pro Tip
Mark each component with a Sharpie so you can easily return to your original position if needed.
2. Rear Suspension Adjustment: Springs and Sag
The main benefits of a well-adjusted rear suspension include:
- better shock absorption;
- improved riding position;
- optimized weight distribution;
- enhanced handling;
- and better cooling system control.
These simple steps will greatly affect how your sled behaves. You’ll need your new best friend again: your owner’s manual!
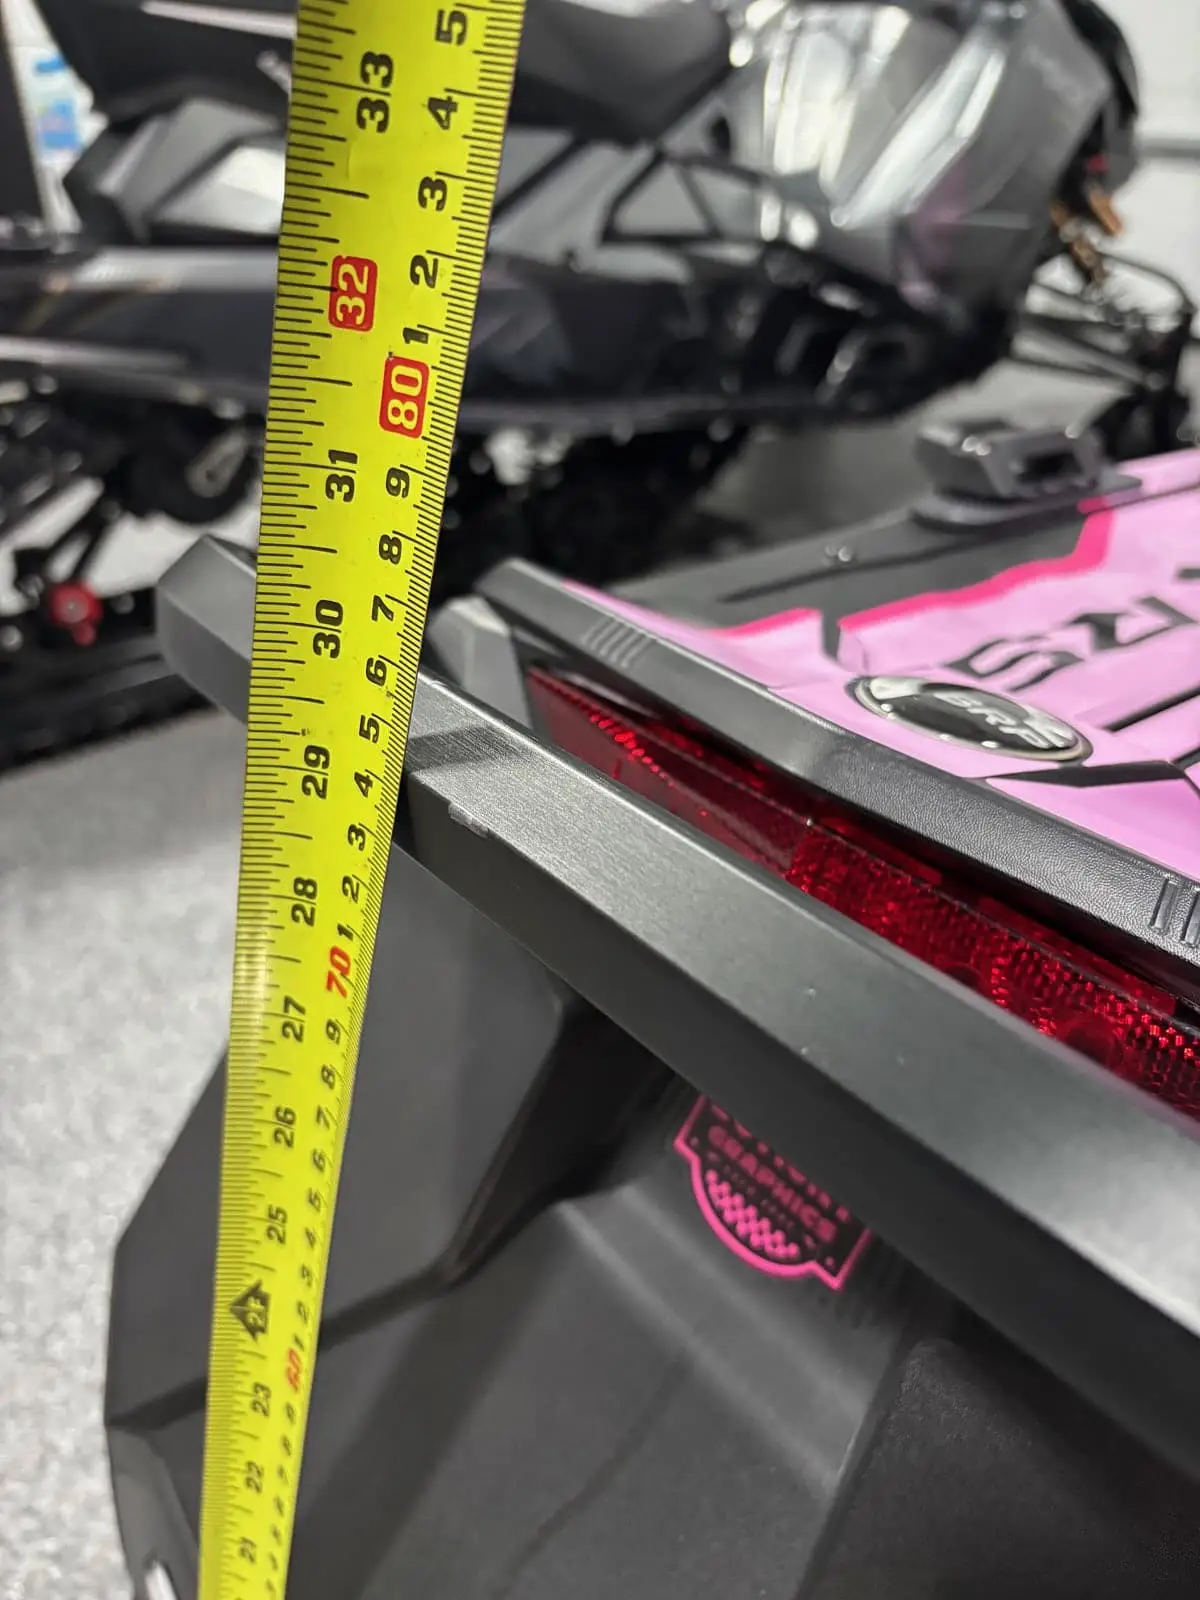
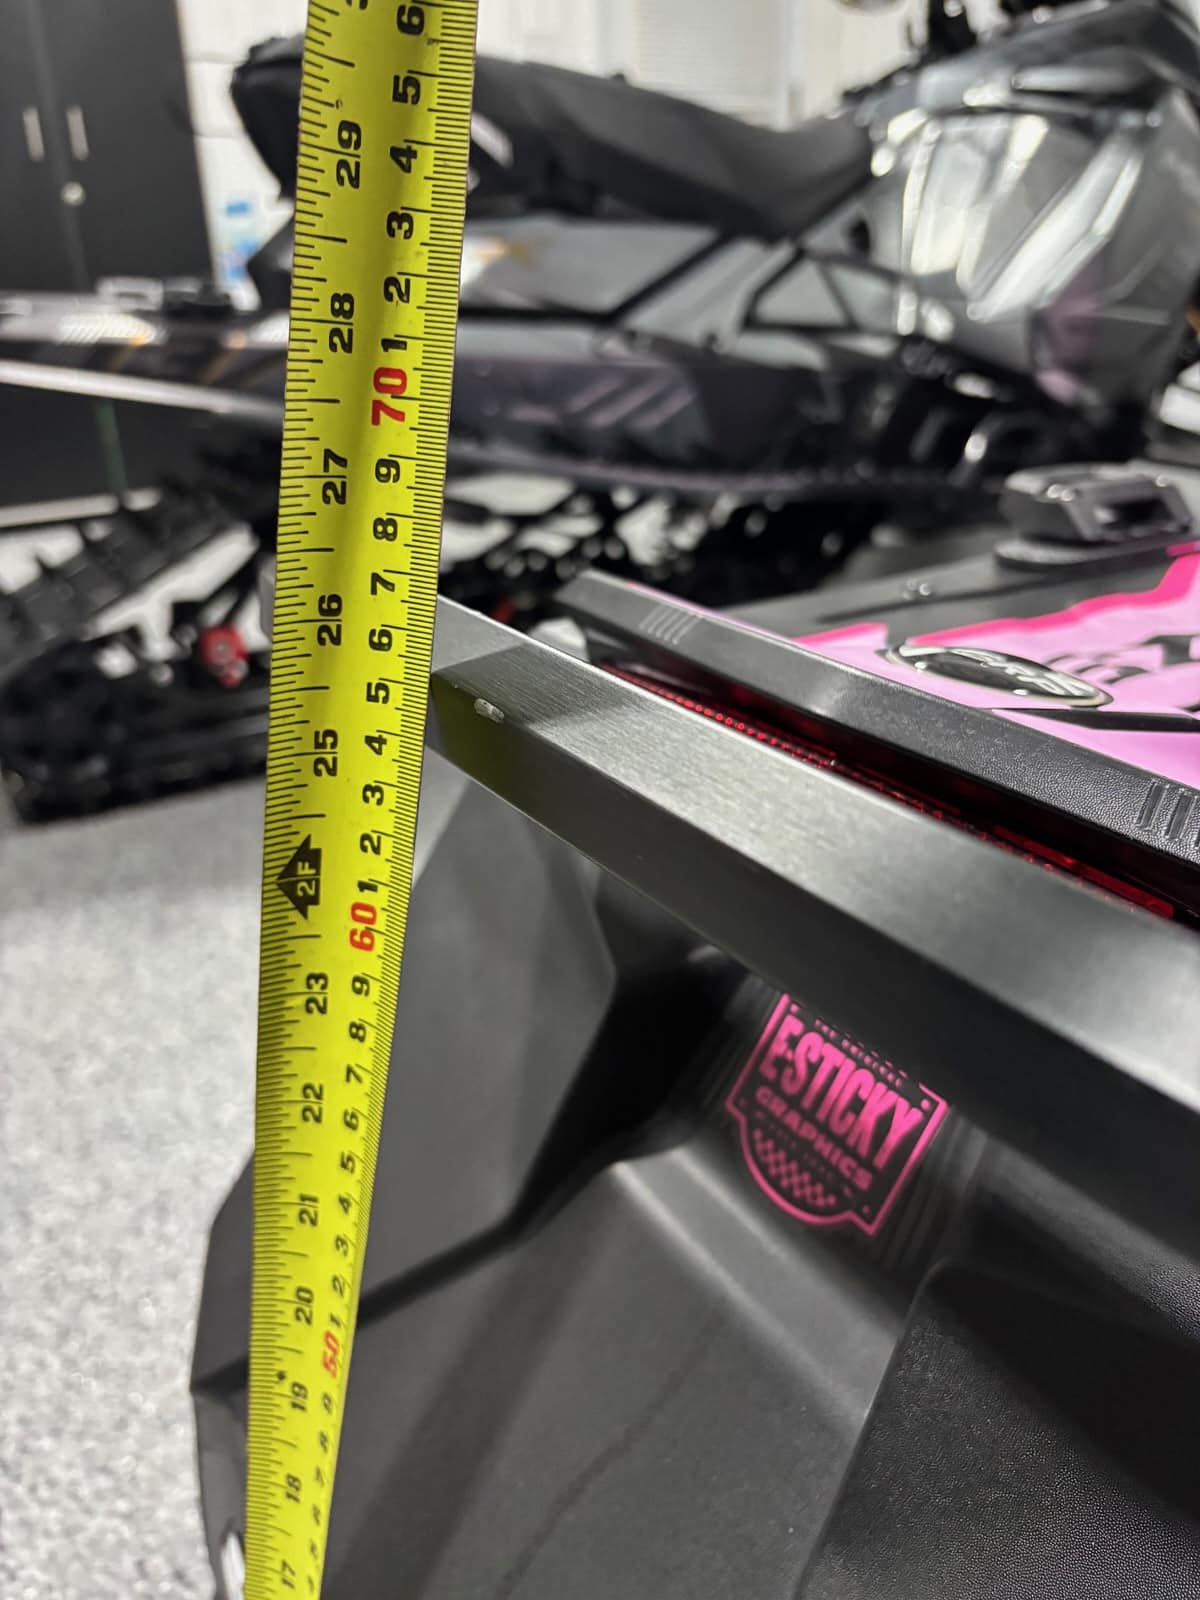
3. How to Adjust Suspension Sag
This adjustment has the biggest impact on all the factors above.
It’s as simple as A – B = C! Sag is measured from the rear bumper. Refer to your owner’s manual to find the manufacturer’s recommended measurement, usually listed under “suspension” or “ride customization”.
Steps to measure it properly:
- “A” is the distance between the ground and a fixed point on the sled (for example, the rear bumper centre) when the suspension is fully extended, with no rider.
- “B” is that same distance but with riders, gear, and baggage on board.
- “C” is the difference between “A” and “B”.
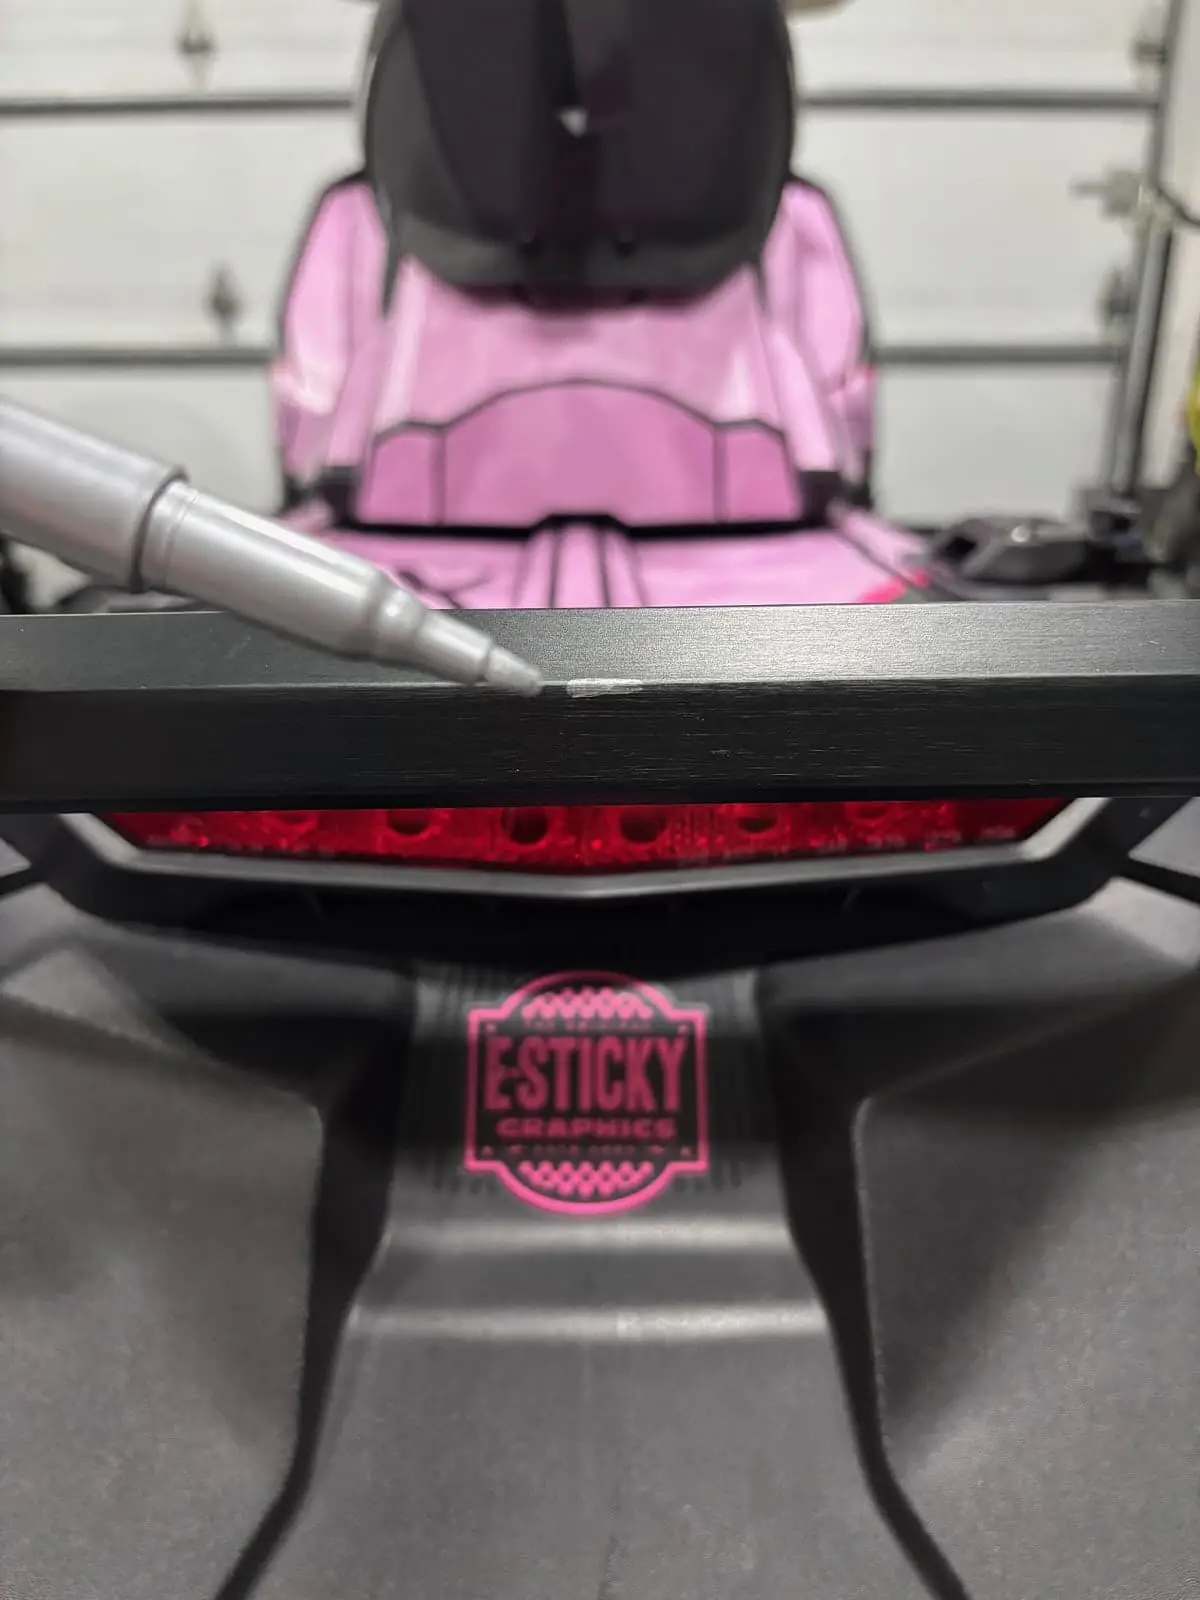
Pro Tip
Mark the bumper with a Sharpie to ensure consistent reference points for accurate measurements.
For a 2024 Ski-Doo MXZ 850 X-RS, sag “C” should be between 50 mm and 75 mm. If your measurement is above that, increase spring tension with the adjustment blocks.
If it’s below 50 mm, reduce tension by moving to a lower-numbered position.
If you’re still out of range at maximum stiffness, consider replacing your springs with higher-rate ones. Your dealer can guide you through this. This single adjustment can drastically improve your sled’s control.
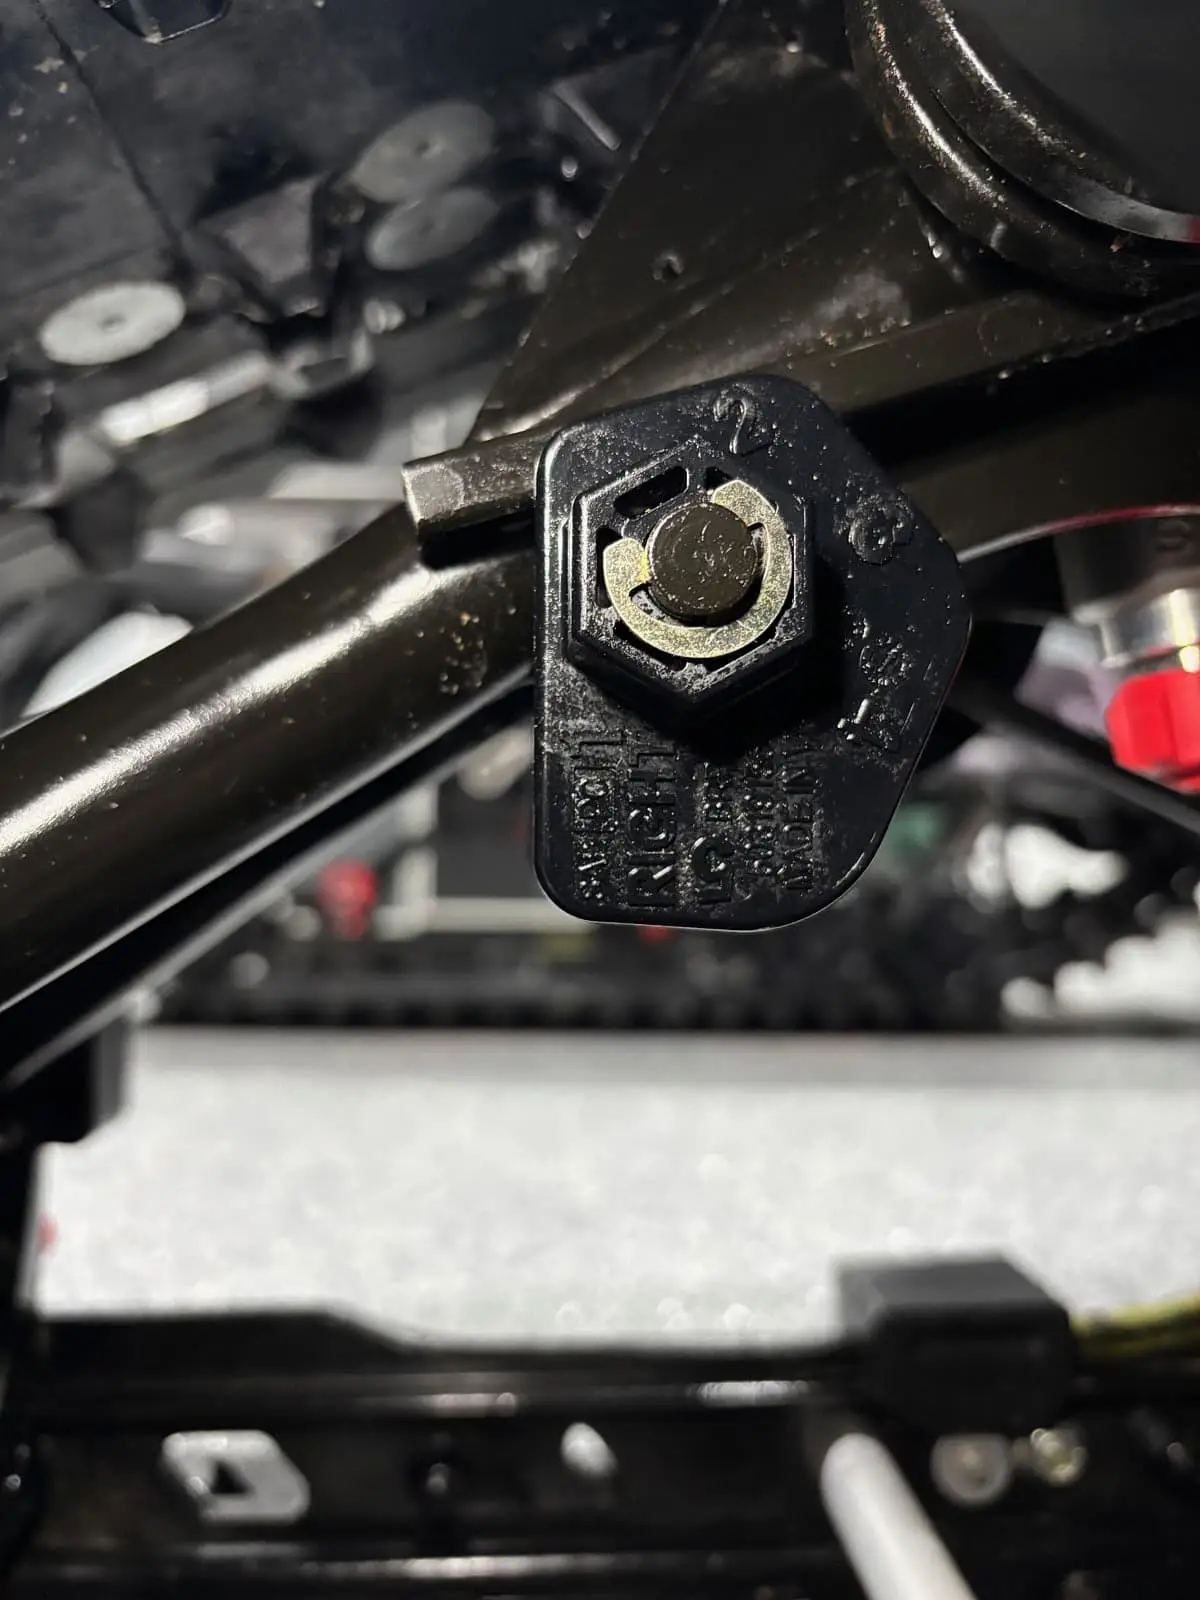
4. Adjusting Snowmobile Weight Transfer
Many manufacturers allow you to fine-tune weight distribution using a rear suspension device called a transfer block. Adjusting these coupling blocks affects handling, especially during corner exits.
![]()
On Ski-Doo trail models, this block has four numbered sides, each with a distinct thickness. Position 4, the thickest, minimizes rear transfer and adds weight to the skis. Steering becomes more precise but slightly heavier. Position 1, the thinnest, shifts more weight to the track, creating lighter steering and a sportier feel. Don’t hesitate to test different configurations during a ride—conditions can change throughout the day.
Pro Tip
The harder the surface, the higher the number you should try.
5. Limiter Strap Adjustment: Balance and Traction
The limiter strap length affects how much load the centre spring carries, especially during acceleration and cornering.
A longer strap increases shock absorption and lightens the skis under acceleration. A shorter strap limits suspension travel and adds pressure to the skis.
6. Front Shock Adjustment
Most front shocks are adjustable, and some offer multiple settings. To avoid confusion, start by noting each shock’s current position.
If your sled is new, remember the suspension also needs a break-in period and may feel stiffer for the first 500 km.
Like with the handlebar, experiment with different settings on the same day in similar trail conditions. Choose a short section of trail and make several passes to feel the differences.
Many owner’s manuals also include troubleshooting tables for common handling issues—check them out.
Shock Adjustments
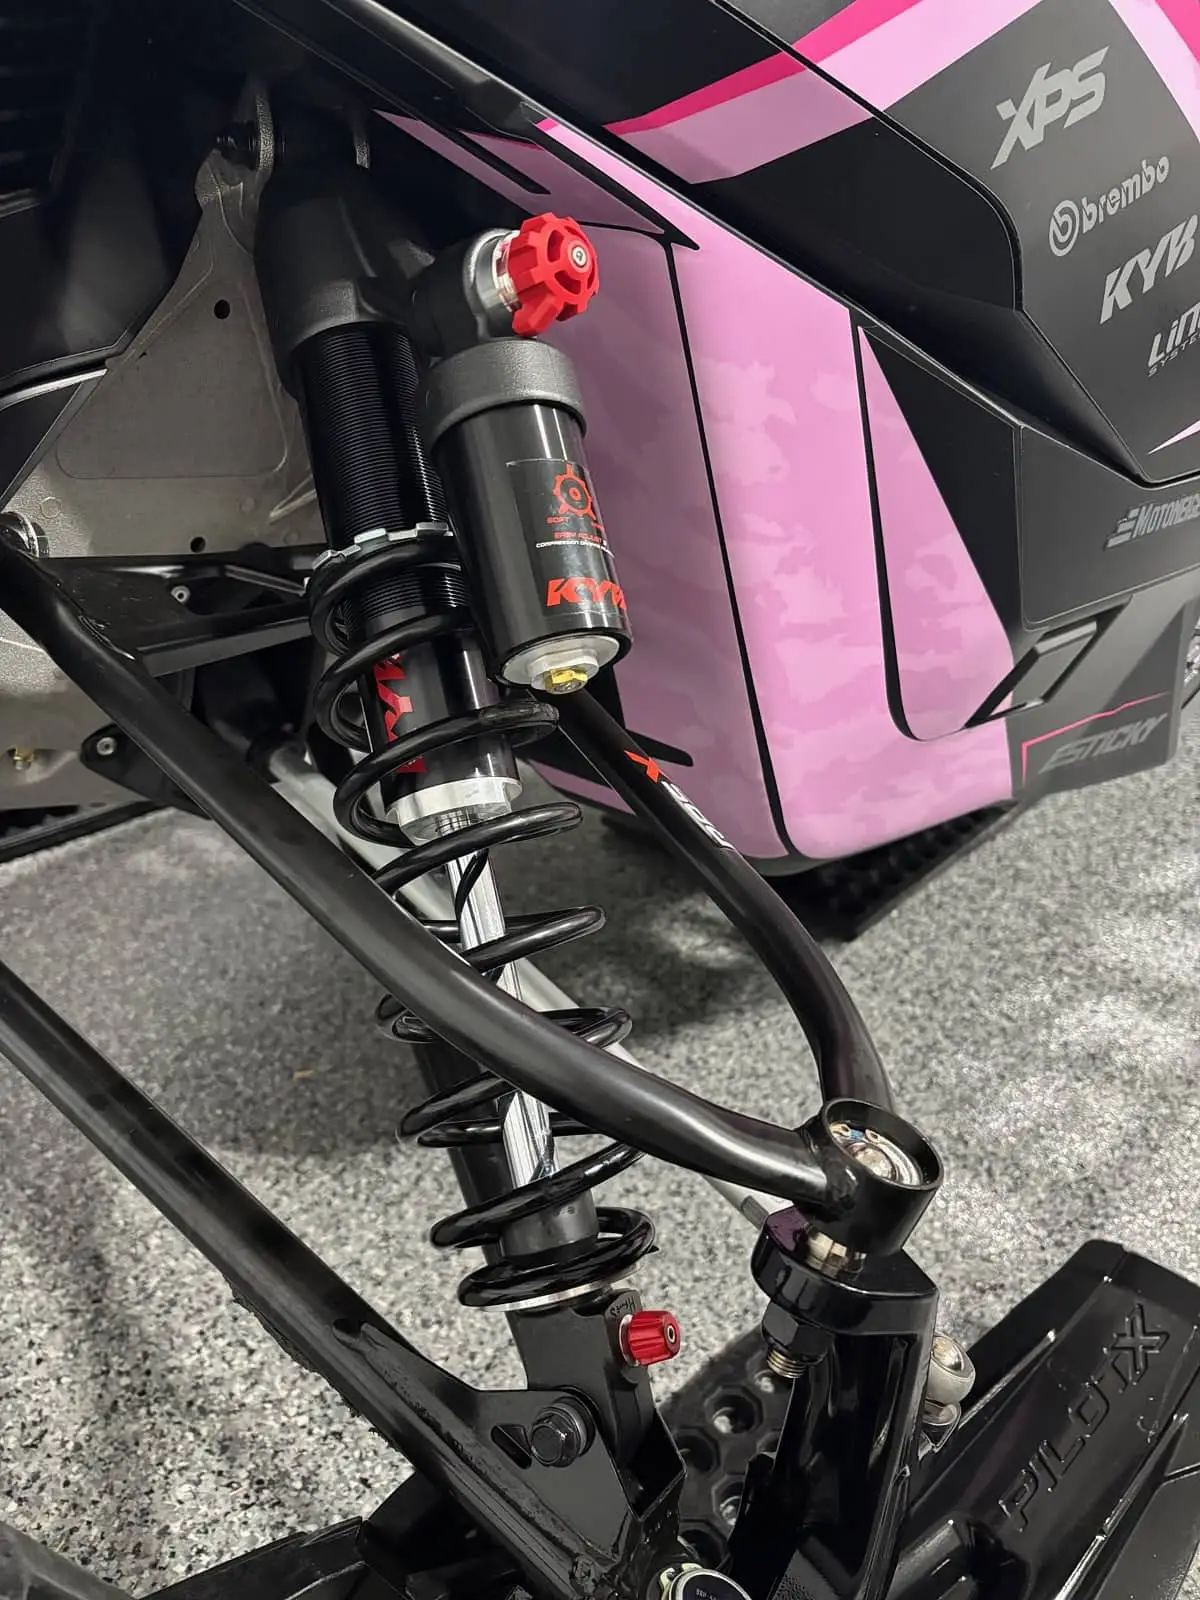
Most front shocks offer several types of adjustments. Let’s keep it simple:
1. Spring Preload
This cam or threaded-ring adjuster increases or decreases spring tension. Add tension to reduce front-end sag and/or increase ground clearance.
2. Compression Speed (on some models)
Located at the top of the shock, this hand-turn dial—often red—controls how fast the shock compresses. When the terrain gets rougher, turn it a few clicks clockwise to prevent bottoming out.
Without going overboard, a slightly firmer front suspension improves bump absorption and steering precision.
Pro Tip
Make one change at a time. Each adjustment will affect overall handling.
7. Ski Adjustments
Check Toe Alignment
Make sure your skis are aligned according to manufacturer specs. Once again, your owner’s manual will guide you.
Ski Spacing Adjustment
![]()
Some ski models allow width adjustment by moving spacers along the mounting axle. A narrower stance gives sharper, more precise steering at low speeds. A wider stance improves high-speed stability but can make steering heavier. If you have three width options, the middle one is usually best.
Another major factor in handling and ride quality is the wear bar. We’re lucky to have specialized companies that offer products tailored to every need.
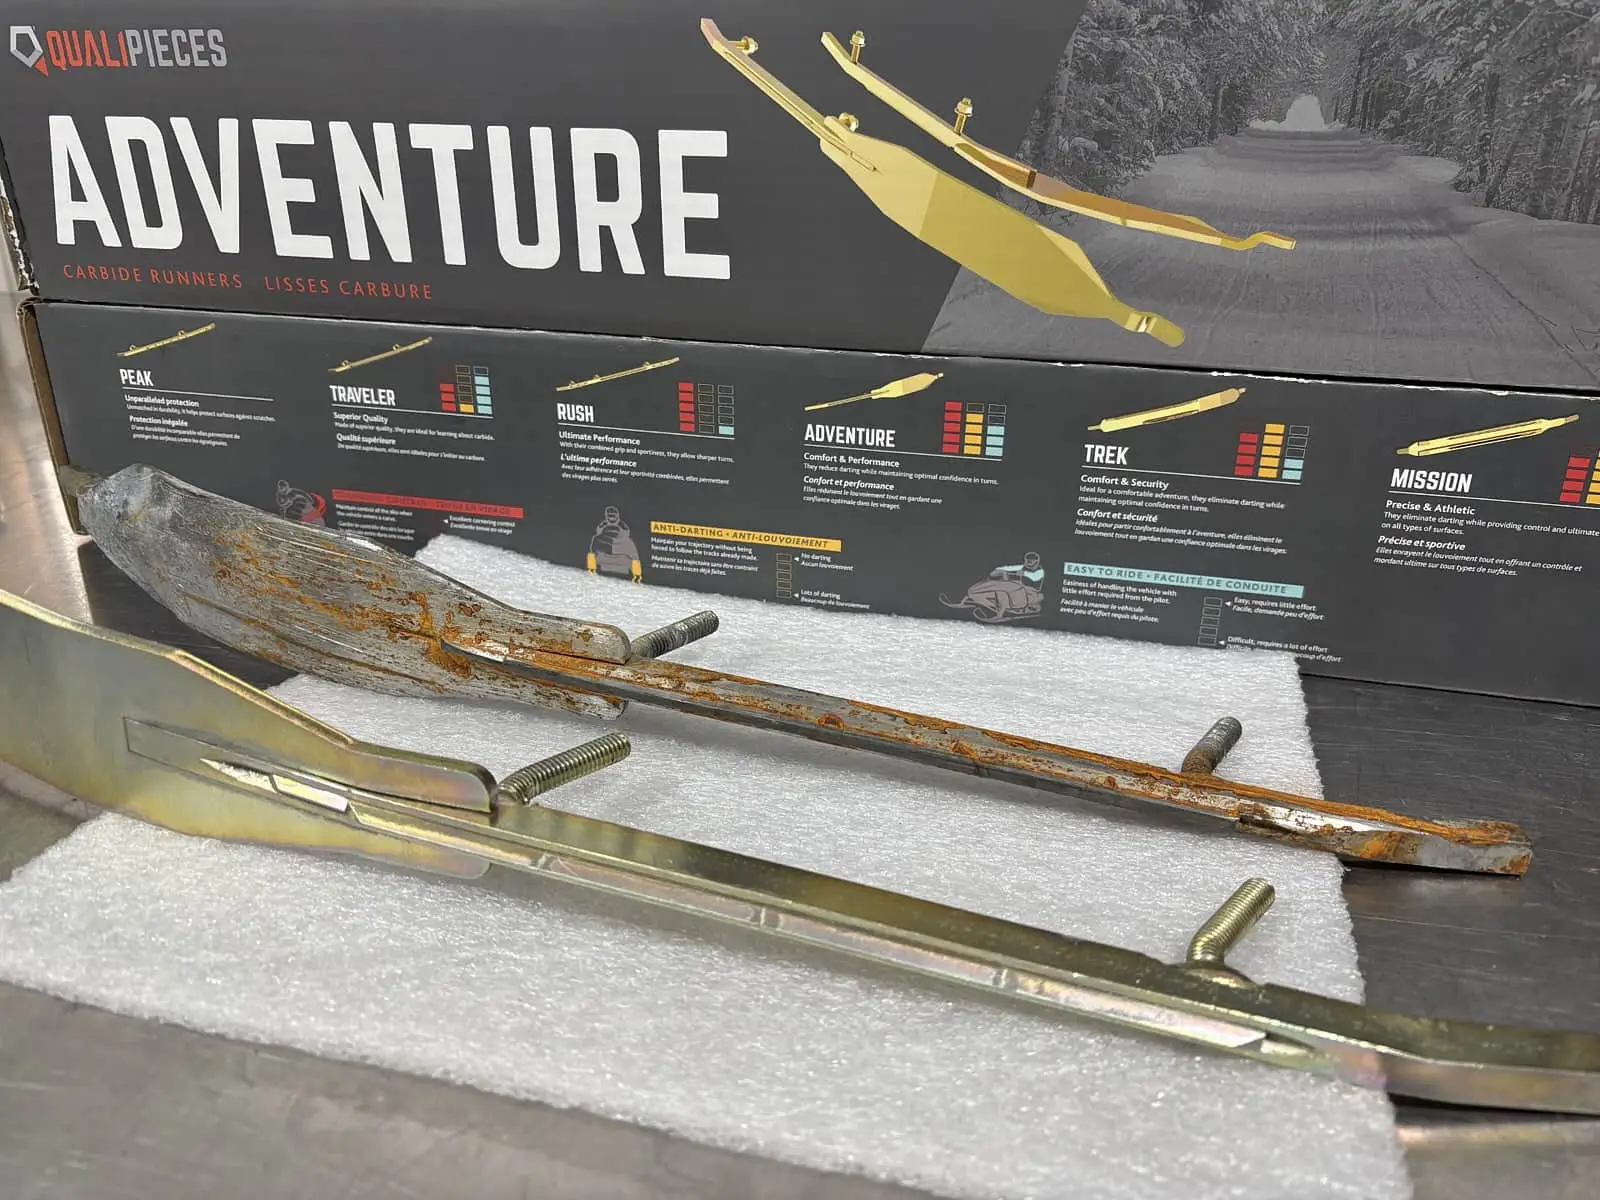
Personally, I really like the carbide runner selector tool from the Québec manufacturer Qualipièces. They provide various solutions to correct issues like darting while improving control. If you’re still using stock runners, I strongly recommend looking to purchase through the aftermarket. It’s one of the best investments you can make in your snowmobile.
Conclusion: Fine-Tuning for Comfort and Control
There are many more possible adjustments, but these are the simplest and most effective. My goal is to show that, by personalizing a few key settings, your snowmobile becomes safer—and far more enjoyable—to ride.
Enjoy the ride!
