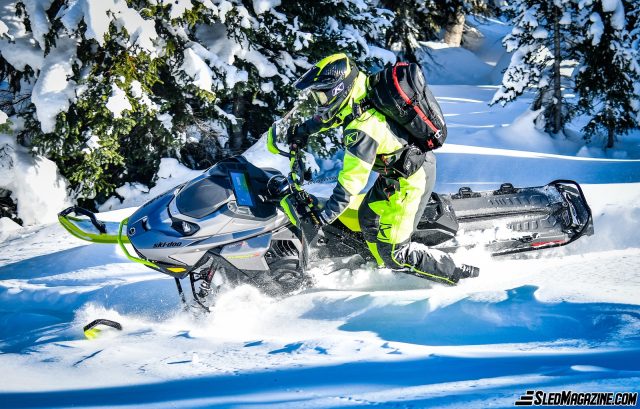
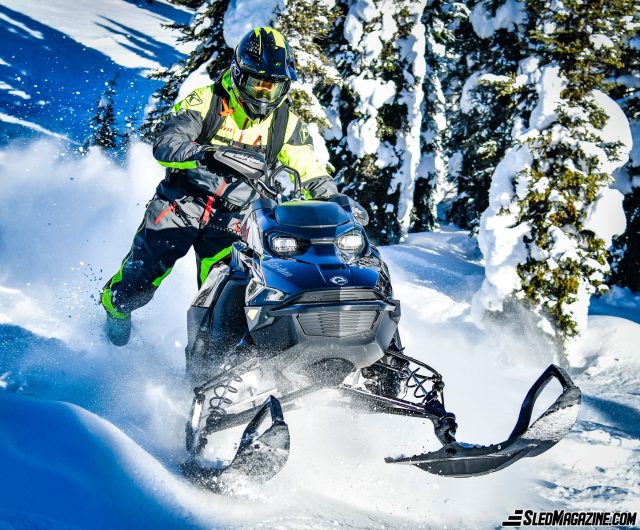
During the 2021-22 snowmobile season I was able to ride with and test a few new pieces of Klim Technical Riding Gear. These were all new pieces that I had never ridden with before, so I was excited to get out in the mountains and have a full season to put them to the test. This year my season started in early December and ran through late April. So, over the course of the season, this gear was tested through varying winter mountain conditions from deep powder days to -33F (-36C) degree cold high-speed trail days to warm 40F (4C) spring riding days and everything in between. It’s great to be able to test gear over such a wide range of temperatures and conditions.
As a point of reference for gear sizing, my height is 5’11” (180cm) and my weight is 170 lbs (77kg).
Klim Gear Klim Technical Riding Gear Tested
- RIPSA ONE-PIECE – HI-VIS – Large
- F3 CARBON HELMET – RIPPER HI-VIS – Medium
- EDGE GOGGLE – Focus Black with Yellow Tint
- POWERXROSS HEATED GLOVE – Asphalt Black – Large
- ATLAS 26 AVALANCHE AIRBAG PACK
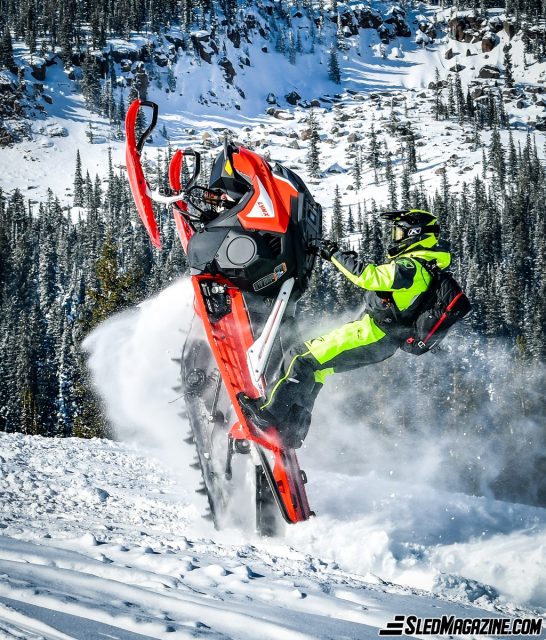
RIPSA ONE-PIECE – HI-VIS
This year I tried the Ripsa one-piece suit. It’s a non-insulated one-piece that’s designed for maximum mobility. The main framework of the Ripsa one-piece suit is a 2-layer GORE-TEX performance shell that’s engineered to be durable while still being highly breathable with great ventilation. The Ripsa also has a slightly more relaxed fit than the Lochsa one-piece. Even with its more relaxed fit, the Ripsa doesn’t feel baggy or bulky but does allow for an extra layer without feeling cramped or too tight. Because of the two-piece GORE-TEX material design it also feels softer and slightly more maneuverable than the 3-layer GORE-TEX design of the Lochsa mainly because of the difference in stiffness between the 2 and 3-layer GORE-TEX designs. As with all GORE-TEX products they’re water-proof and breathable, perfect for any snowmobiler looking to stay out longer and maintain the highest level of comfort.
Venting and Fit Options
The main venting option for the Ripsa is 16” armpit vents with mesh. The size and placement of these large vents work well to cool down your body when opened. You can open the leg zippers for additional venting, but there’s no mesh to keep snow out, so no powder turns with the leg zipper opened or you’ll get a lot of snow in your gear.
Inside the Ripsa theirs a hidden built-in suspender system to taylor the fit and feel of the one-piece to each rider. The suspender system works well and helps the rider get precise placement of the one-piece for their body shape and size. If for some reason you don’t want the suspender system, you can easily remove it.
YKK waterproof zippers are a key element to the durability and performance of the Ripsa. They flawlessly held up to the abuse of this mountain rider for a whole season and are still working perfectly after the abuse I put them through.
Built-in knee pads are another nice feature of the Ripsa. Klim also left enough room in the leg and knee area to add additional knee pads or knee braces for riders looking for added protection. I ride with knee braces to protect my knees in case the sled flips and lands on me. Knee braces are bulky and take up a lot of room, so it was great that the Ripsa had plenty of room for knee braces to fit and freely move for maximum range of motion.
Keeping the Snow Out
The Ripsa has a velcro boot cuff and tether to keep the deep snow from coming up your legs when you’re walking or wading through deep snow. It also has a little extra room in the arm cuffs to better fit over smaller gloves, yet it is not getting in the way of a gauntlet-style longer glove. It also gives you the option to fully remove or adjust the gore-tex hood.
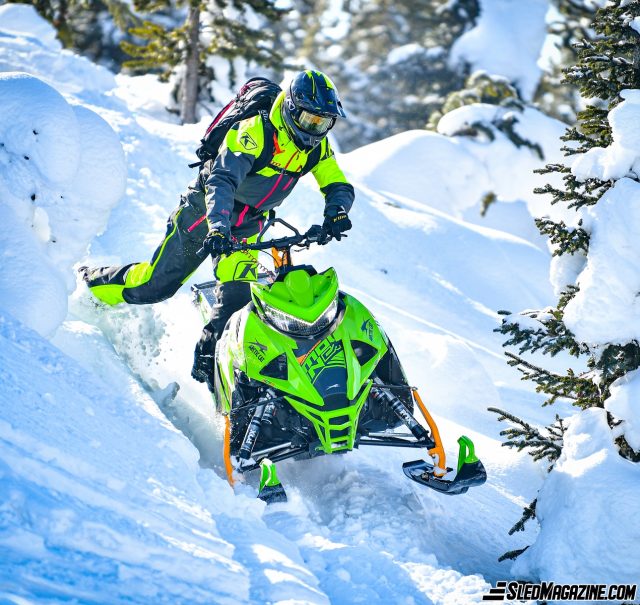
The Ripsa I chose this season was the HI-VIS color. It was designed with two main colors, Asphalt and HI-VIS, with a third accent of red zippers and a red Klim logo embroidered over the right chest. I thought it was a very good-looking one-piece and having three colors gave it extra depth and pop of color that appealed to me and helped me stand out on the snow.
Ripsa has slightly more room than the Lochsa with a high-end look and feels with nice touches like embroidered Klim emblems and stylish zipper pulls. The fit and finish of the Ripsa one-piece are very nice, all still maintaining a maximum level of comfort while out in the elements and on the snow.
For Ripsa, the combination of comfort and performance for the one-piece suit is incredible and was appreciated all season long. The Ripsa is a high-level gore-tex mono for value and brings one of the best values for its price.
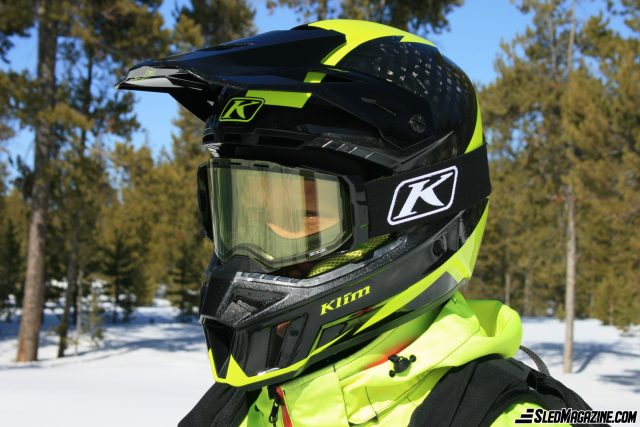
F3 CARBON HELMET – RIPPER HI-VIS
The F3 Carbon Fiber Helmet is a super lightweight helmet designed for snowmobiling and off-road adventures. When you first pull this helmet out of the box, you’ll immediately notice two things: it’s super light and it looks amazing. All Klim helmets look good, but the F3 with the hand-laid carbon fibre gives it an added depth and look that’s really appealing especially on sunny days. The weight of the F3 carbon helmet is light, I think it’s the lightest helmet I’ve ever ridden with.
When you put it on you hardly feel the weight, it’s comfortable and fits great. The F3 also has a larger eye port for improved visibility. Even though the eye port is larger, when I used the F3 with the Edge goggles, the fit was seamless. I didn’t have any cold spots between the helmet and the goggles even riding on some really cold days with higher speeds.
The F3 Carbon helmet comes with the Fid-Lock quick-release magnetic strap which is amazing and super easy to use. The Fid-Lock is a magnetic chin strap that once you adjust it once, you’re in and out of your helmet in seconds with the slight pull of the quick-release strap, an amazing feature of the F3 helmet.
Venting in the Right Locations
The F3 carbon helmet is incredibly efficient with its venting engineering. This helmet has 13 intake vents and 6 exhaust vents. It does a great job moving the air in and around your head to keep you cool when you’re riding sleds or dirt bikes. The vent design on the F3 is great and in the right location. Some helmets I’ve used in the past had vents next to your ears. The problem with vents in that location is it usually adds a lot of noise when you’re travelling at higher speeds. The F3 carbon fibre helmet was a great helmet all season long and in all the weather conditions it was tested in. It’s comfortable, quiet, easy to use and has a large eye port to allow for great visibility.
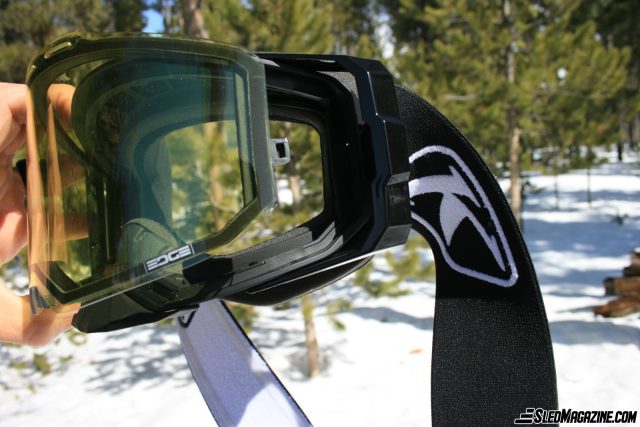
EDGE GOGGLE
The Edge goggle was incredible goggle all last season. It’s a goggle with many features but the two main features that stand out and put this goggle in the next level category are the incredible field of view and how quickly you can change out lenses. The quick-release magnetic slide lock system allows you to change lenses easily and in seconds. So, now you can bring an extra lens or two and, in a minute change out the lens to match the conditions you’re riding in. The field of view with the Edge goggle was incredible and made seeing your surroundings easier.
The Edge goggle has a silicon-lined strap to keep your goggles from slipping around on your helmet which works great.
Edge Goggles Fit Over Some Glasses
I don’t wear glasses, but I know plenty of people that ride wear glasses or use contacts. I tried putting on a pair of sunglasses to see if the Edge goggle would fit over them and they did. Now full disclosure, I didn’t test wearing my sunglasses and goggles at the same time out in the elements, so I’m not sure about fogging with limited air flow around the glasses, but they fit so it seems like it could be an option. Being able to wear your prescription glasses inside your goggles seems like a game changer for people that have glasses and need them to ride.
The fit of the Edge goggle with the F3 Carbon helmet was seamless with no cold spots. I also had no issues with fogging or freezing up. The Edge goggle has a lot of engineering with its foam design to maximize airflow to reduce fogging and improve comfort and fit to the rider.
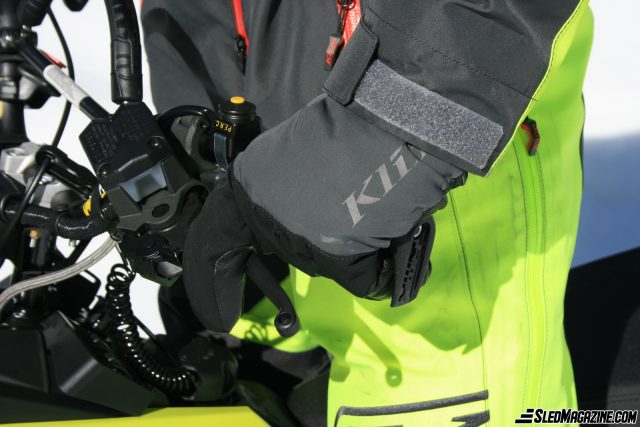
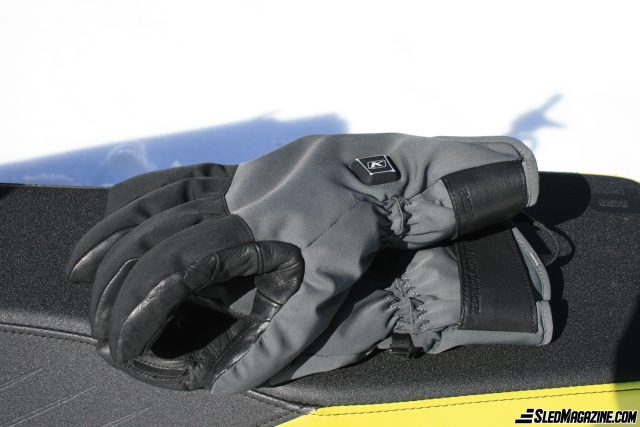
POWERXROSS HEATED GLOVE
The Powerxross heated glove is a lightweight wind & waterproof breathable Gore-Tex glove designed for maximum dexterity with a 3-level heating system. Now you can have the best of both worlds with this new heated glove, great grip and tactile feel to the bars all while having warm hands and fingers while you’re riding. The glove has a great feel to the bars, perfect for mountain or aggressive trail riding but with the ability to heat the gloves, you won’t have to sacrifice a better grip for warmth.
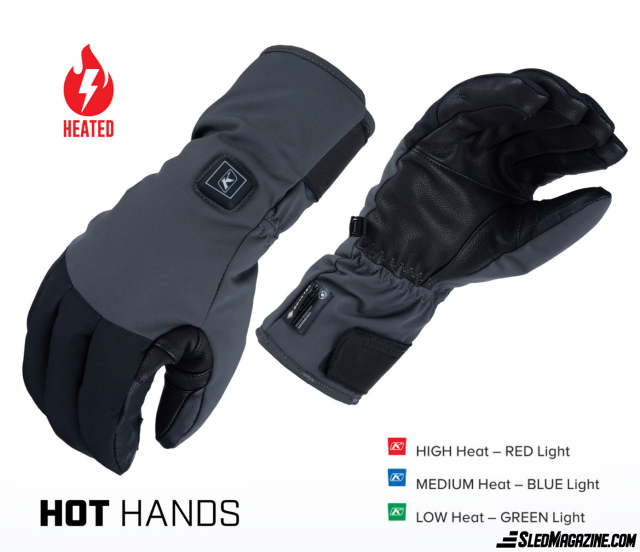
The heating elements start on the back of the hand and then wrap each finger to provide warmth in the areas you need it. When you turn the gloves on you can almost immediately feel the heat. It doesn’t take long, and your hands are toasty warm especially when you start on the high setting.
The 3-level heating system is extremely easy and intuitive to use. Once the battery is charged and plugged in, you just hold down the Klim button on the top of the wrist for about 1 second and the gloves turn on.
Three Easily Adjustable Heat Settings
When you initially turn the gloves on, they go to high heat with the button illuminating red. You can immediately turn down the heat level to medium (blue light) or low (green light) if you choose. If you don’t turn the heat setting down the gloves will automatically turn themselves down from high to medium after 10 mins on high. The battery in each glove will last up to 8 hours on low heat (Green Light), 3 hours on medium (Blue Light) and 1.5 hours on high heat (Red Light). The Powerxross gloves are powered by one lithium-polymer battery per glove that when in use, lives in a pocket in the wrist area. There is a slight bit of pressure in the wrist area from the battery that you’ll notice when you put the gloves on, I wouldn’t say it’s uncomfortable, but it’s noticeable.
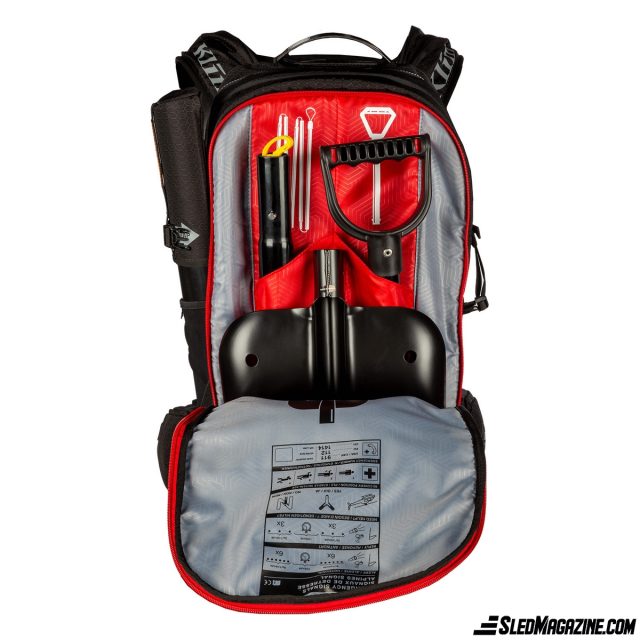
ATLAS 26 AVALANCHE AIRBAG PACK
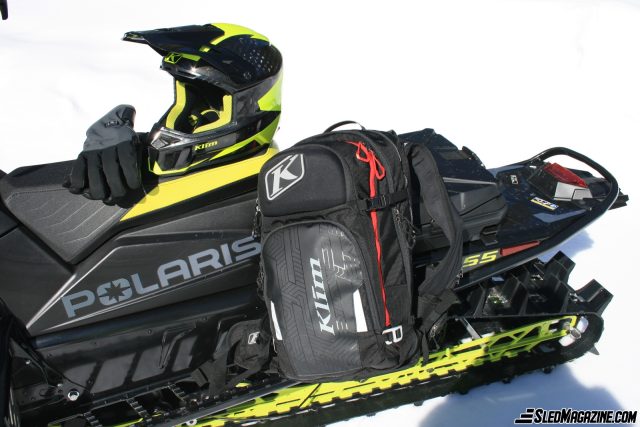
This season I was able to ride with and practice using the Atlas 26 avalanche airbag. Klim has two airbag options for their customers, the Aspect 16 and the Atlas 26. Both have many similarities and operate with the same airbag system; the largest difference is the size of the storage of each bag. The Aspect 16 has 16 litres of equipment storage, and the Atlas 26 has 26 litres of storage. I decided to go with the Atlas 26 because I’m a backcountry snowmobile guide, and avalanche instructor and assist with search and rescues, so extra storage and the ability to bring extra gear was important to me. After many pieces of training and trips to the backcountry, I feel the Atlas 26 was the right call for the gear I sometimes need to bring.
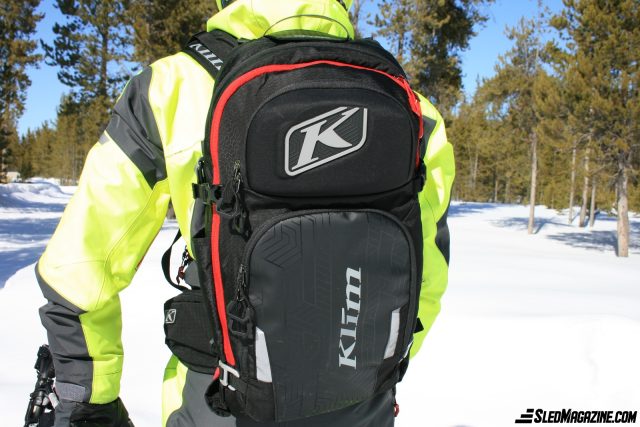
The Atlas airbag was a very comfortable pack that has a lot of straps to help it fit comfortably and securely to any rider or body type and size. It also has many different compartments and gear storage options for staying organized, which I appreciate. It’s nice to go right to the area where you have that item stored and grab it without having to open one big area and dig through all your stuff to find the one thing you need. One of the storage areas is dedicated to avalanche rescue gear and is marked with a red zipper so it is easy to find. Inside the avalanche gear storage area are specific spots for each safety item to keep you organized and efficient.
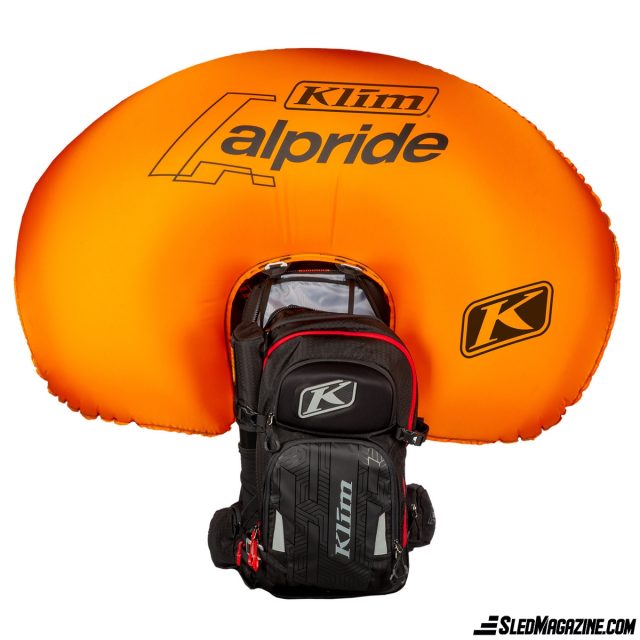
How Do You Know if the Atlas Airbag is Ready
The airbag blower system is charged with a micro-USB cable, and I found it charged in about an hour. The airbag also has a spot for a pair of AA batteries that will recharge the capacitor after use in the field, it also takes approximately an hour to recharge the system. Three lights will indicate if the system is ready, green, amber and red indicator lights to let you know if the bag is charged and ready to head out for a ride. Green means the system is good to go and is ready to be deployed. Amber means the power is getting low or the bag is partially charged.
The Red light means the bag is not ready and should be charged or something in the system isn’t ready. There’s no compressed air cylinder so you can do multiple deployments while you’re in the field. So, if you’re caught in an avalanche or have one coming toward you, you can deploy the airbag without hesitation. Then, once you’re safely away from the slide area you can deflate the airbag and reset the pack, so you have protection for the rest of your ride or until you’ve made it clear from avalanche terrain.
Practice Practice Practice….The Key to Success
The other nice part about having an airbag pack with a blower system is it can be reset and recharged easily, so you’ll be more likely to use it for practice. Practicing with all your avalanche gear is important. Even with your avalanche airbag. You should practice setting off the airbag when you’re in a safe spot in the field regularly. Don’t wait to learn how to use the airbag until you need it. Practice is the key to confidence and success.
The Atlas 26 airbag pack has 6 pull handle adjustments so you can set the location of the pull handle to the perfect height for each rider. The pack is also ambidextrous; whether you want the pull handle on the left or right side, the Atlas bag gives you the option.
Go Ahead and Treat Yourself…You Deserve Great Riding Gear.
When you’re out riding, the snowmobile you’re on plays a big part in the enjoyment of your day, but the gear your wearing is, in my opinion, just as important. The riding gear you’re in is what you’re feeling when you’re out riding all day long. When you’re in the elements it’s what’s keeping the cold out and from wrecking your day by sending you home early. If you’re hot and sweaty it might be because you don’t have breathable gear. If you’re getting cold, your gear might not be wind and waterproof.
There’s a lot of engineering that goes into high-quality riding gear and it pays to invest. Let’s face it, some of the best days of riding are when the weather is the worst. Invest in yourself and your future ride days. Buy good gear. Remember, you get what you pay for, so if you want to be comfortable and confident out in the worst mother nature has to offer…do yourself a favor and look at Klim’s winter gear lineup.