If you own a snowmobile equipped with a two-stroke engine and exhaust valves, this article is tailored for you. If you’ve recently noticed tough starts and sluggish acceleration, it’s time for a clean-up. While some manufacturers claim their exhaust valves are maintenance-free, there are exceptions. A snowmobile idling too long or using the wrong injection oil may need more thorough maintenance. I’ll guide you to the best of my knowledge to simplify the task.
Note:
These instructions are based on a Polaris RMK Khaos Slash snowmobile equipped with a Patriot 9R 900 cc engine. You can apply this information to other brands or models, but tools and specifications may vary. The basic operation remains similar.
Important: DO NOT DISCONNECT THE BLACK CABLE CONNECTED TO THE VALVE BOX. This could disrupt the engine’s brain and require recalibration.
Work safely within your limits. A well-ventilated space is recommended, and wearing safety glasses is essential.
Difficulty Level: Moderate
Required Tools:
- Ratchet wrench with a 4- or 6-inch extension.
- 13 mm socket.
- 5 mm hexagonal socket.
- Universal joint.
- Wire cutters.
- Flathead screwdriver for springs.
- Combustion chamber cleaner.
- Brake parts cleaner.
- Scotch Brite scrubbing pad (no steel wool, steel brush, or grinder).
- Container for soaking and recovering sprayed product.
- Small flathead screwdrivers.
- Toothbrush-style brush.
- Rags or cardboard.
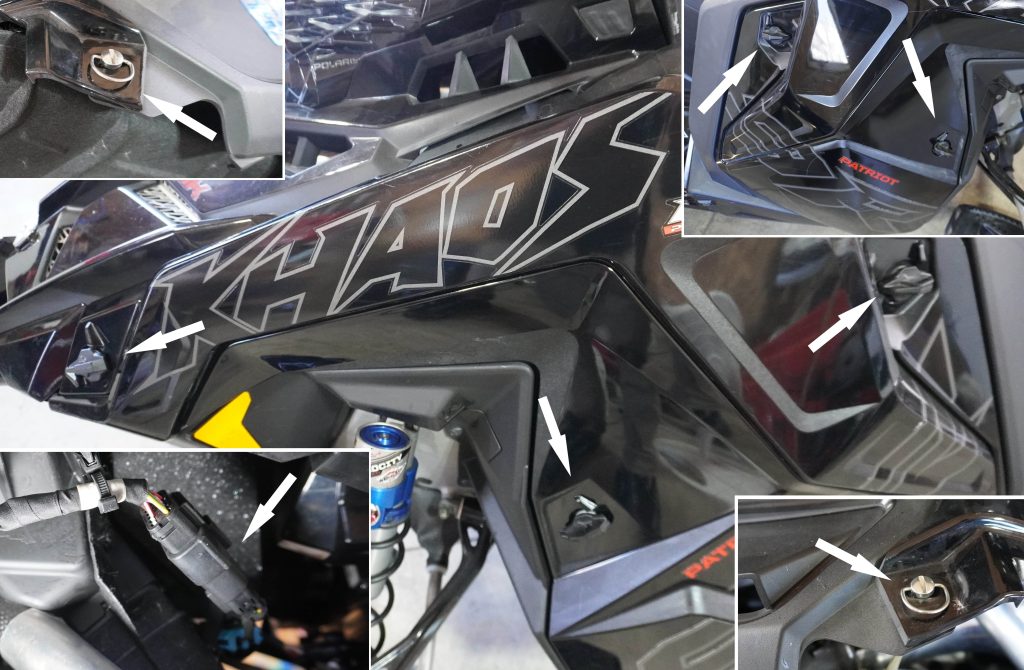
Step 1: Removal of Protective Covers and Hood.
Required Tools: None
Steps:
- Remove the side protective covers.
- Disconnect the main wiring under the hood on the right side (brake side).
- Remove the hood by unscrewing the 2 safety screws on each side of the headlight. Turn them ¼ turn counterclockwise.
- Place the hood in a safe location.
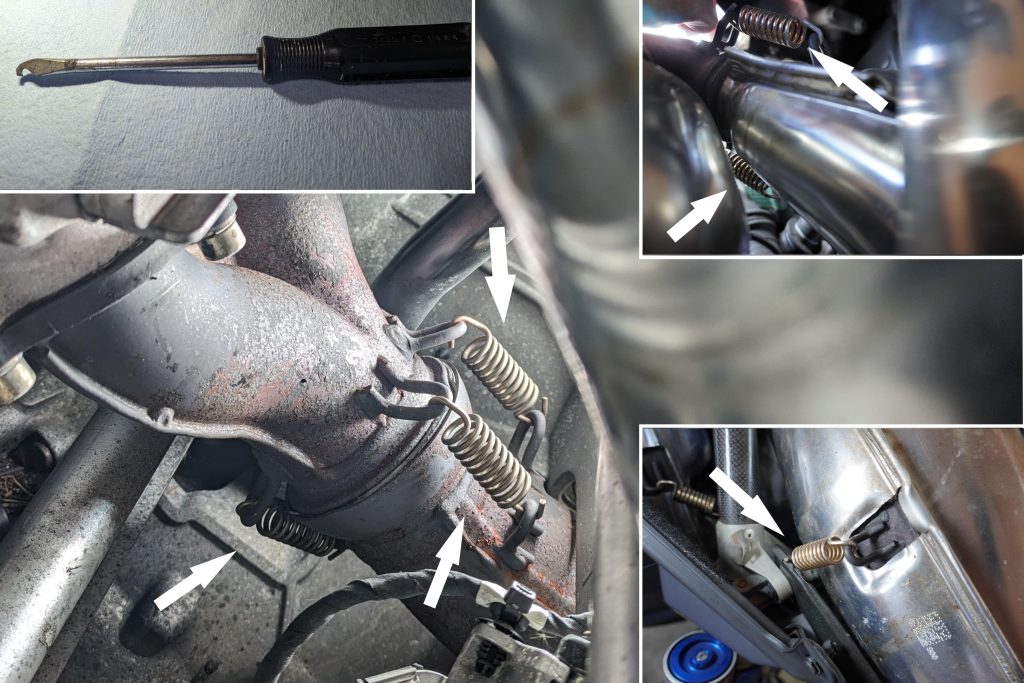
Step 2 (optional, but recommended): Removal of the “Tuned-Pipe.”
Required Tools:
- Wire cutters,
- Flathead screwdriver for springs.
Photo montage pipe et tournevis
Steps:
- Carefully disconnect the probe with two (2) small wires.
- Locate the springs of the “Tuned-Pipe” connecting it to the engine (there are three) and those connecting it to the muffler and chassis (there are three). Clearly identify them.
- Use the flathead screwdriver or tool of your choice to remove the springs.
- Set the springs aside.
Step 3: Loosening the steering column.
Required Tools:
- Ratchet wrench,
- 13 mm socket.
Steps:
- Near the air intake, locate one of the steering pivots held by two bolts.
- Use the ratchet wrench and the 13 mm socket to remove the nuts.
- Set the nuts aside.

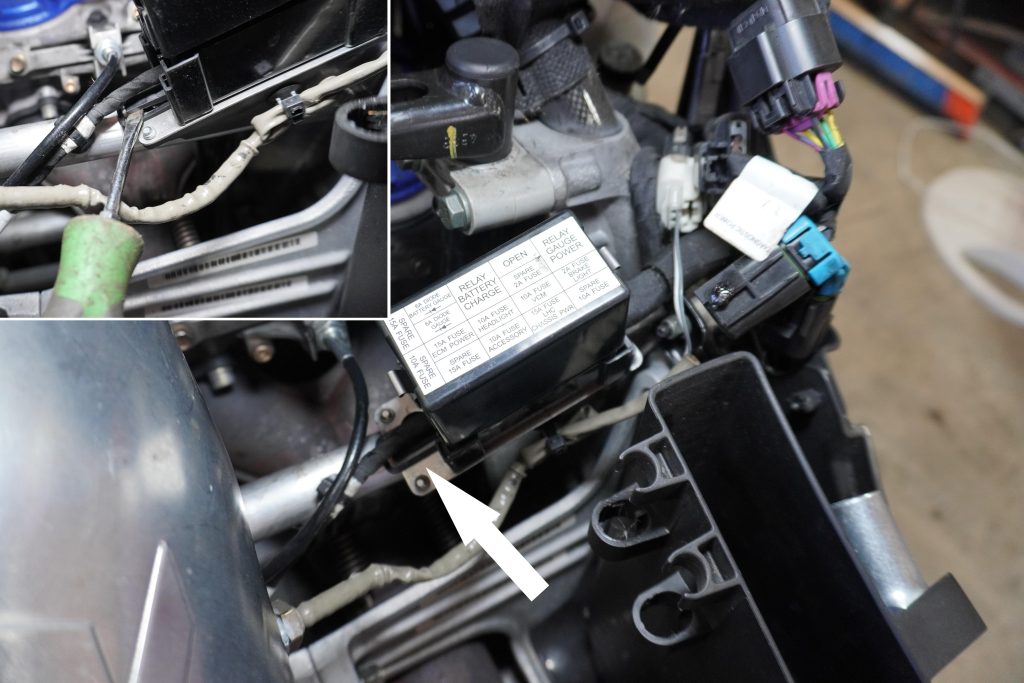
Step 4: Removal of the fuse box.
Required Tools: None
Steps:
- On one of the chassis reinforcement rods, locate the fuse box.
- At the base of the box, find a small plastic tab. Once found, lift it and slide the box towards the muffler. This will release the box and facilitate later access to the valve bolts.
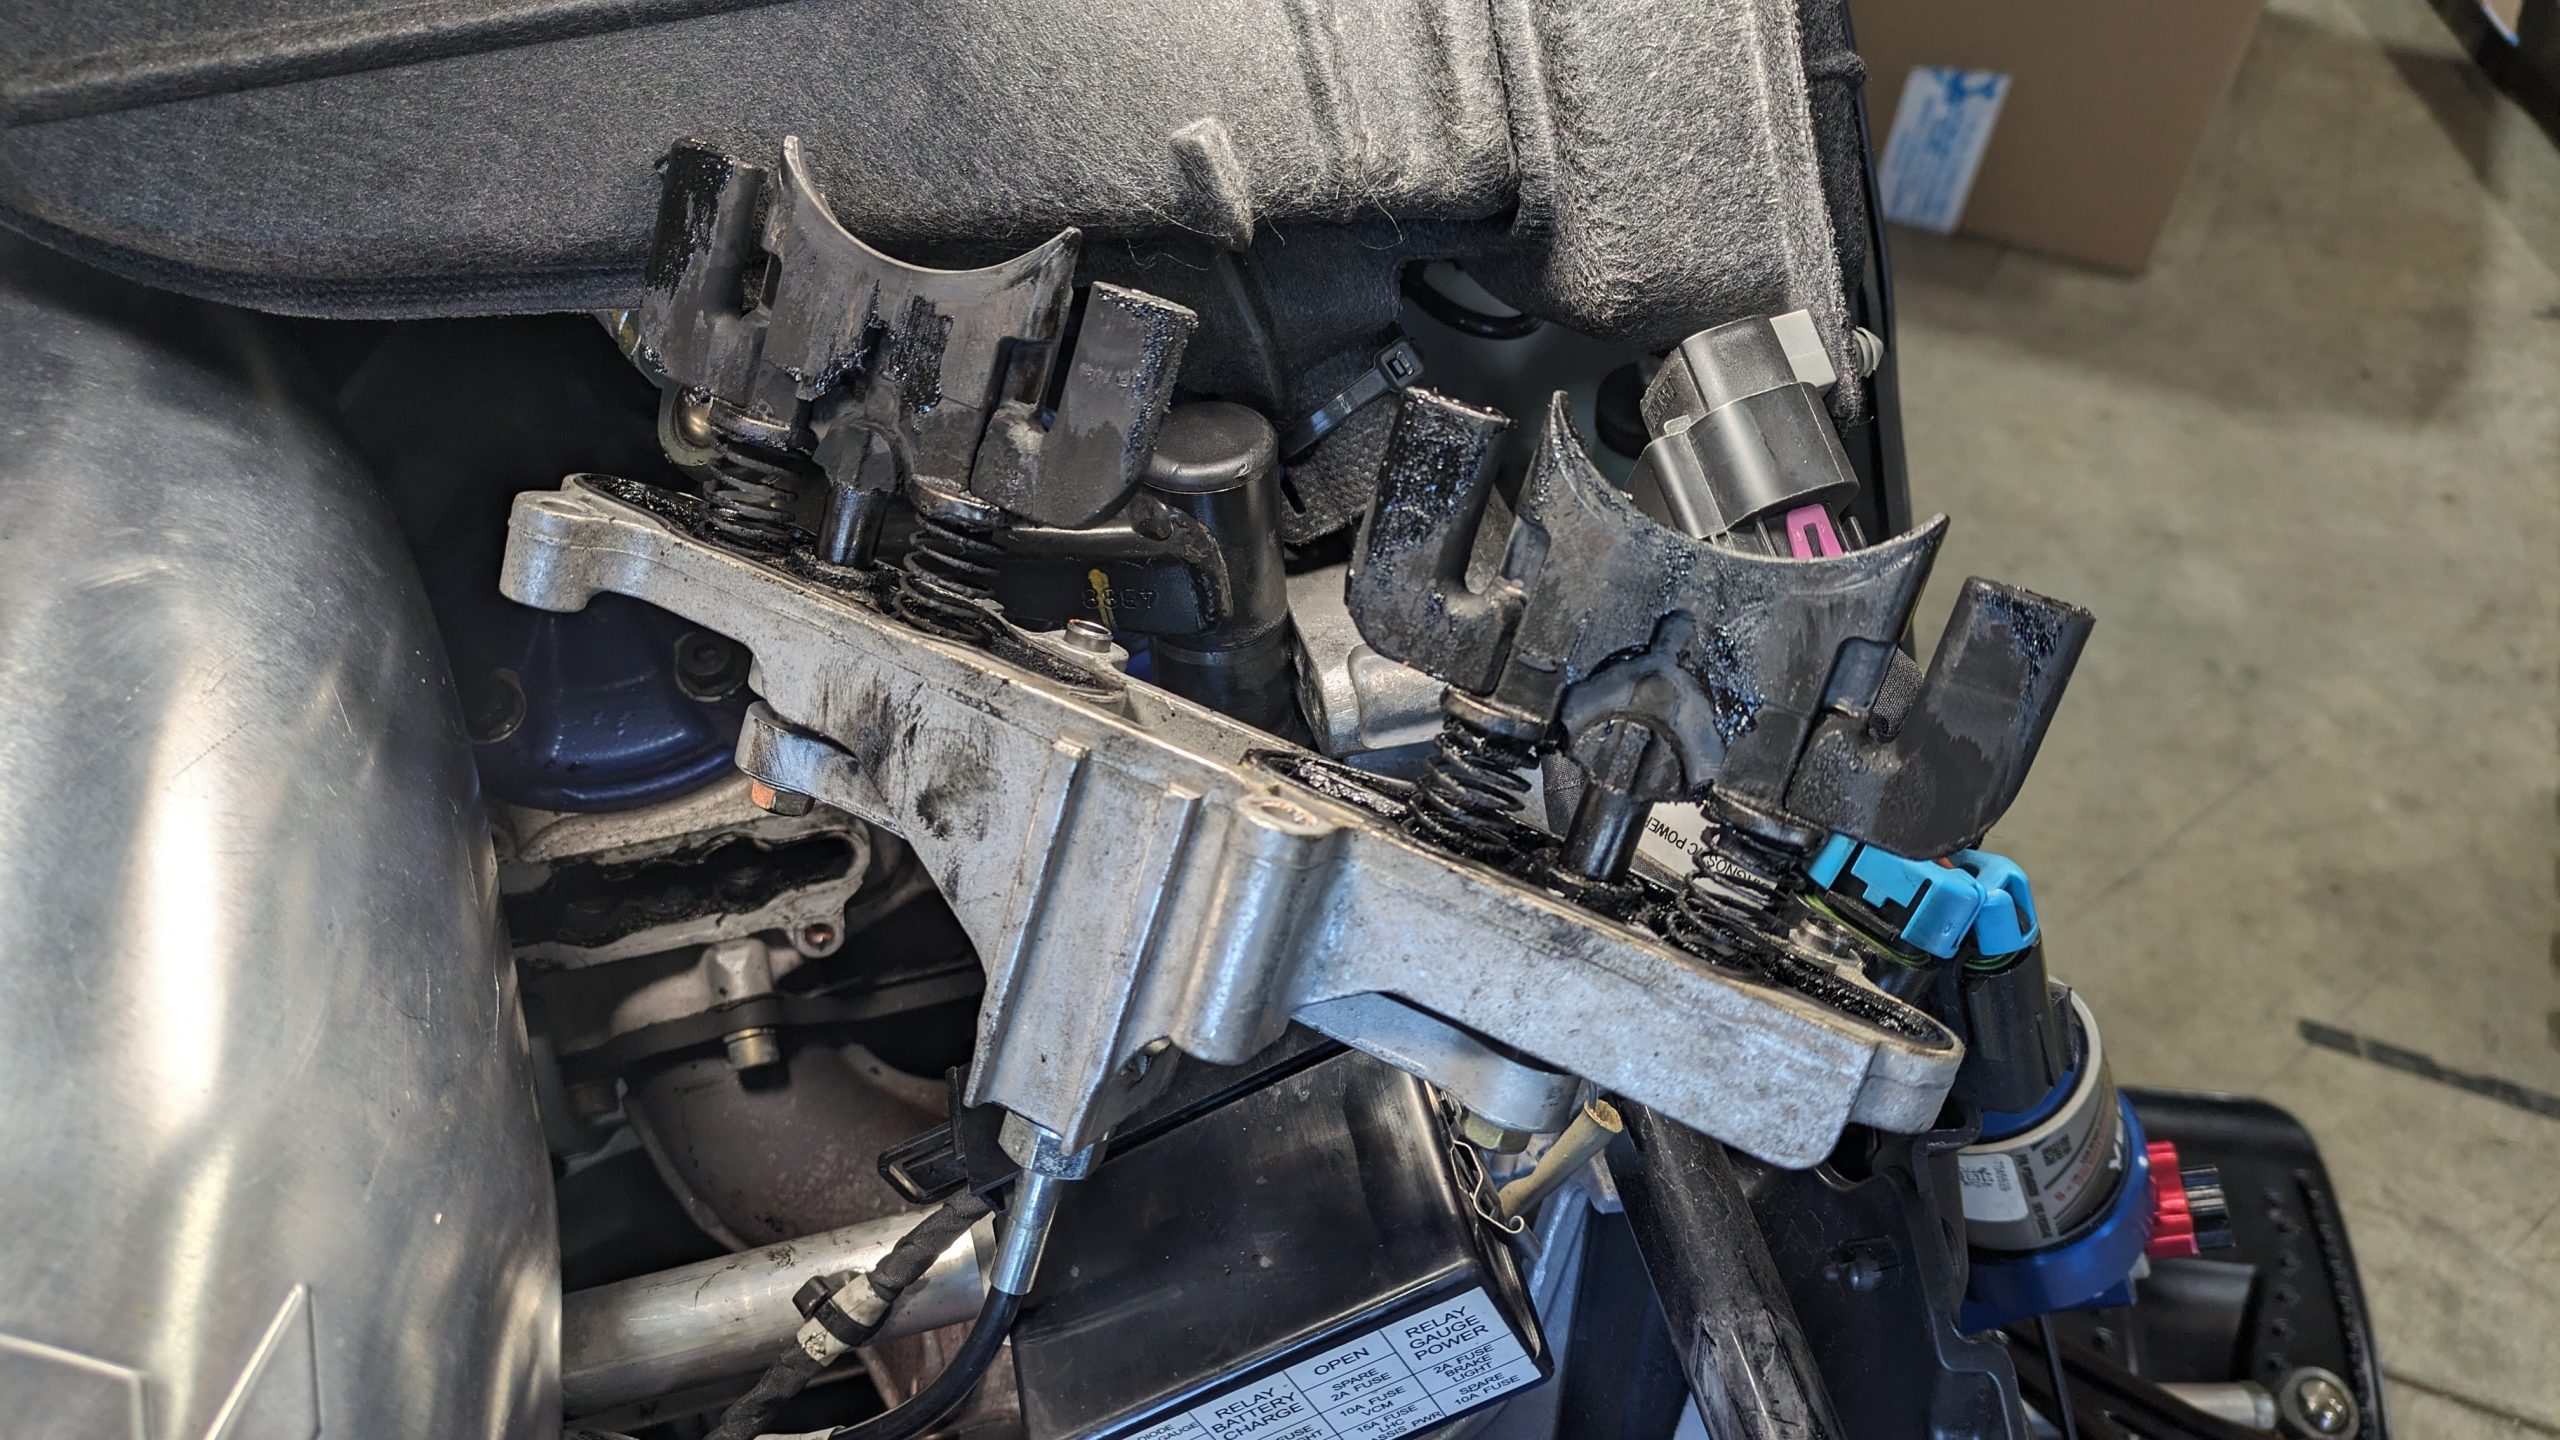
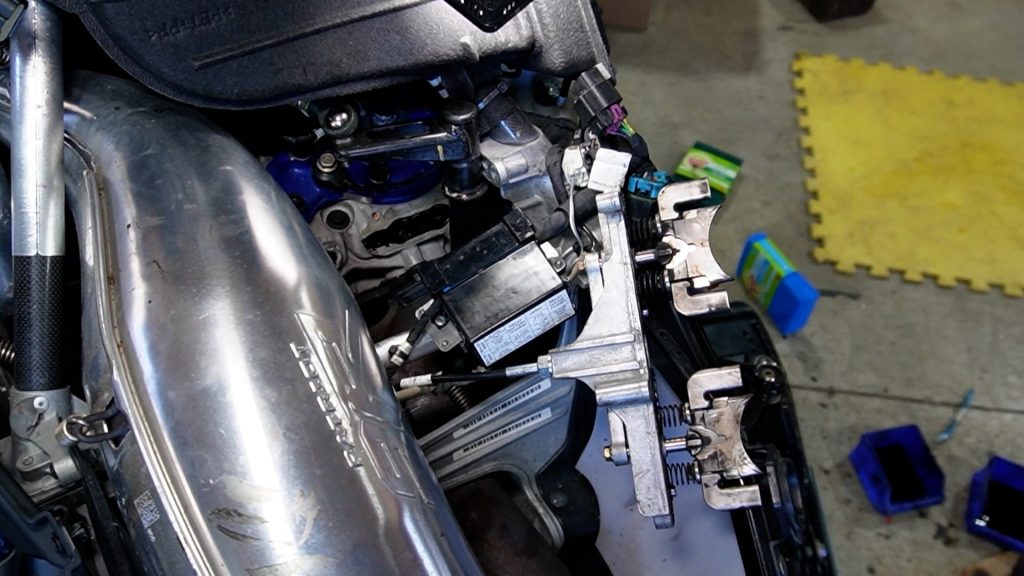
Step 5: Removal of the exhaust valves
Required Tools:
- Ratchet wrench and an extension.
- Universal joint.
- 5 mm hexagonal socket.
Steps:
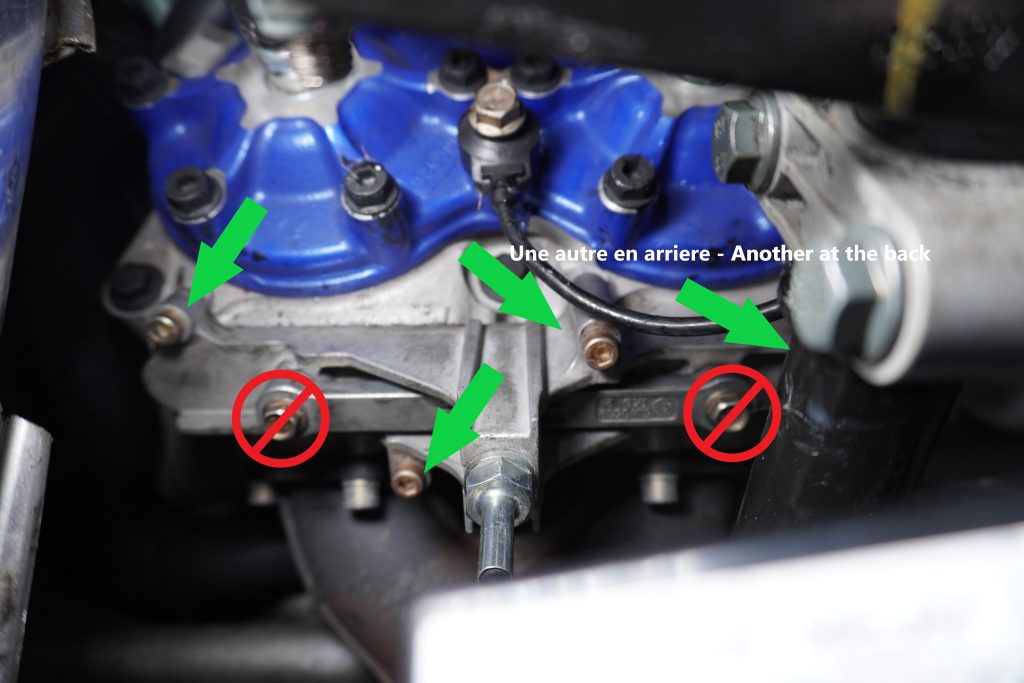
- DO NOT TOUCH THE 10 mm BOLTS on the valve housing.
- On the engine wall, locate the exhaust valve housing and the four (4) hexagonal bolts.
- Using the 5 mm hexagonal socket and the ratchet wrench with an extension, proceed with disassembly.
- Use the universal joint for the lower bolts.
- Once the four (4) bolts are unscrewed, set them aside.
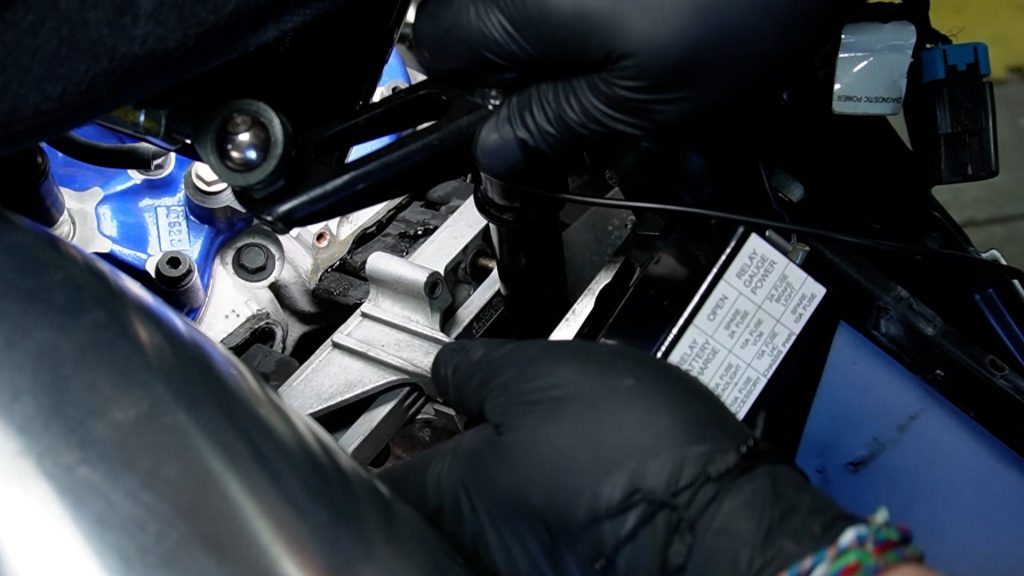
- Gently extract the exhaust valves by moving the steering rod towards the primary pulley (the clutch) while removing the valves.
- Slightly extract the left side of the valve assembly to remove them at an angle. Continue applying tension on the steering rod, and everything should come out smoothly. CAUTION! DO NOT FORCE IT! Otherwise, you risk damaging the parts.
- If you are unable to remove them, disassemble the steering rod for more space.
- Be careful not to lose springs when removing the valves.
- Once extracted, plug the intake holes on the engine to prevent debris from falling inside.
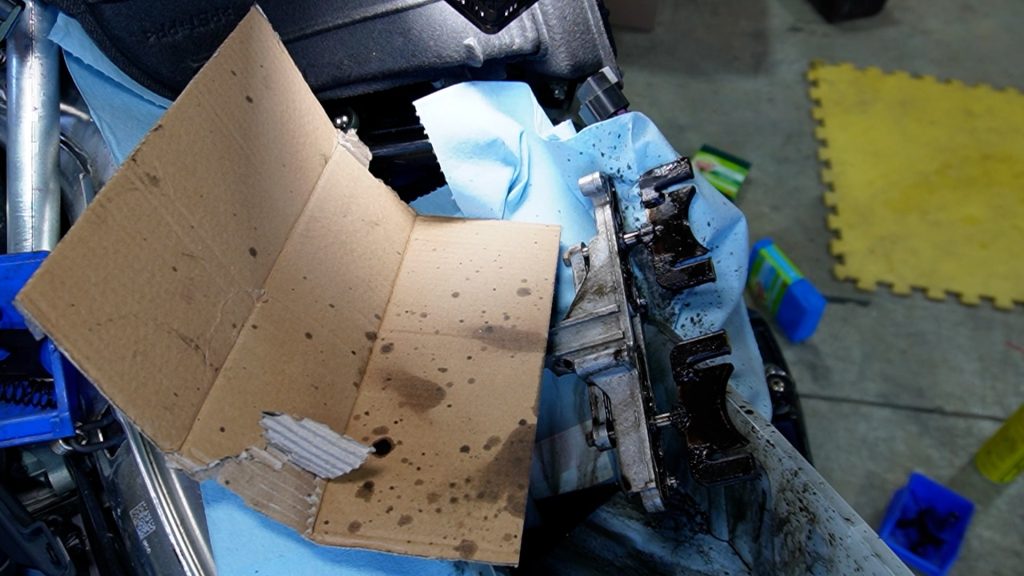
Step 6: Protecting the cockpit
Required Material:
- Rags or cardboard
Steps:
- Use a product to clean carbon, knowing that there will be inevitable splashes.
- To avoid soiling or damaging the engine compartment, carefully cover exposed surfaces with rags or cardboard.
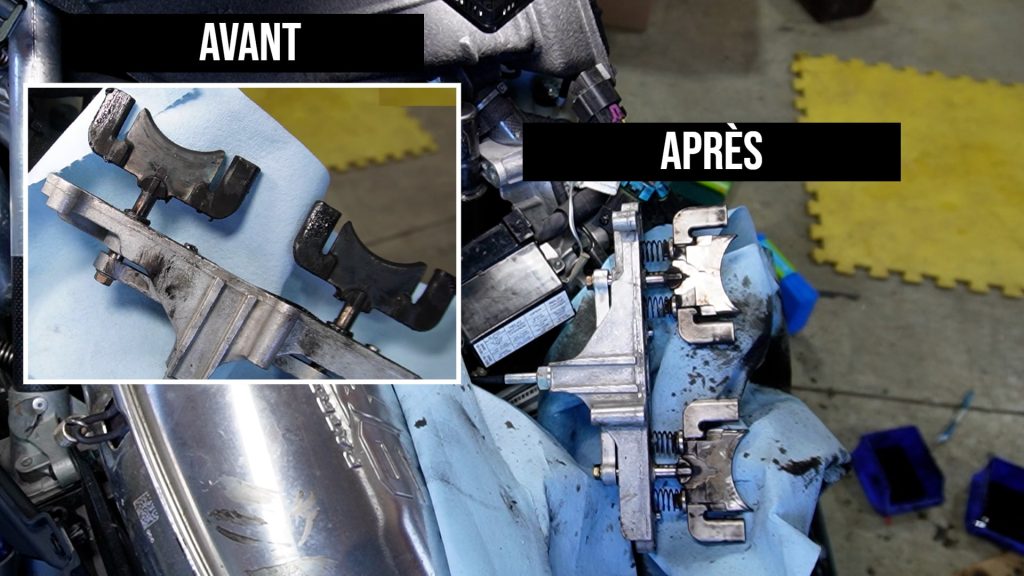
Step 7: Cleaning the valves
Required Materials:
- Combustion chamber cleaner.
- Brake parts cleaner.
- Scotch Brite scrubbing pad (NO steel wool, steel brush, or grinding wheel).
- Container for soaking and recovering sprayed product.
- Small flathead screwdrivers.
- Toothbrush-style brush.
Steps:
- Remove the two (2) O-rings around each valve using the provided tab.
- Spray the combustion chamber cleaner into a container to create a soaking bath.
- Remove the four (4) springs and the two (2) guillotines. Soak them while cleaning the other components still attached to the snowmobile.
- Generously spray the combustion chamber cleaner on the valves and the housing, then let it sit for a few minutes.
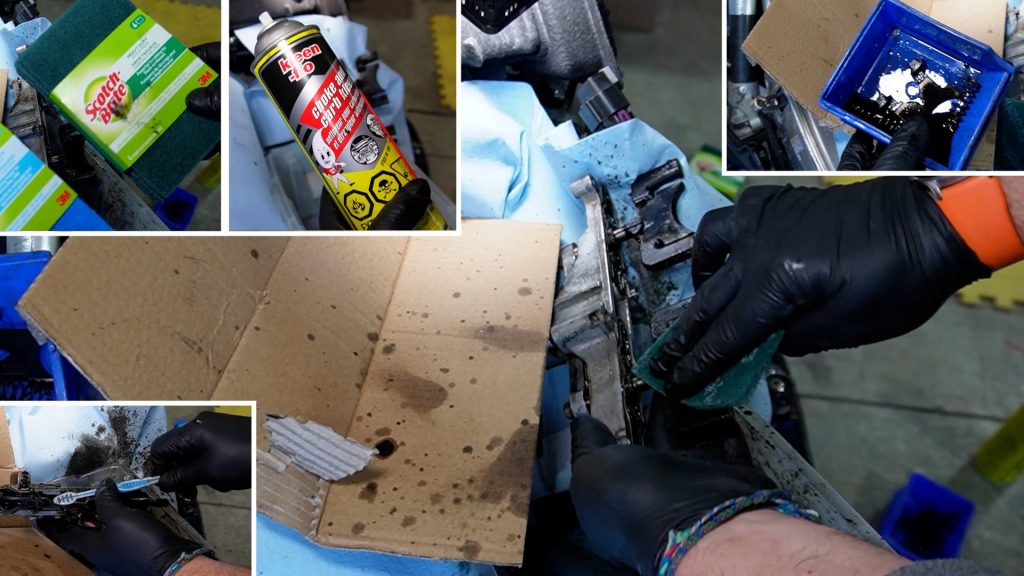
- Use a rag to remove the bulk, repeating until nothing else detaches.
- For the valves, use a Scotch Brite scrubbing pad to remove the remaining stuck-on carbon. Spray the cleaner, let it sit, and scrub. Repeat these steps until the desired result is achieved.
- For the valve housing, remove the bulk with a cloth. Spray the cleaner, let it sit, and scrub. Use a small screwdriver wrapped in a rag to clean without scratching the material, path, or the area where the O-ring sits.
- Use the brush to clean the inside of the housing. Repeat these steps until the desired result is achieved.
- Use the brush to clean the springs in your soaking bath.
- Clean the second part of the valves with your Scotch Brite scrubbing pad. Repeat these steps until the desired result is achieved.
- After cleaning with the combustion chamber cleaner, spray everything with the brake parts cleaner. This will remove any grease residue from the parts.
Step 8: Reassembly.
The reassembly steps are the reverse of disassembly. Make sure EVERYTHING IS CLEAN, as the parts tend to be more mobile or detach during handling.
- Install the two (2) O-rings starting with the small tab, then press them into the groove all around with your fingers.
- Reassemble the valves with the springs. If the springs are not aligned with the valves, it means the movable part is not oriented correctly. Invert it, and everything will be ready to be installed.
- Insert the valves assembly into their respective positions precisely, then gently tighten the 10 mm bolt on the primary pulleys (the clutch) side of the steering rod, making sure not to lose any springs during handling.
- Replace the four (4) hexagonalagonal bolts, two (2) long and two (2) short. The long ones go into the raised part of the housing, and the short ones into the lower part.
- Replace the steering column.
- Replace the “Tuned-Pipe” if it was removed during disassembly. Place the two (2) sealing joints at the ends. Install the three (3) springs, two (2) at the junction of the two mufflers and one (1) on the chassis. Reconnect the probe with its two (2) wires.
- Replace the fuse box.
- Retrieve the rags and cardboard used for protection.
- Clean everything, and you’ll be ready for a test.
Step 9: The Test
- Perform the test in a well-ventilated room or outdoors.
- Lift the rear of the snowmobile.
- Start the engine and let it run several times.
- If everything works correctly, the process is complete.
IMPORTANT: Always follow the manufacturer’s specifications for torque settings.
In conclusion, maintaining exhaust valves may seem complex, but the benefits will be significant. After this maintenance, starts will be quicker, and acceleration will be livelier. Clean valves mean fewer risks of fouling spark plugs and therefore fewer replacements. Dare to venture into your vehicle’s mechanics; it will boost your confidence and could even save you money. Understanding your mechanics will make you confident and capable of preventing breakdowns, even far from any assistance. If you don’t feel comfortable doing these tasks, don’t hesitate to contact your dealer; they will be there to help you. Have an excellent snowmobiling season!