Whether your snowmobile is brand new or has a few years under the belt, your brakes are your primary safety guarantee. It is imperative to always be aware of their condition, as your life, and that of others, depends on it. Adopt a preventive approach rather than a reactive one to ensure your protection. Moreover, by performing regular inspections, you significantly reduce the risk of breakdowns, especially far from home. Throughout this article, I will guide you step by step through brake maintenance, providing details and images to facilitate understanding.
Note:
This article is based on a Polaris snowmobile, RMK model, equipped with hydraulic brakes. You can use this information for other brands or models, but the tools or specifications may differ. However, the operation and principle will be similar.
Work safely and know your limits.
Difficulty level: Easy to moderate
Tools Required
- Flat-nose pliers
- Adjustable pliers
- Ratchet wrench with a 4″ or 6″ extension
- 8 mm wrench
- 13 mm socket
- T20 Torx socket for the reservoir
- T40 Torx socket for the hood
- Flathead screwdriver
- Appropriate brake fluid (according to the manufacturer)
- Brake parts cleaner
- Rags
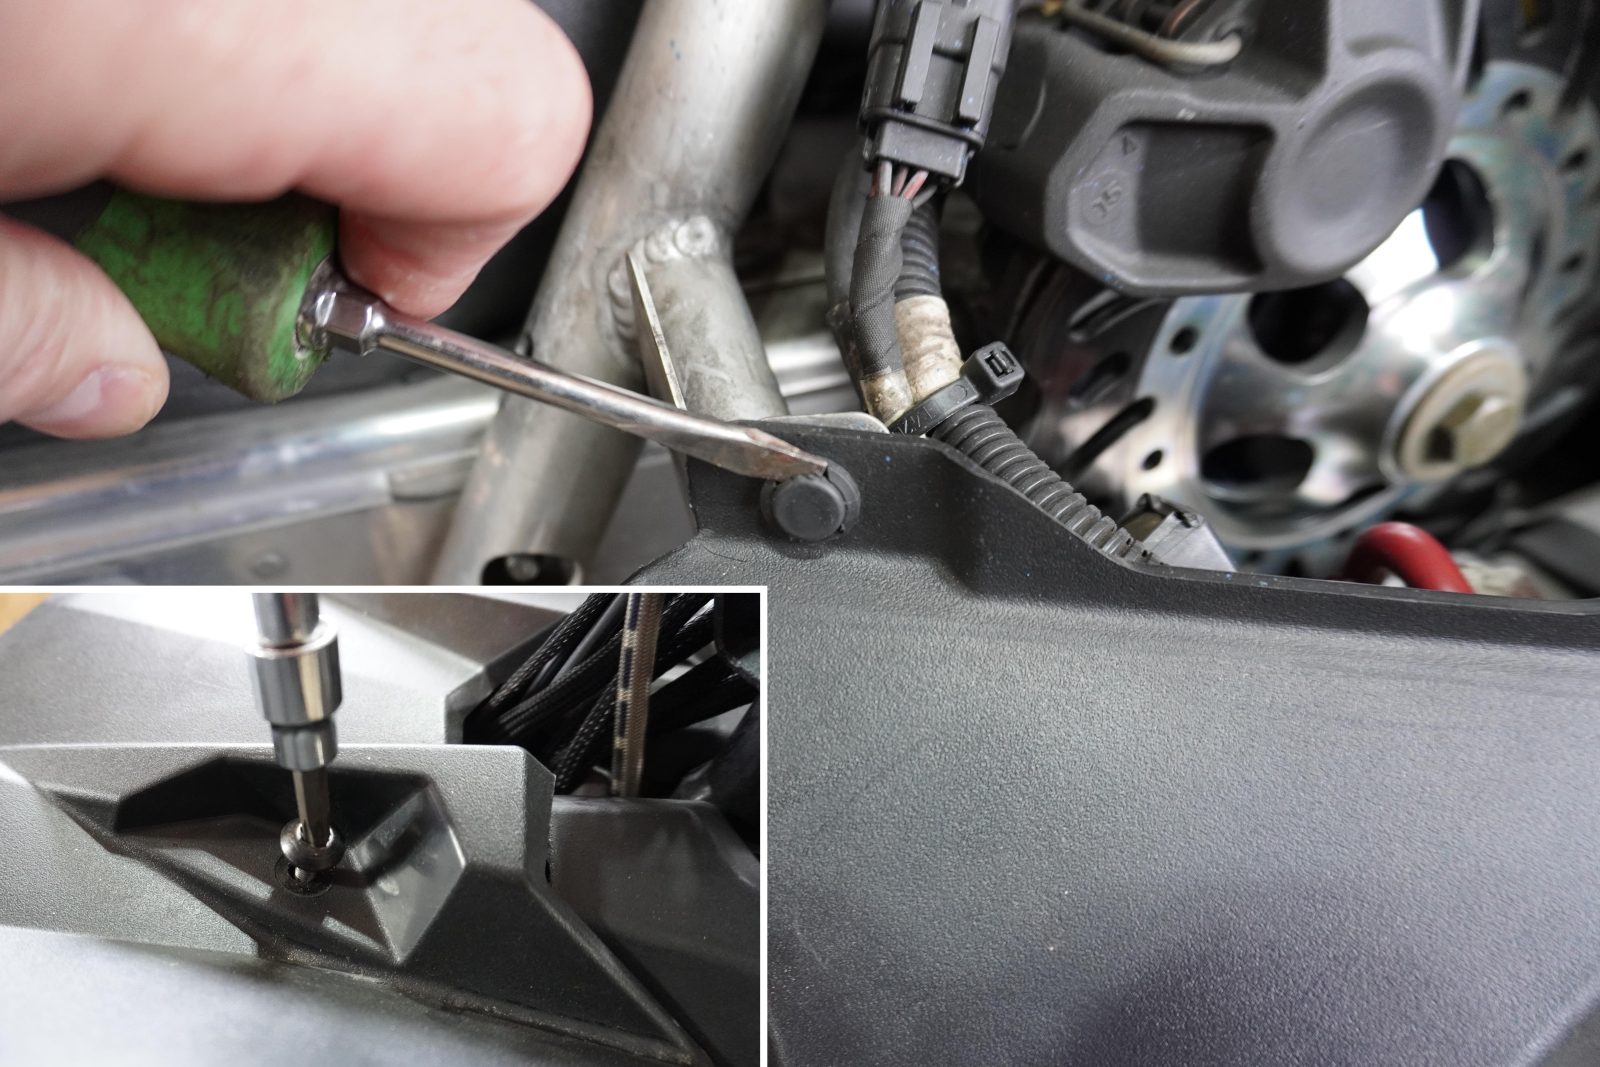
Step One: Removal of Protective Covers and Hood
Required Tools:
- Flathead screwdriver
- T40 Torx socket
Steps:
- Remove the side protective covers.
- Disconnect the main wiring under the hood on the right side (brake side).
- Remove the hood and locate the two security screws on each side of the light. Turn them ¼ turn counterclockwise. Remove the two T40 Torx bolts located near the handlebar.
- The hood will be free, remove it and place it in a safe location.
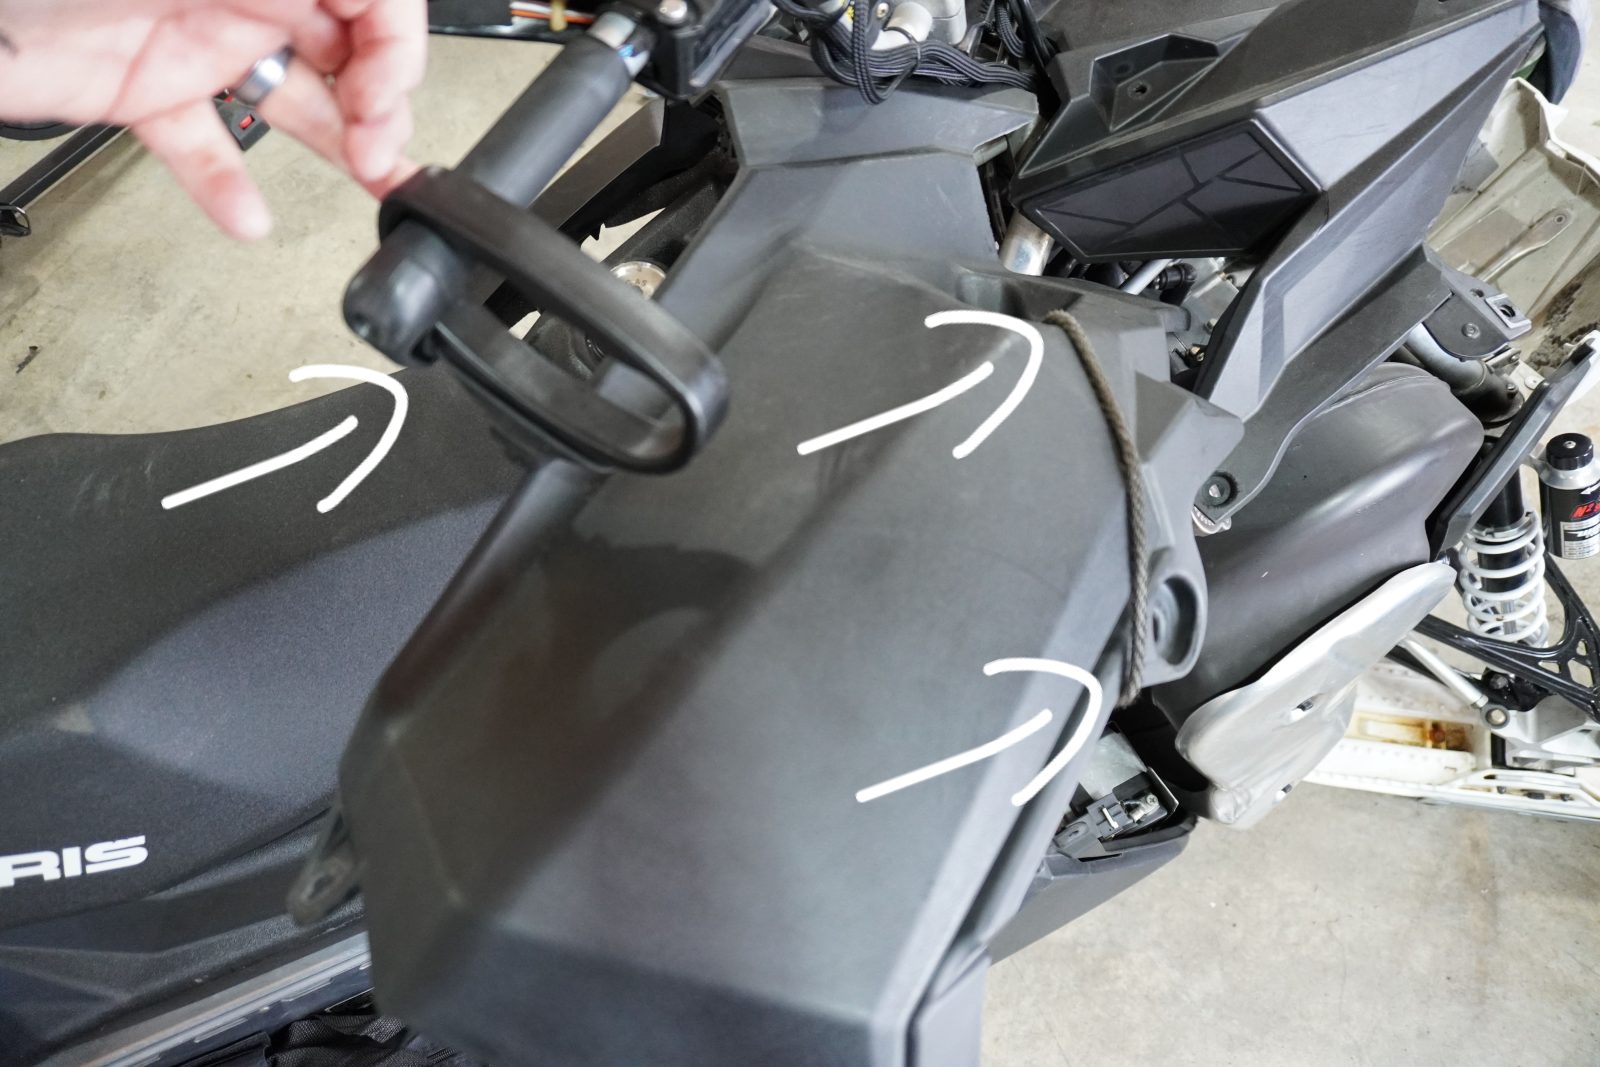
- Using a flathead screwdriver, remove the plastic retaining pins on the side panels. Secure the right-hand panel closest to the handlebar with the starter rope. You will have a better view of the workspace.
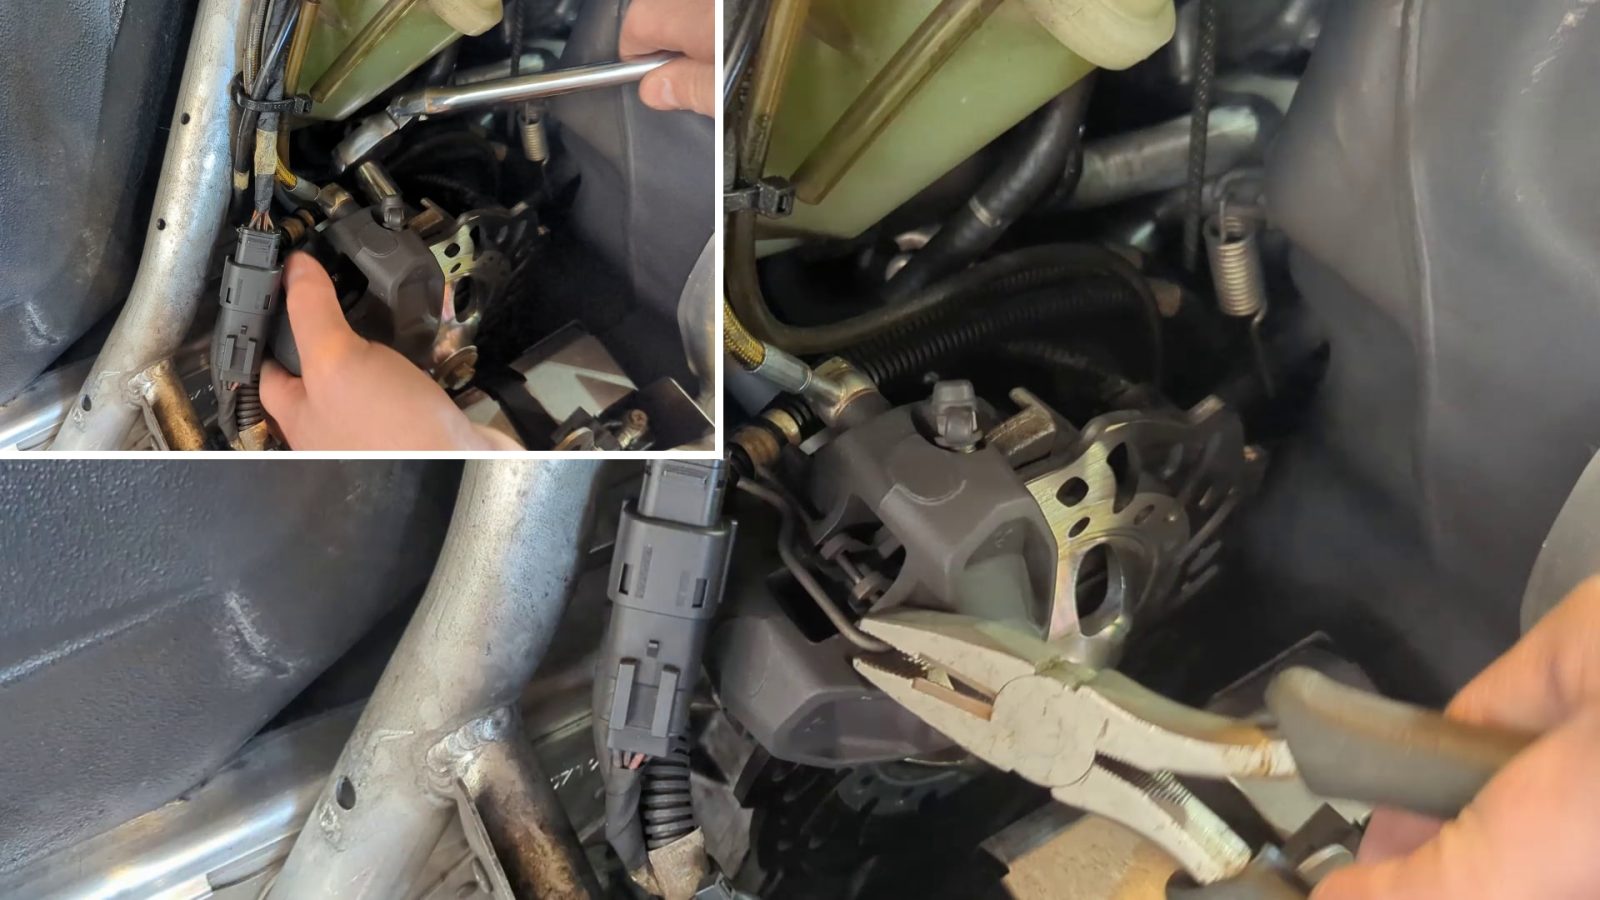
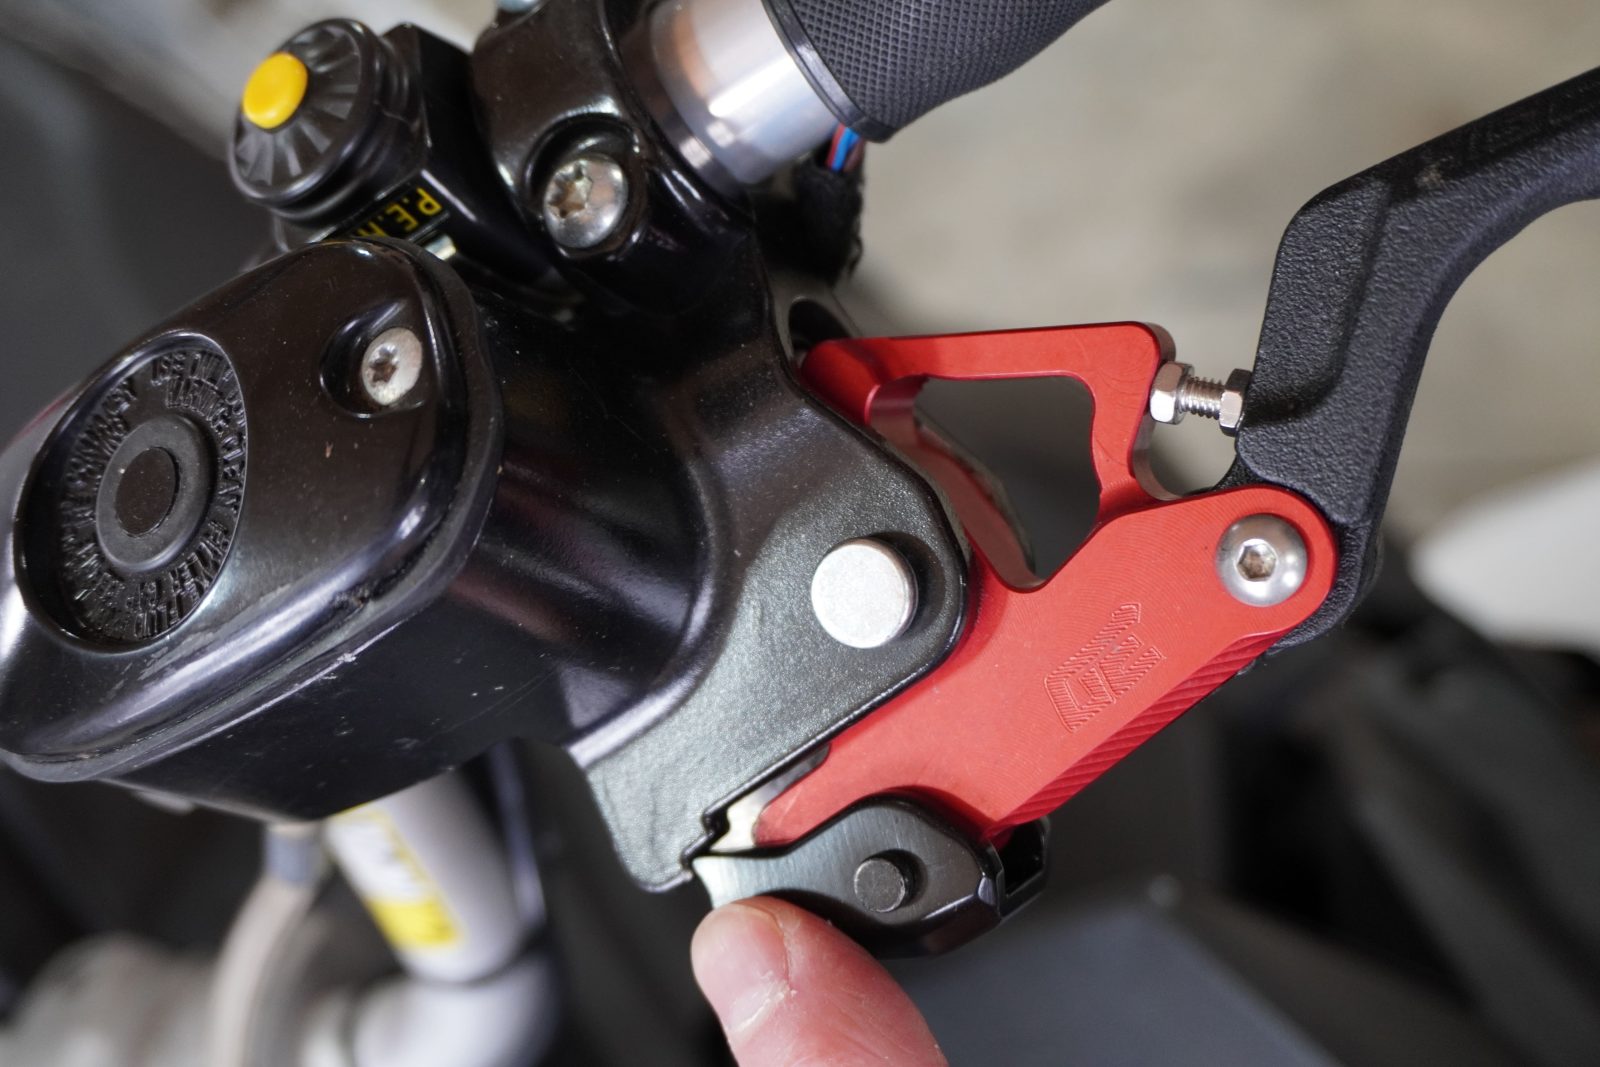
Step 2: Removal of the brake caliper and pads.
Required Tools:
- Flathead screwdriver
- Ratchet wrench
- 13 mm socket
Steps:
- Using the ratchet wrench and the 13 mm socket, locate the nuts at the back of the caliper and remove them.
- Use the flathead screwdriver to remove the clip that holds the brake pads in place. Set the pads aside.
Step 3: Brake system maintenance and inspection.
Required Tools:
- Ratchet wrench
- Torx T20 socket
- Pliers
- Wooden block or large flathead screwdriver
Steps:
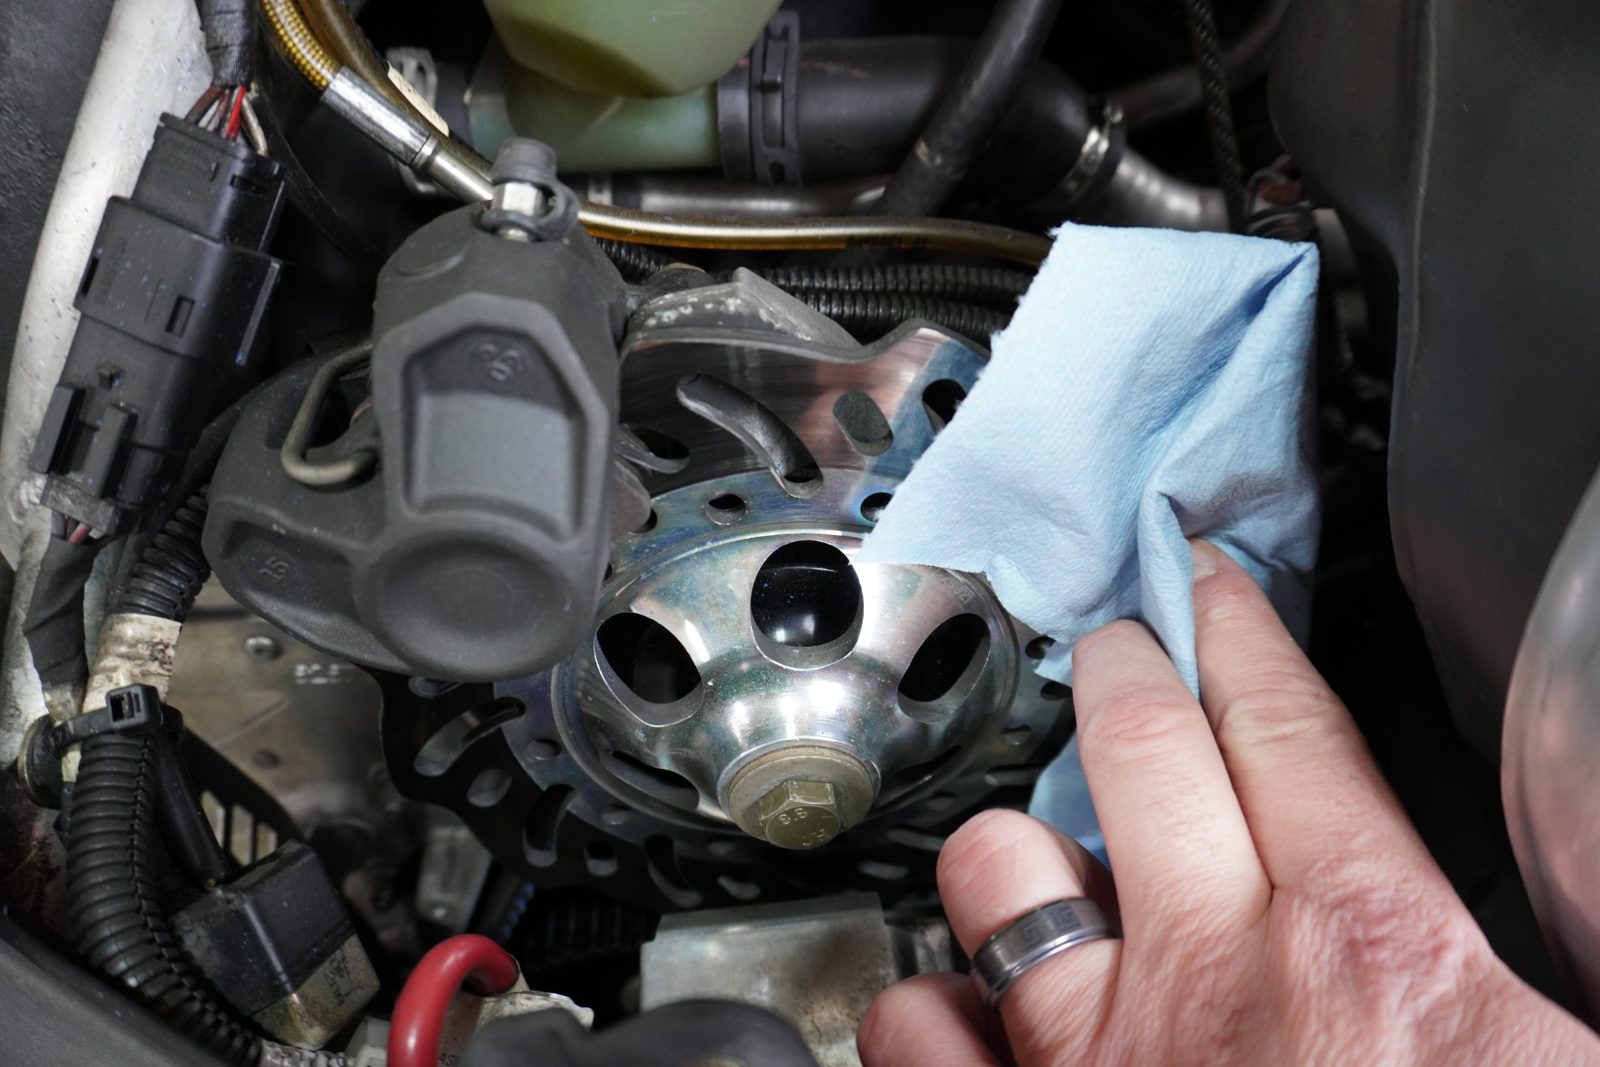
- Conduct a visual inspection to detect any leaks or physical damage on the caliper.
- Next, on the left handlebar, locate the brake lever and the oil reservoir.
- Use the ratchet wrench and the Torx socket to remove the cover of the brake oil reservoir.
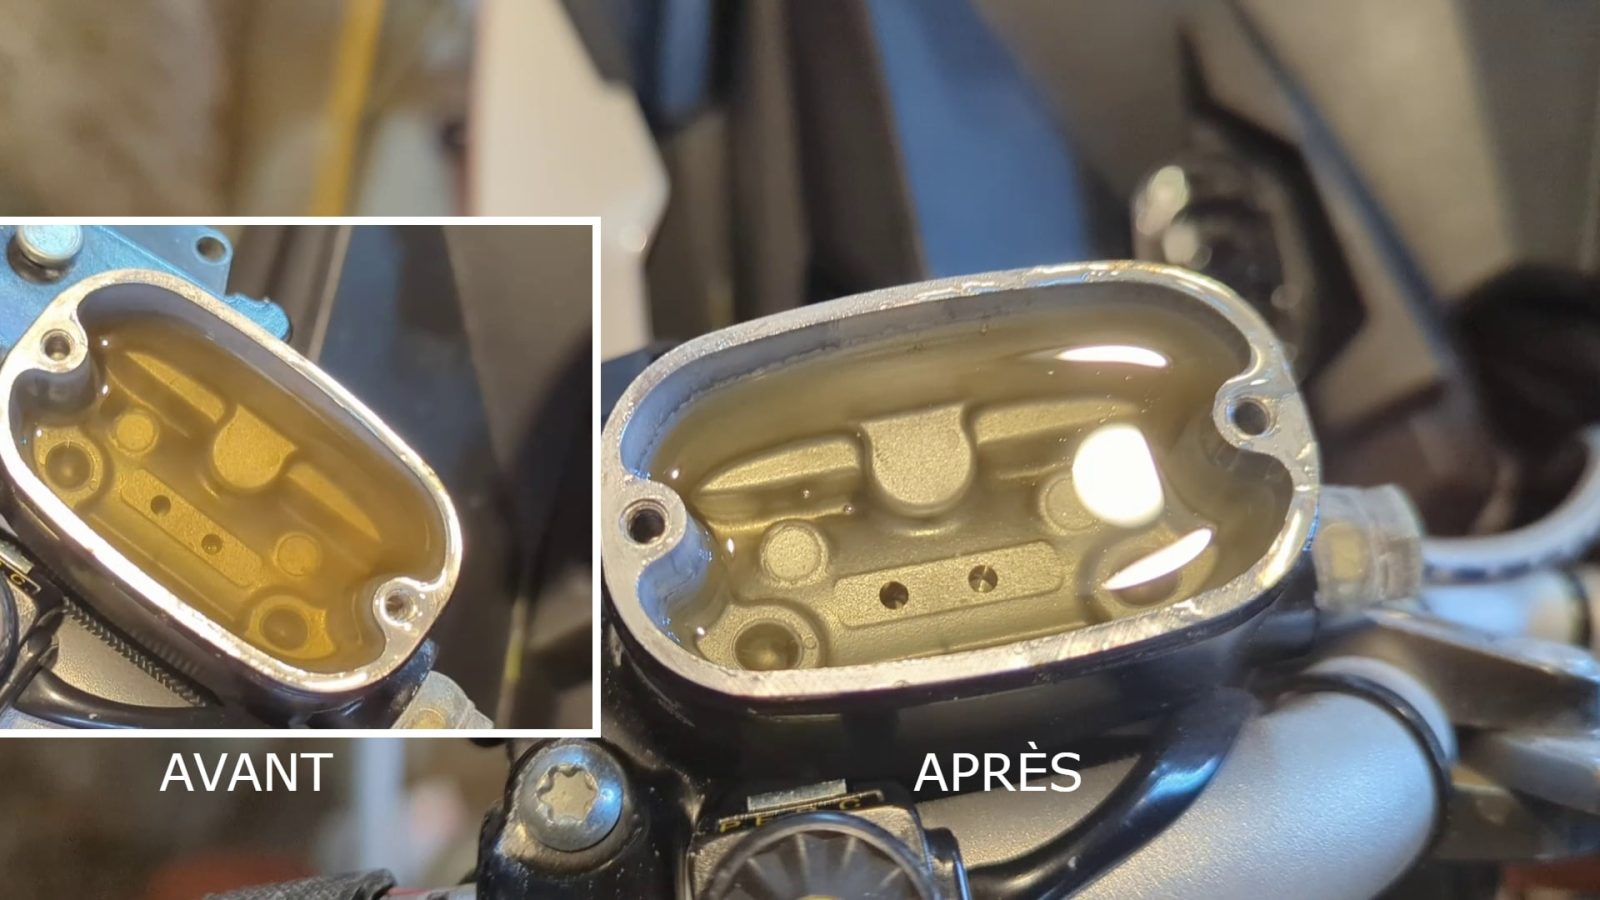
- Note the level and condition of the oil. The oil should be clear and clean. If it appears cloudy, replace it (the procedure will follow below).
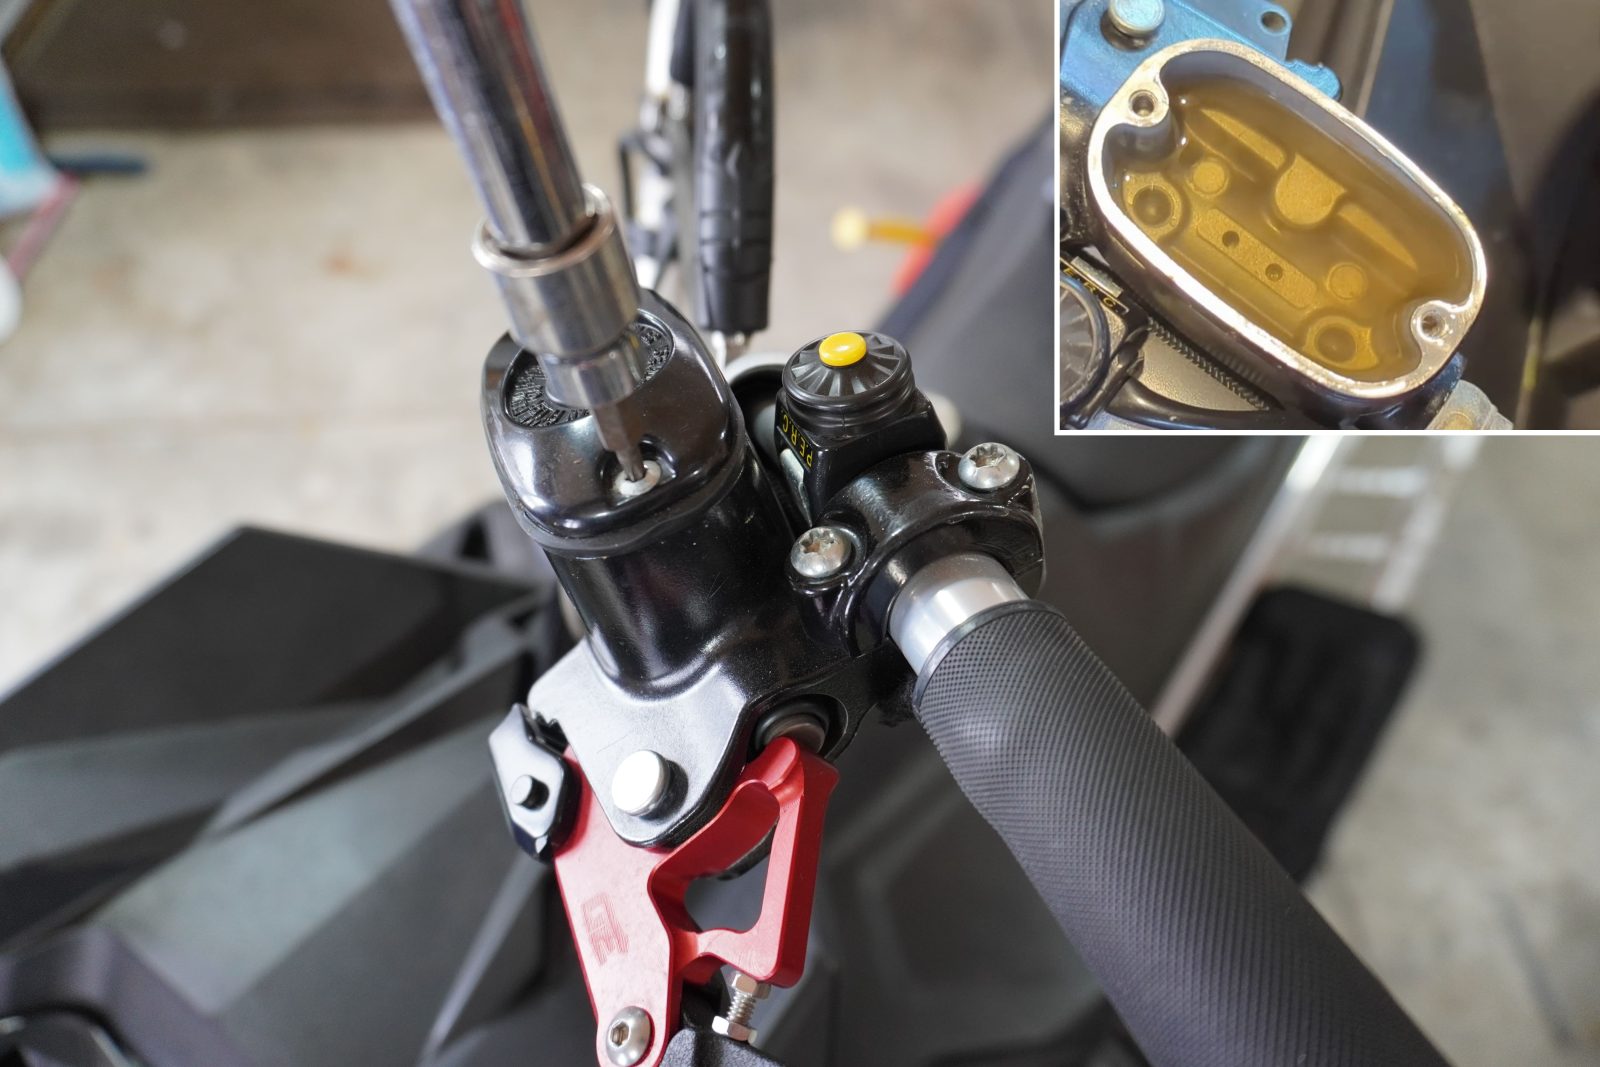
- If the oil is clear, adjust the level as needed. There should be an indicator inside the reservoir for this purpose.
- The brake disc should be uniform and free of grooves. Replace it if necessary. Surface rust is acceptable after storing the snowmobile during the summer. You can clean it with brake cleaner or very fine sandpaper. Or simply after your first ride, it will no longer be noticeable.
- The pads must also be in good condition and have sufficient lining thickness. Inquire with the manufacturer for wear standards.
- Check that the handbrake is functional.
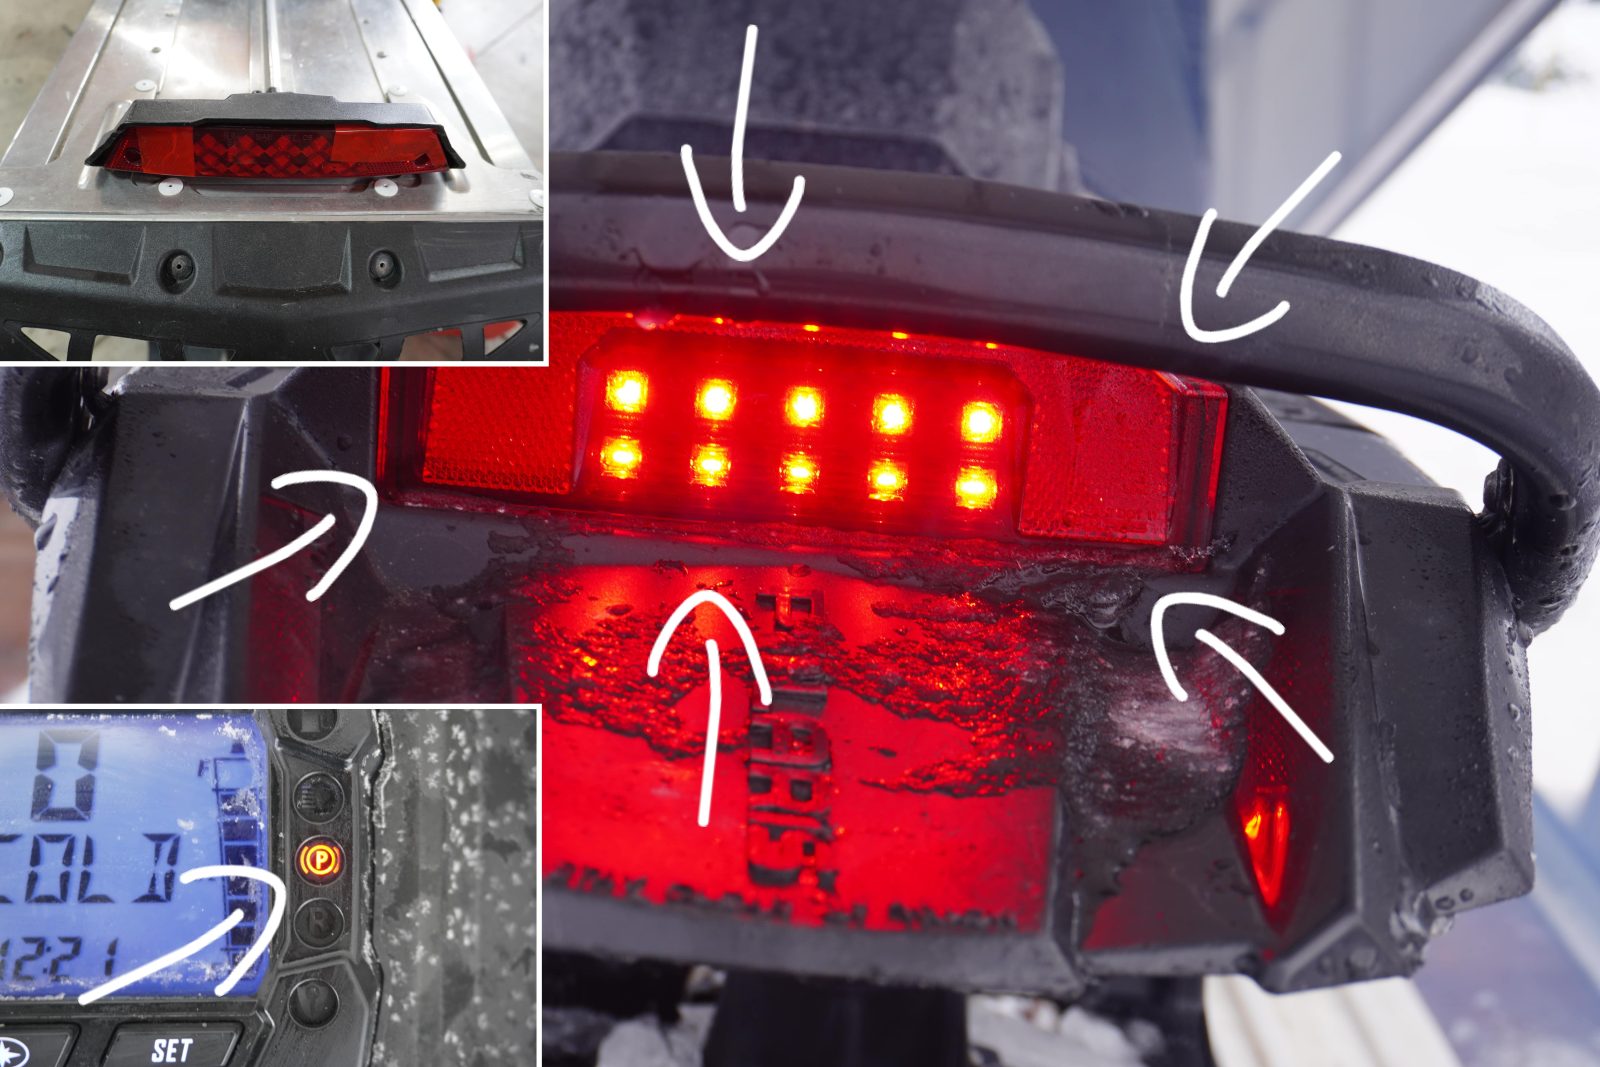
- Start the snowmobile in a well-ventilated area, check that the brake light turns on when you apply the brakes. Replace it if the light does not turn on; it may be a sign that the brake switch is faulty. For Polaris models, there is a warning light on the dashboard indicating that the brake is applied. This can help diagnose the issue.
Probable Issues:
If your brakes are noisy and you hear a “chirping” sound while riding after braking, it could be caused by the caliper piston sticking due to inactivity or lack of lubrication. To try to remedy this issue, you can perform a brake oil change. This operation will help loosen up the components and lubricate them again.
Step 4: Brake Fluid Change
Required Tools:
- 8 mm wrench
- Torx T20
- Ratchet wrench
- Hose and catch container
- Appropriate brake fluid (according to the manufacturer)
- Brake parts cleaner
- Rags
Steps:
- Locate the brake lever and brake fluid reservoir on the left handlebar.
- Use the ratchet wrench and Torx T20 socket to remove the brake fluid reservoir cap.
- Ensure that the fluid level is correct.
- Move to the brake caliper. There is a bleed screw on top.
- Place the closed end of the 8 mm wrench on the bleed screw and attach the hose or catch the fluid during the bleeding process.
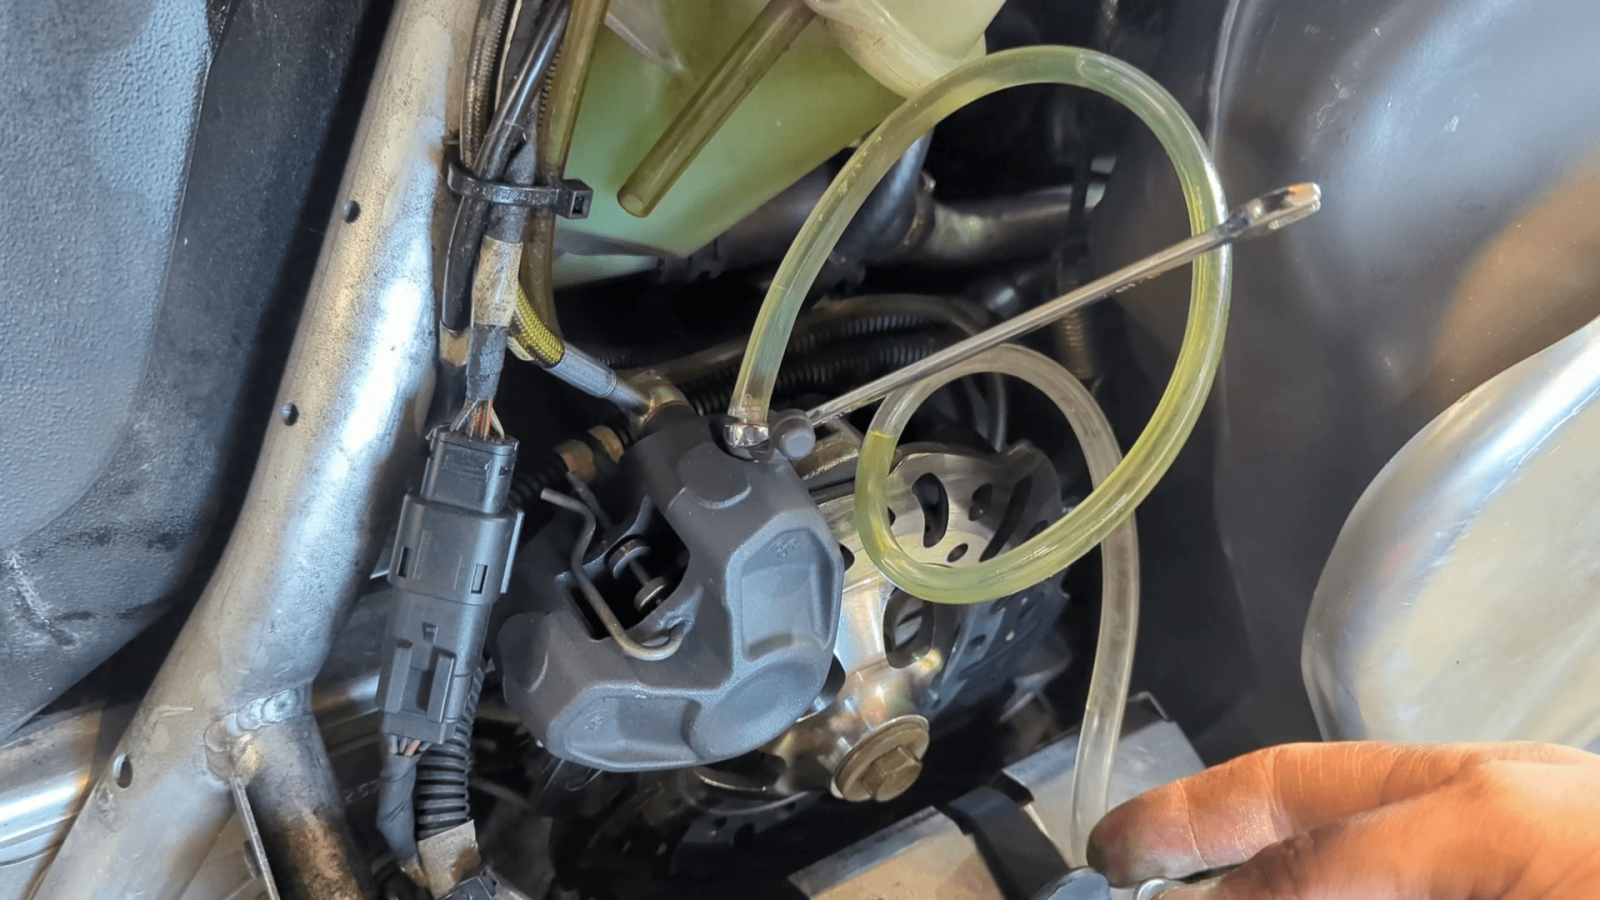
- On the handlebars, grip the brake lever. Apply tension three times and hold the last pressure. Then, loosen the bleed screw.
- Without releasing the brake lever, close the bleed screw.
- Monitor the brake fluid level closely.
- Repeat until the fluid is clear.
- Replace the reservoir cap and tighten the bleed screw securely.
Once everything is properly adjusted and tightened, use brake parts cleaner to clean the components.
It’s IMPORTANT to always follow the manufacturer’s specifications for torque values or wear indicators.
In Conclusion
By taking care of your brakes, you’re ensuring your safety on the trails. This maintenance task is simple and inexpensive, yet it yields numerous benefits. Your braking will be more precise and responsive, enhancing your overall riding experience. Considering that you often use your snowmobile in extreme conditions and store it in varying temperatures, proper maintenance becomes even more critical. Failure to maintain your brakes can lead to rust on the brake disc, corrosion on the moving parts of the brake pads, and even condensation in the brake fluid, which can degrade its performance and potentially cause freezing. Don’t overlook brake maintenance—it’s a small investment that pays off big in terms of safety and performance.
Dare to venture into your vehicle’s mechanics. You’ll become more confident and may even save money. Knowing your vehicle’s mechanics will make you more confident and able to prevent breakdowns when far from home. If you’re not comfortable doing these tasks yourself, don’t hesitate to contact your dealer, they will help you.
In the meantime, here is a video so you can follow all the steps:
Have a great snowmobiling season!