Improving the performance and durability of a snowmobile often involves replacing certain original parts with more robust and optimized components. Among these upgrades, replacing the original suspension arms with B-PWR suspension arms is a significant improvement. This detailed guide will walk you through the various steps of this installation, providing you with the necessary tools and explaining the procedures to ensure an effective and safe setup. Following these instructions will enhance your snowmobile’s handling and longevity while ensuring an optimal fit.
Why Replace Your Snowmobile’s Suspension Arms with B-PWR?
Suspension arms play a crucial role in a vehicle’s performance and safety. Switching from original suspension arms to B-PWR suspension arms offers several significant advantages:
Performance Improvement
B-PWR suspension arms are designed to provide better rigidity and reduced weight. This results in improved handling and responsiveness, especially during tight turns and high-speed maneuvers.
Increased Durability
Made from high-quality materials, these suspension arms are more resistant to wear and harsh conditions. They offer superior longevity compared to original models, reducing the frequency of replacements and maintenance costs.
Riding Comfort
A better absorption of shocks and vibration contributes to increased comfort, making rides more enjoyable, even on rough terrain.
Aesthetics and Customization
Available in various designs and finishes, these suspension arms allow you to customize your vehicle’s appearance while enhancing its performance.
Easy Installation
Designed for simple and quick installation, reducing the time and effort required for the upgrade.
Note:
In this installation guide, I am working with a Polaris Patriot 9R RMK Khaos 155. You can apply this information to other brands or models, but the tools and specifications may vary. That said, the basic process remains similar.
Work safely, respect your limits, and wearing safety glasses is essential.
Difficulty Level: Moderate
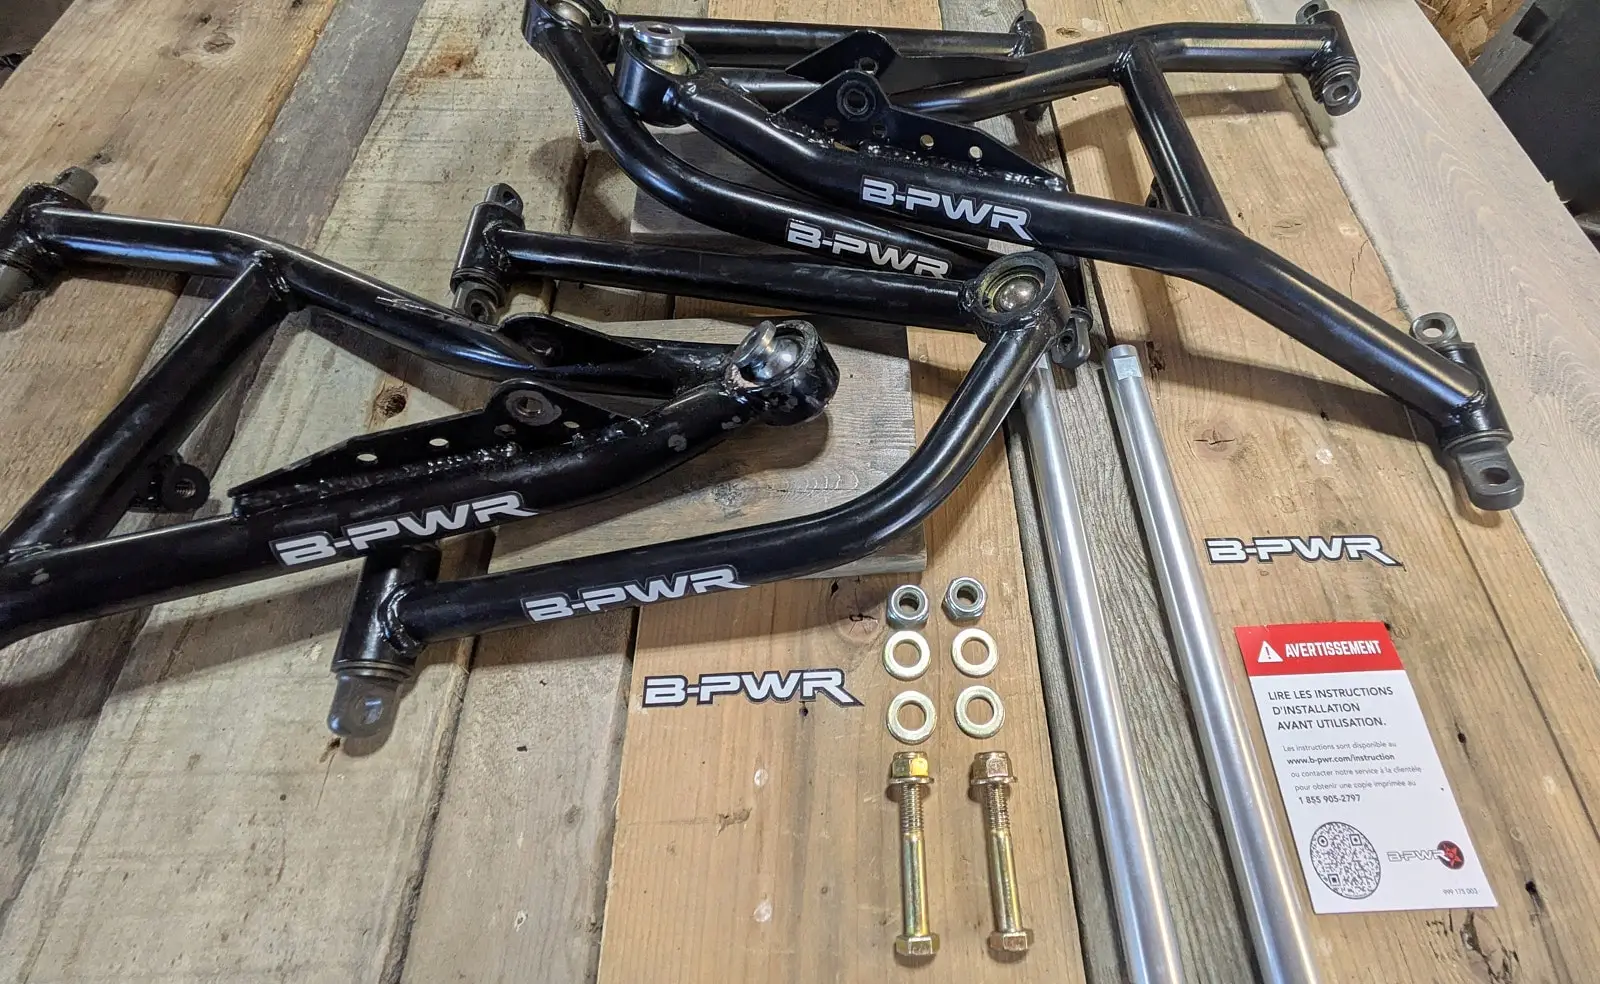
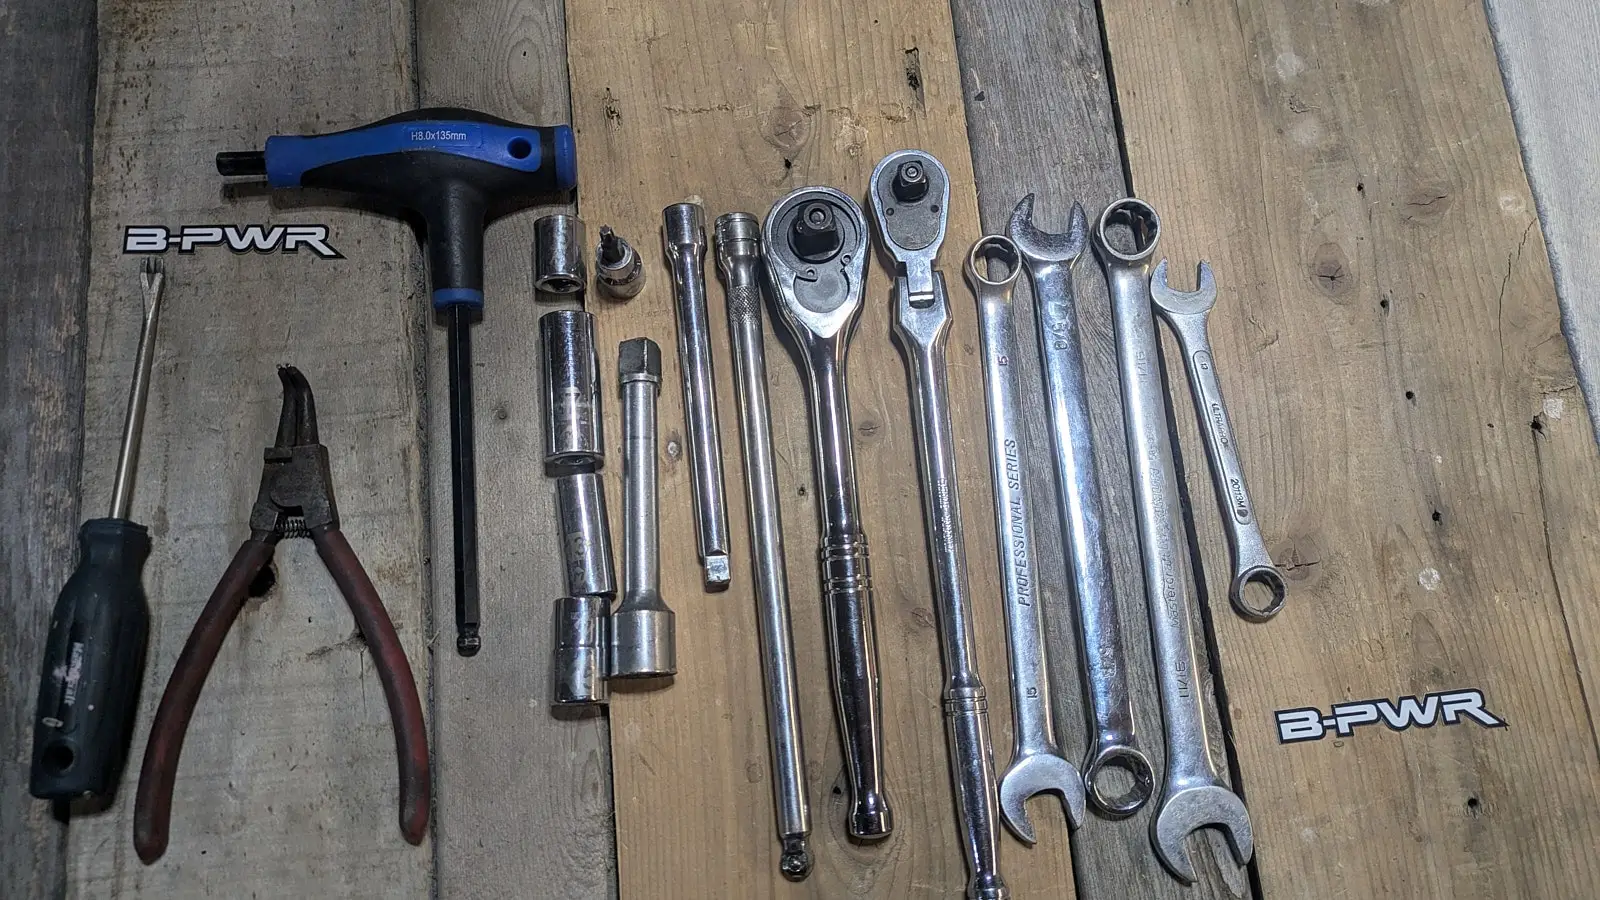
List of Tools Required for B-PWR Suspension Arms Installation
- Two (2) ratchet wrenches and 4″ and 6″ extensions
- 13 mm socket (short and deep), 2 x 15 mm, 17 mm
- Torx T27 socket
- 13 mm, 14 mm, 17 mm wrenches
- 8 mm Allen key
- Snap ring pliers
- Cotter pin removal tool
- ATV jack (safer) or floor jack
- Brake parts cleaner
- Low-temperature or all-purpose grease
- Rag
- Safety glasses
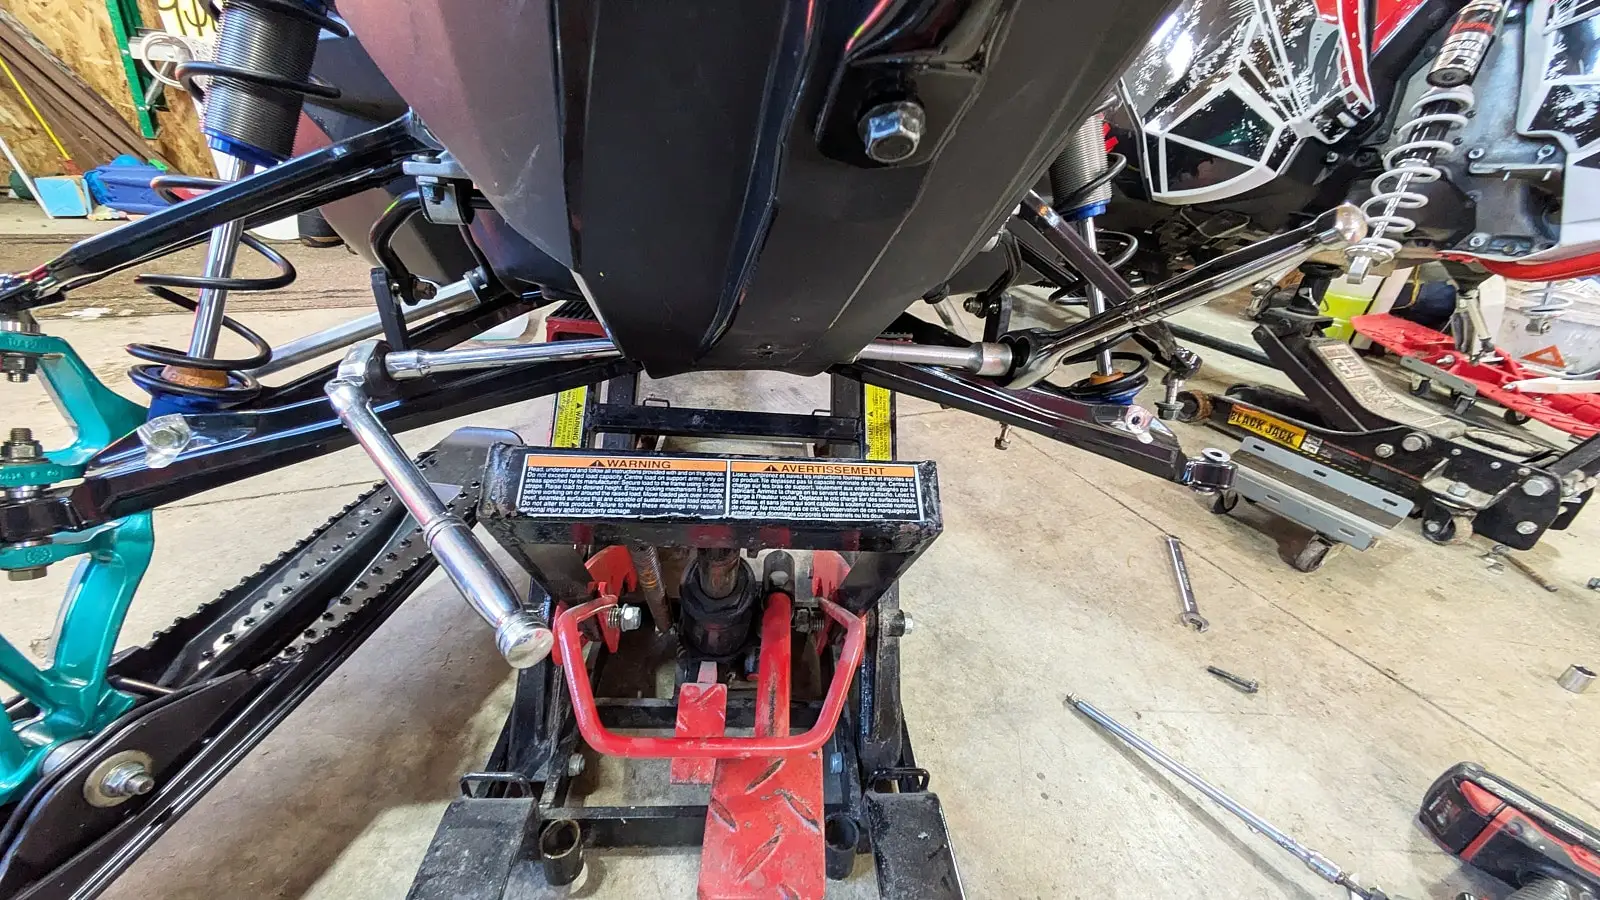
Step 1: Lift the Snowmobile
Tools Required
- ATV jack
Instructions
- Place the jack under the snowmobile deep enough to avoid touching the suspension arms. Use an ATV jack to secure the load without placing stands or protection under the snowmobile.
- Lift the snowmobile until the skis clear the ground.
- Check stability and ensure it is secure.
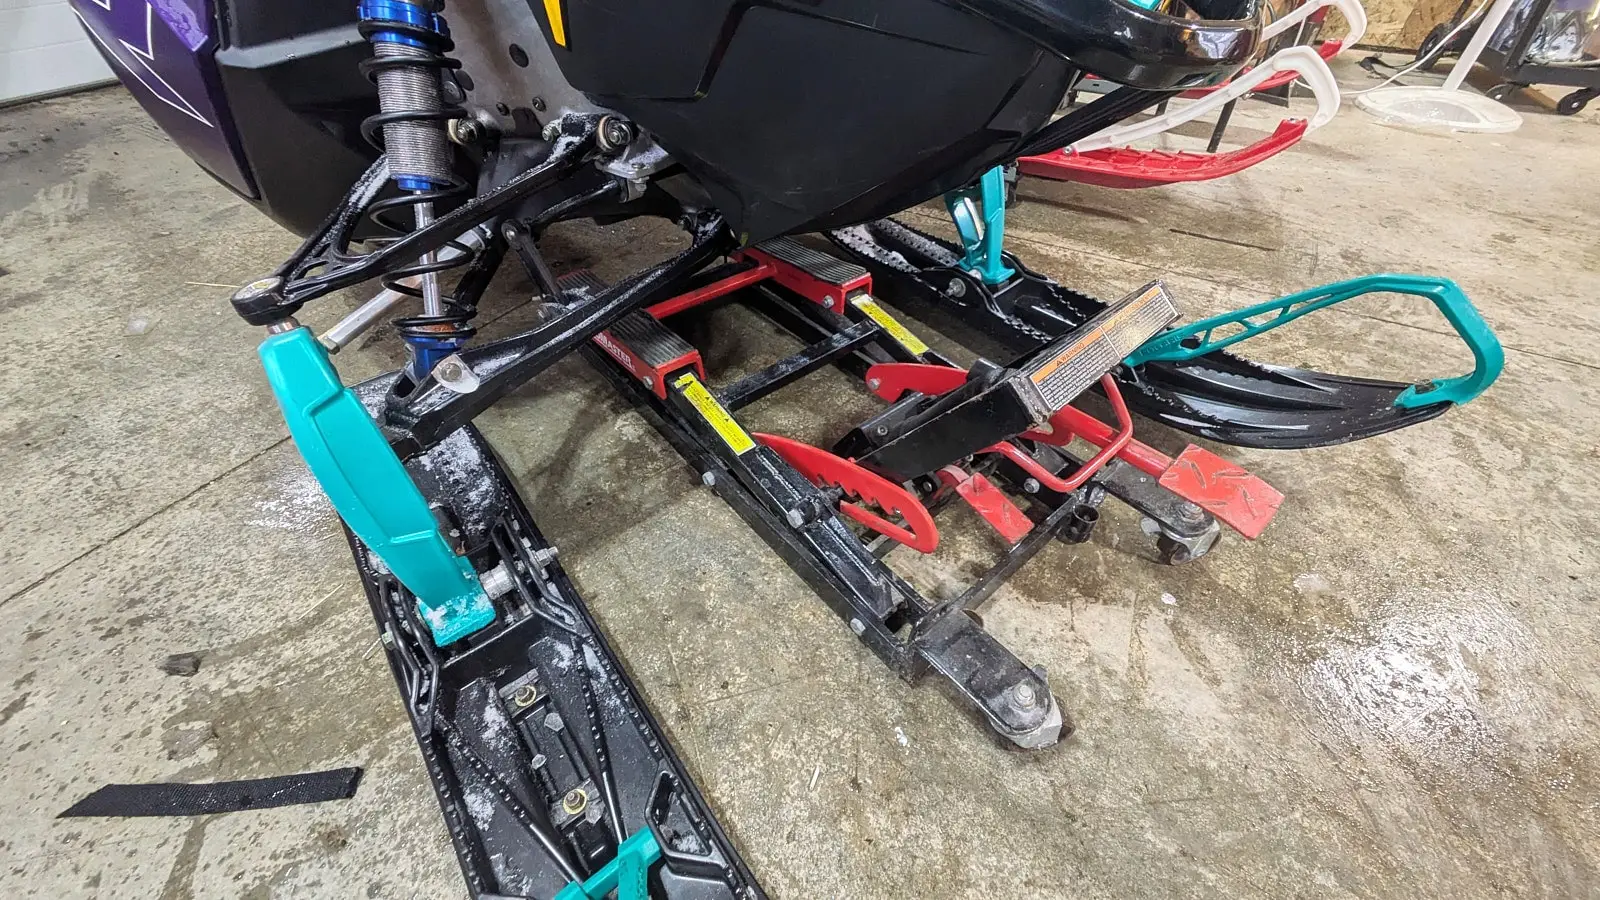
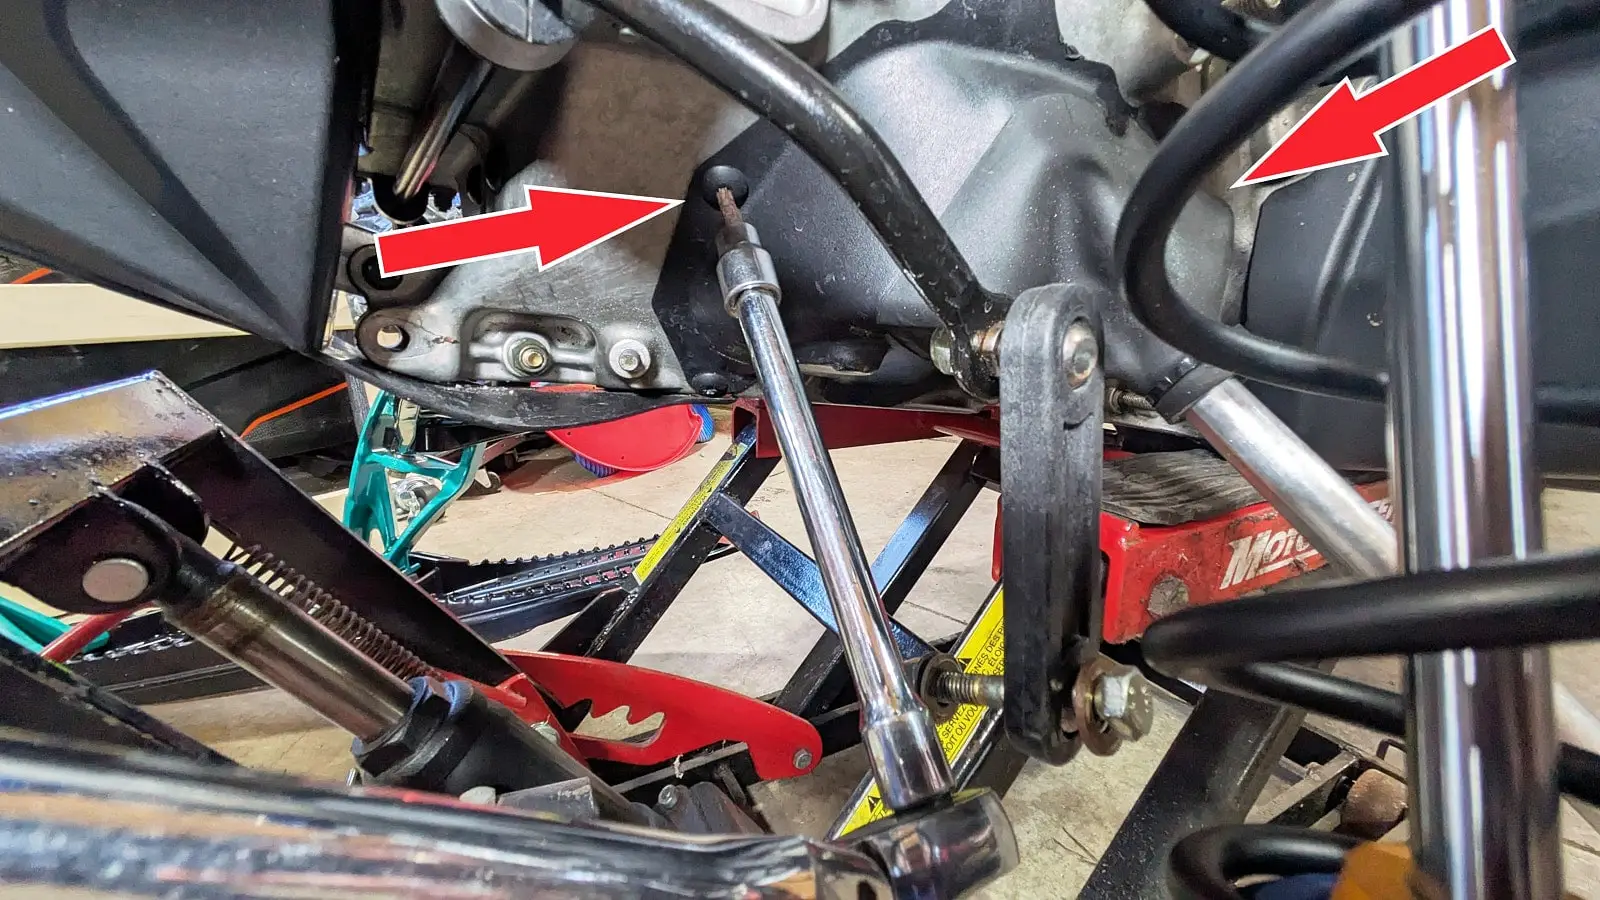
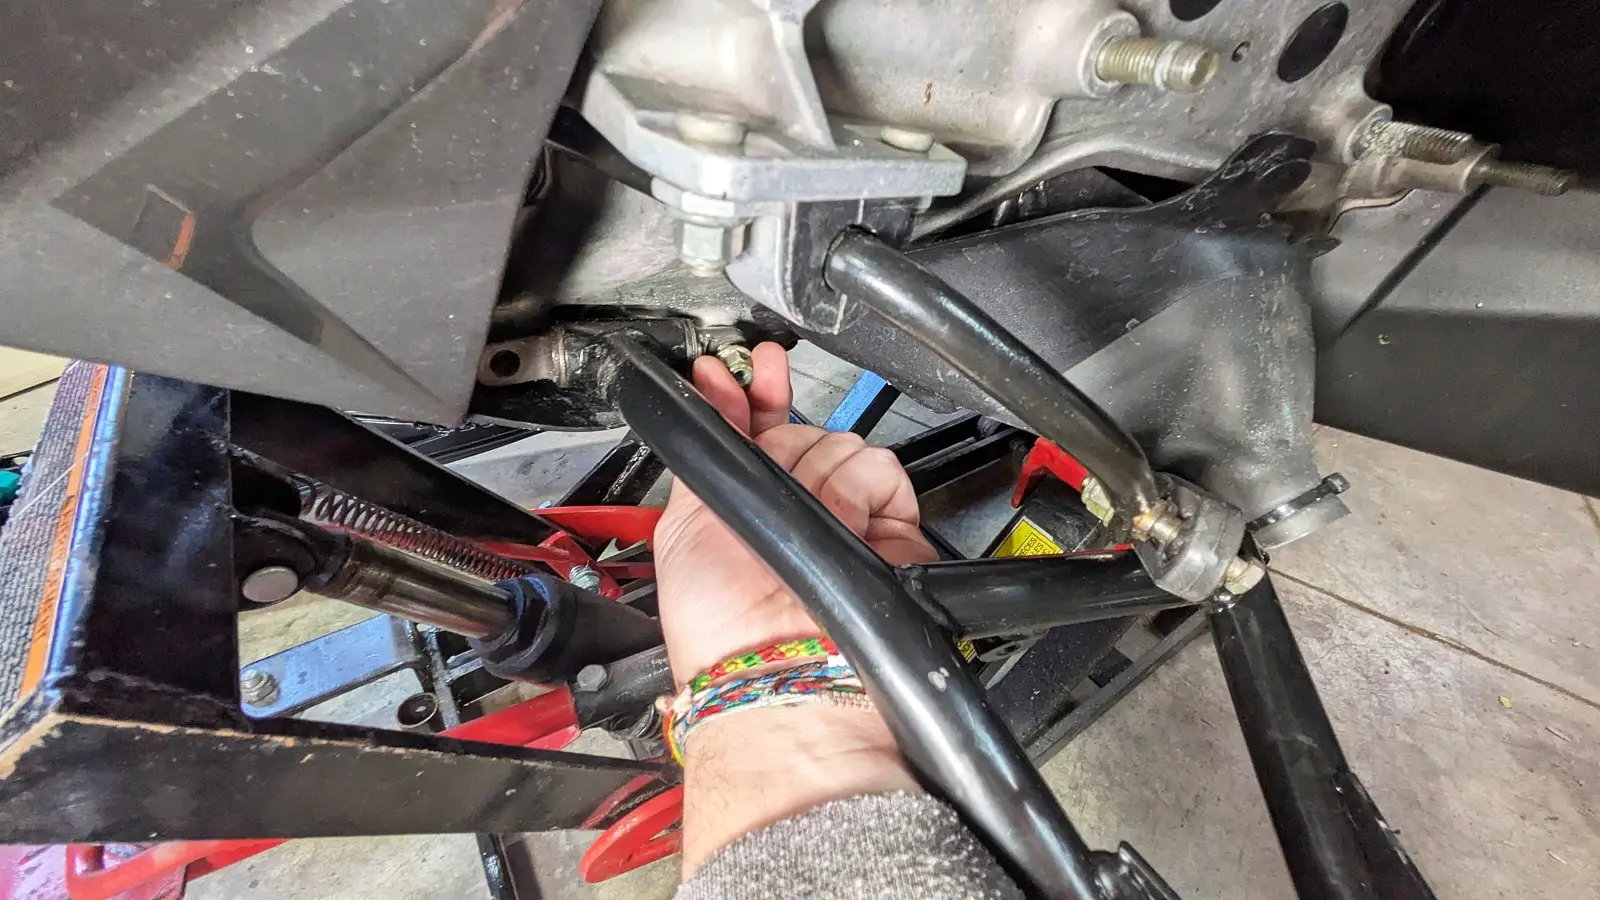
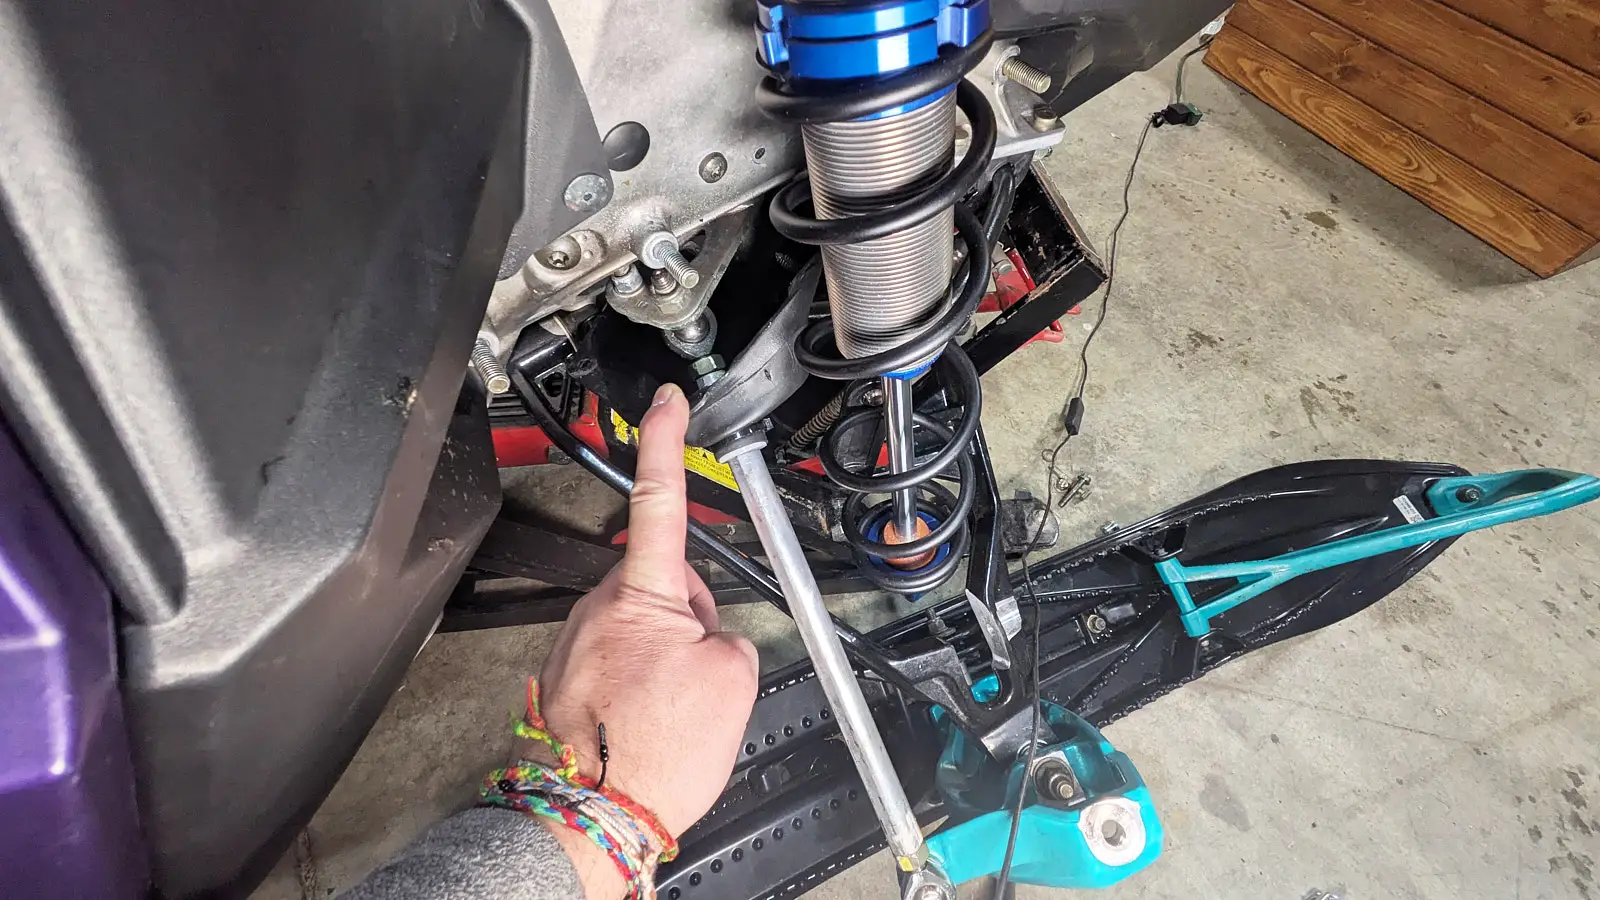
Step 2: Remove the Ski Supports (Spindles)
Tools Required
- 8 mm Allen key
- 15 mm socket
- 15 mm and 13 mm wrenches
- Ratchet wrenches
- Screwdriver
Instructions
- Using the 8 mm Allen key and 15 mm wrench, unscrew the top suspension arm attachment.

- With the ratchet wrenches, 15 mm socket, and 15 mm wrench, remove the bolt and nut from the bottom support. Set them aside, as they will be used later.
- Insert the 13 mm wrench under the ball joint and use the ratchet wrenches and 15 mm socket on the nut. Unscrew and keep the washer and nut together. You will need them later.
- Finally, pull out the ski and support assembly and set it aside.
- Suggestion: Reattach the nut and washer to the bolt to avoid losing them.
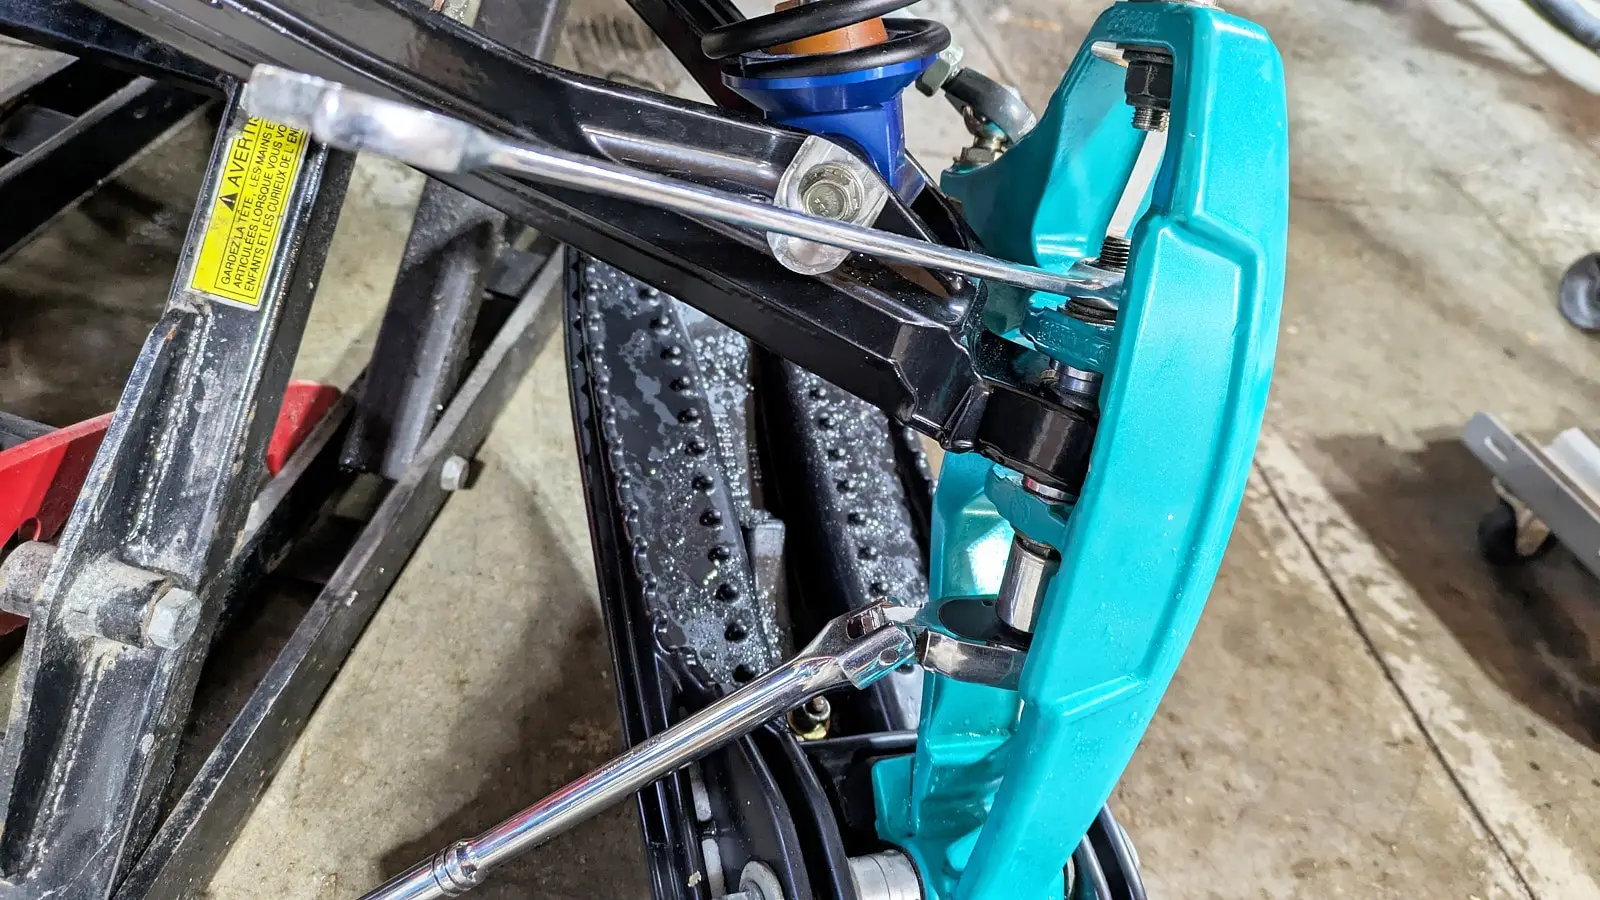
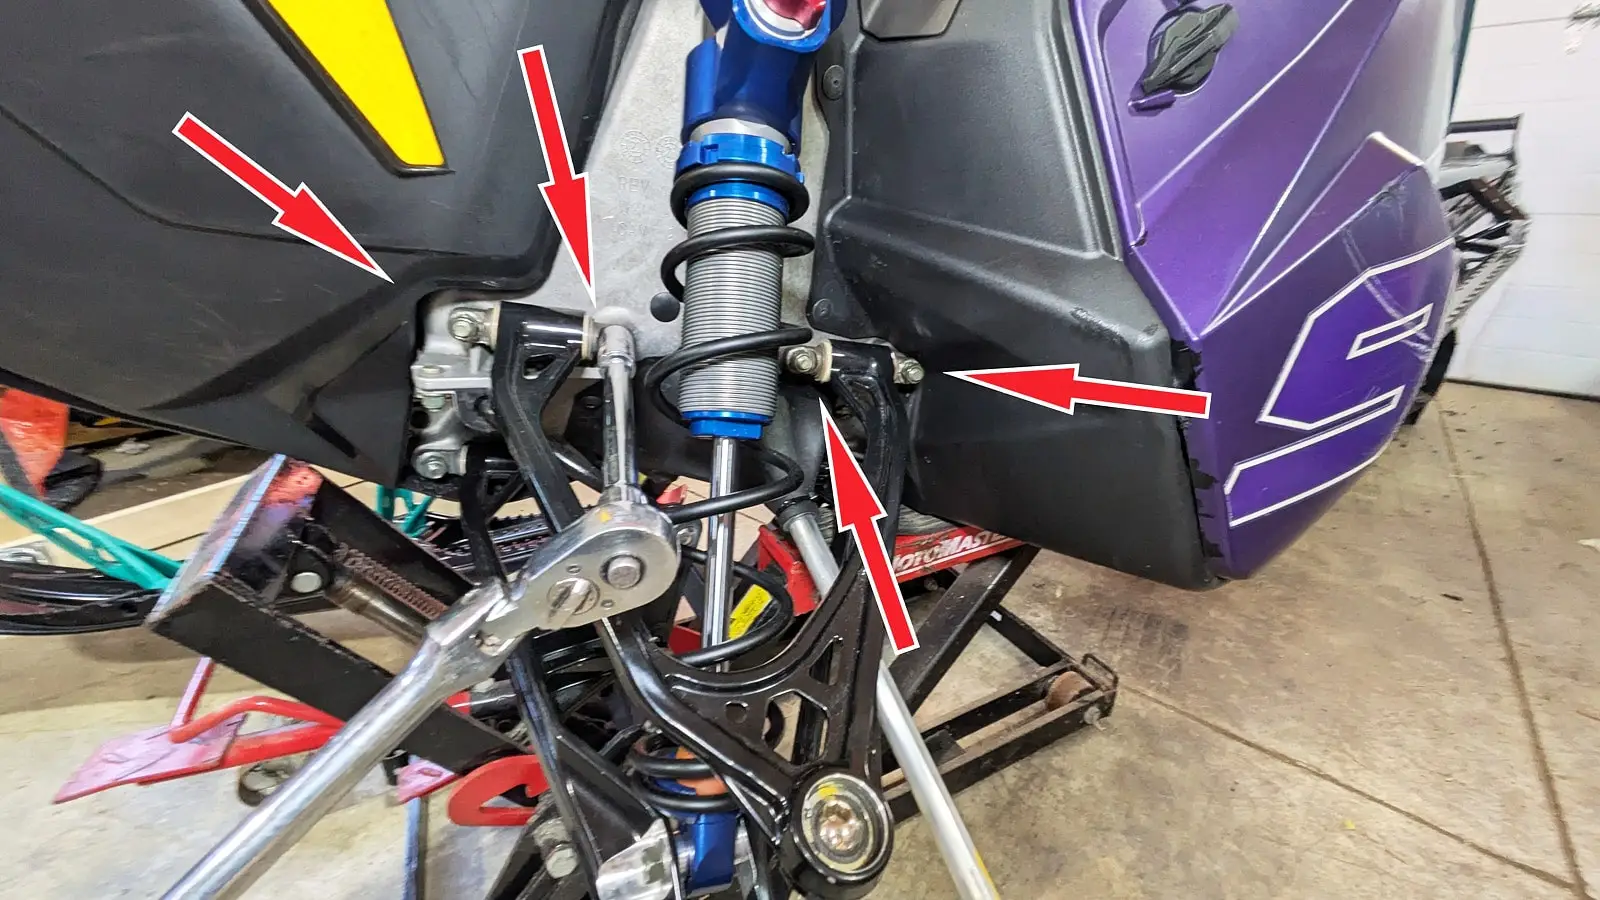
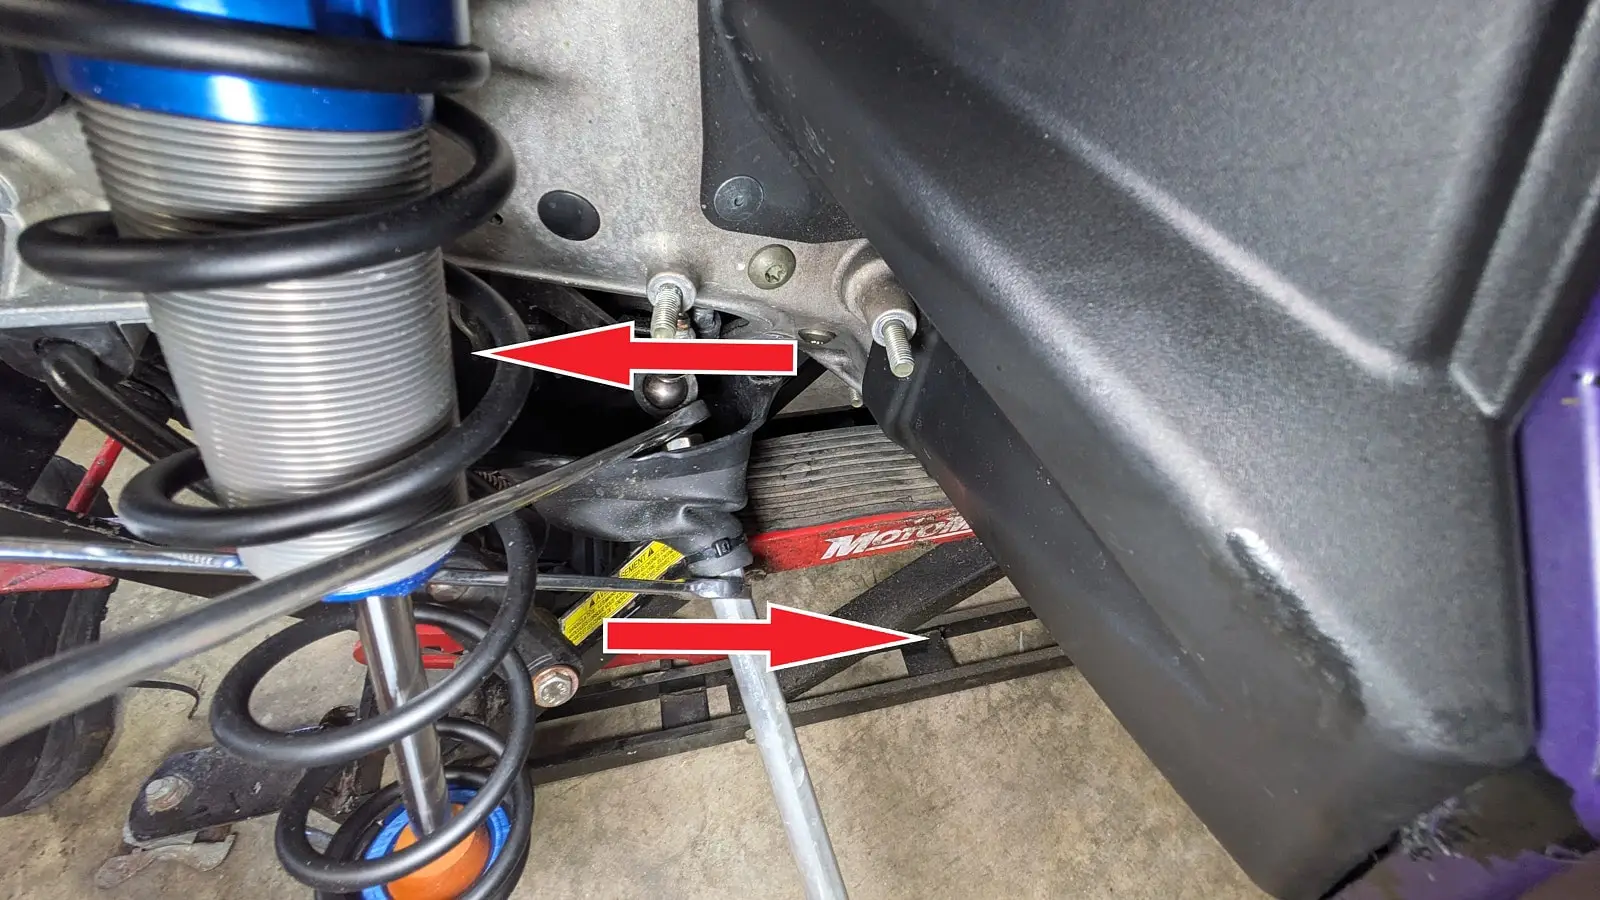
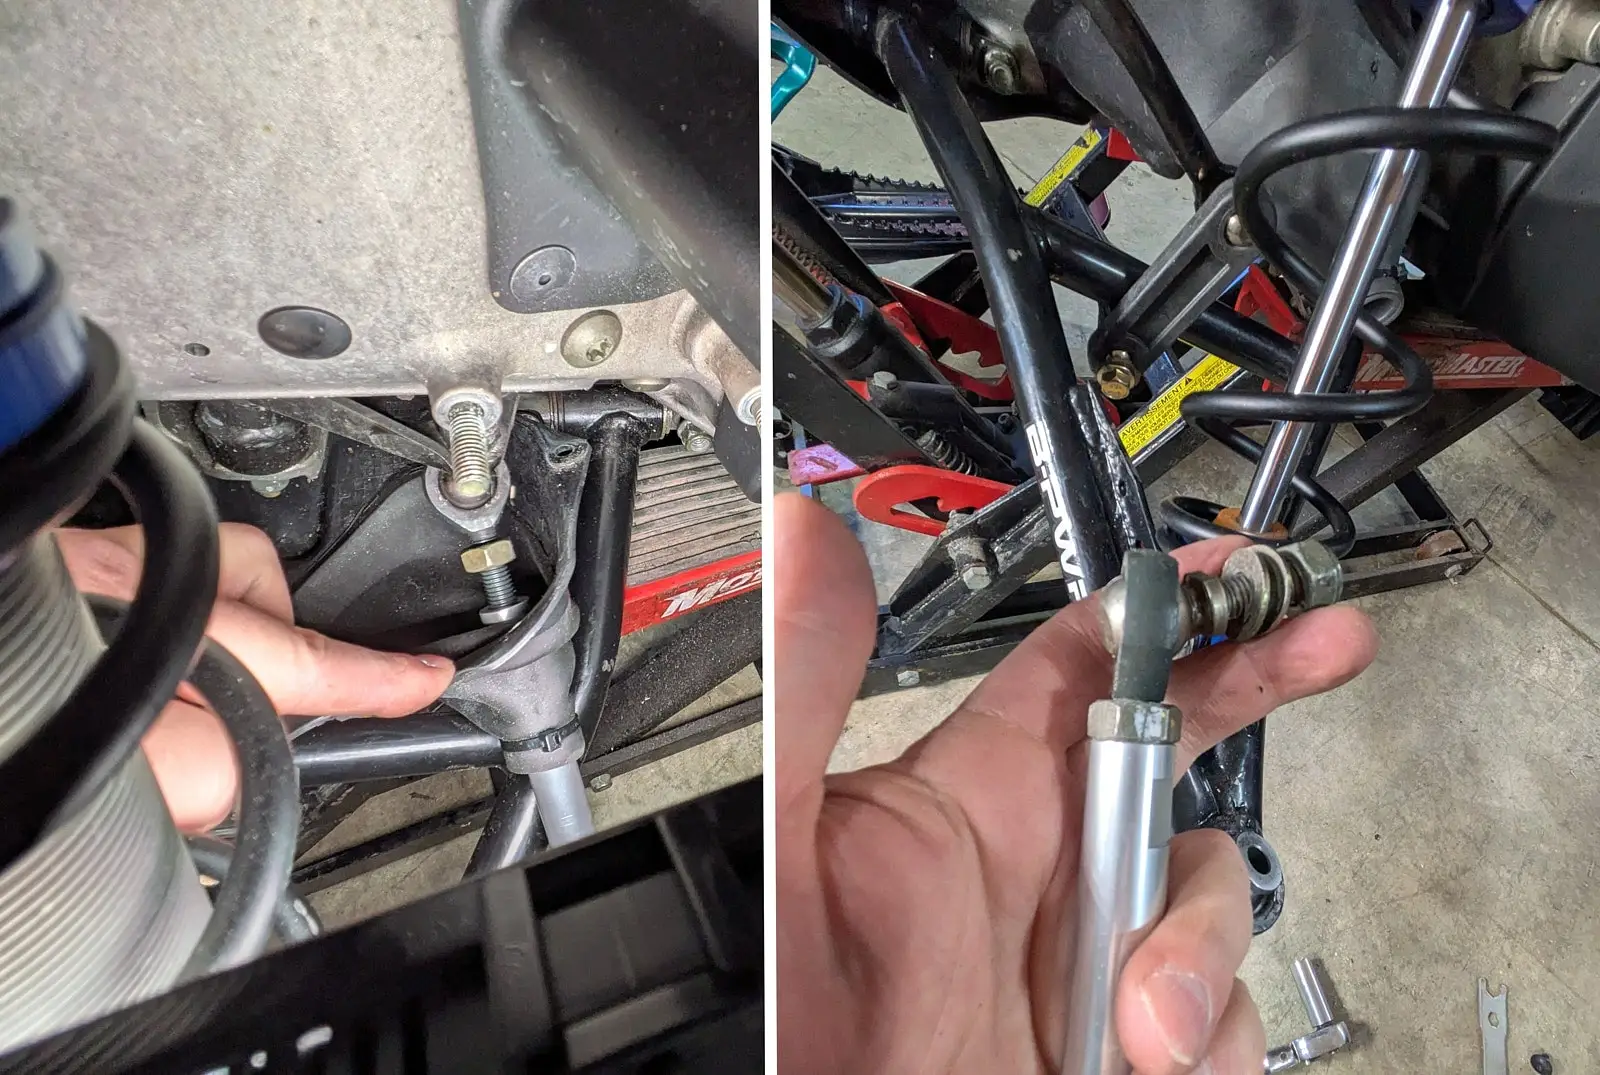
Step 3: Decouple the Stabilizer Bar and Shock Absorber
Tools Required
- Ratchet wrench
- 13 mm socket
- 13 mm wrench
Instructions
- Using the ratchet wrenches, 13 mm socket, and 13 mm wrench, remove the bolt and nut from the stabilizer bar. Set them aside; you will need them later.
- To release the shock absorber, use the ratchet wrench and 13 mm socket to remove the bolt. Dispose of the bolt or keep it if you reinstall the original suspension arms.
- Clear the suspension arm. Be careful, as the shock absorber spacers may fall.

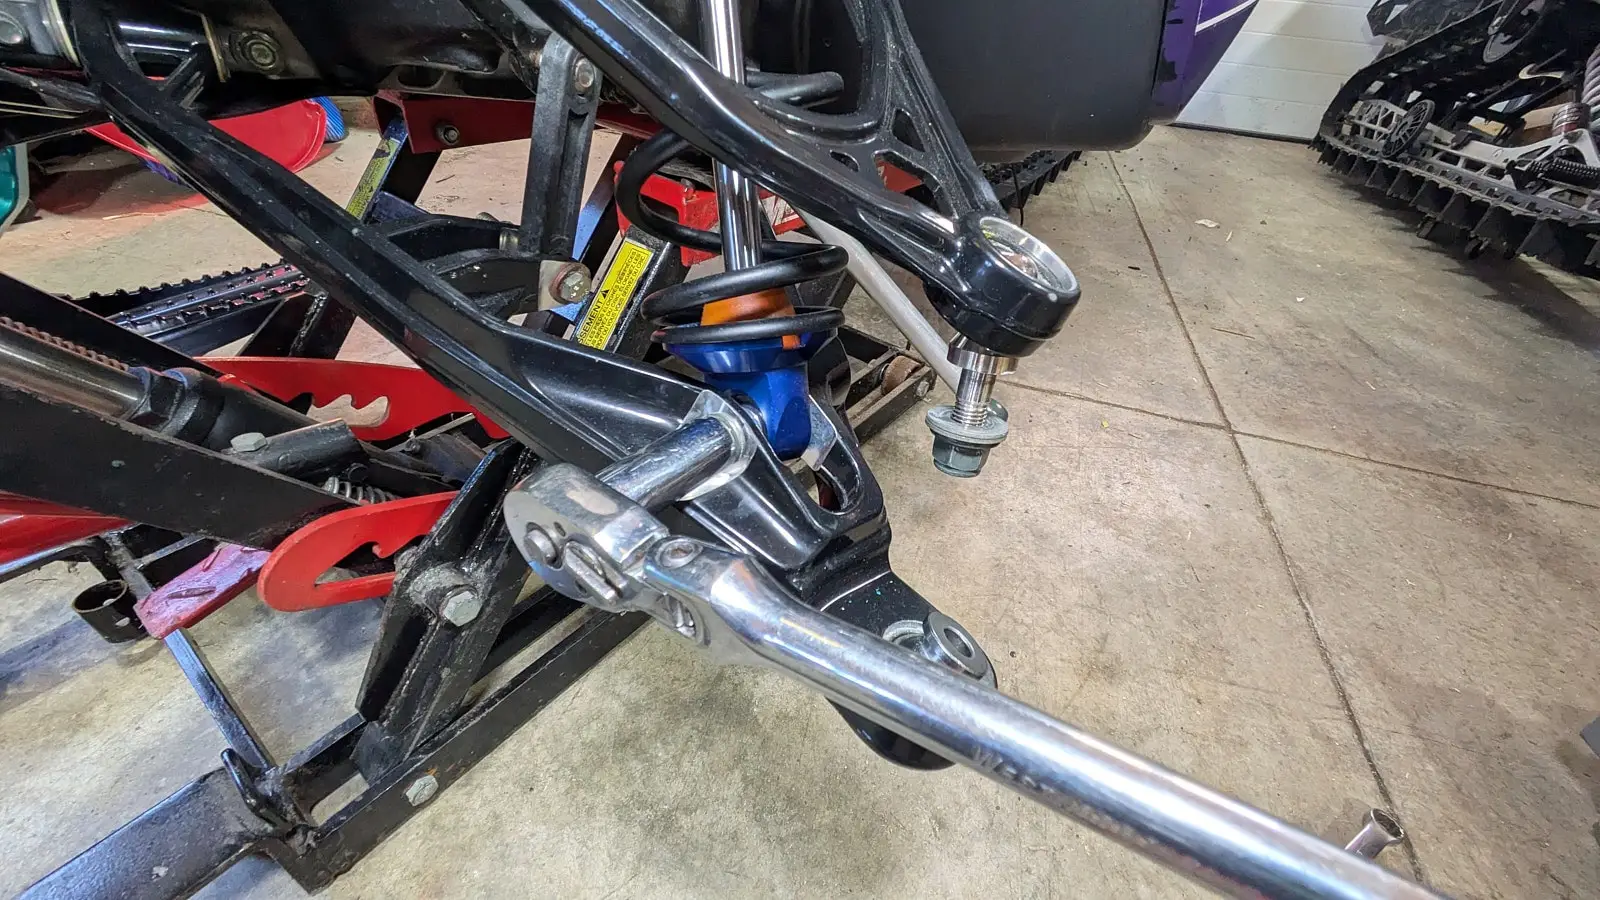
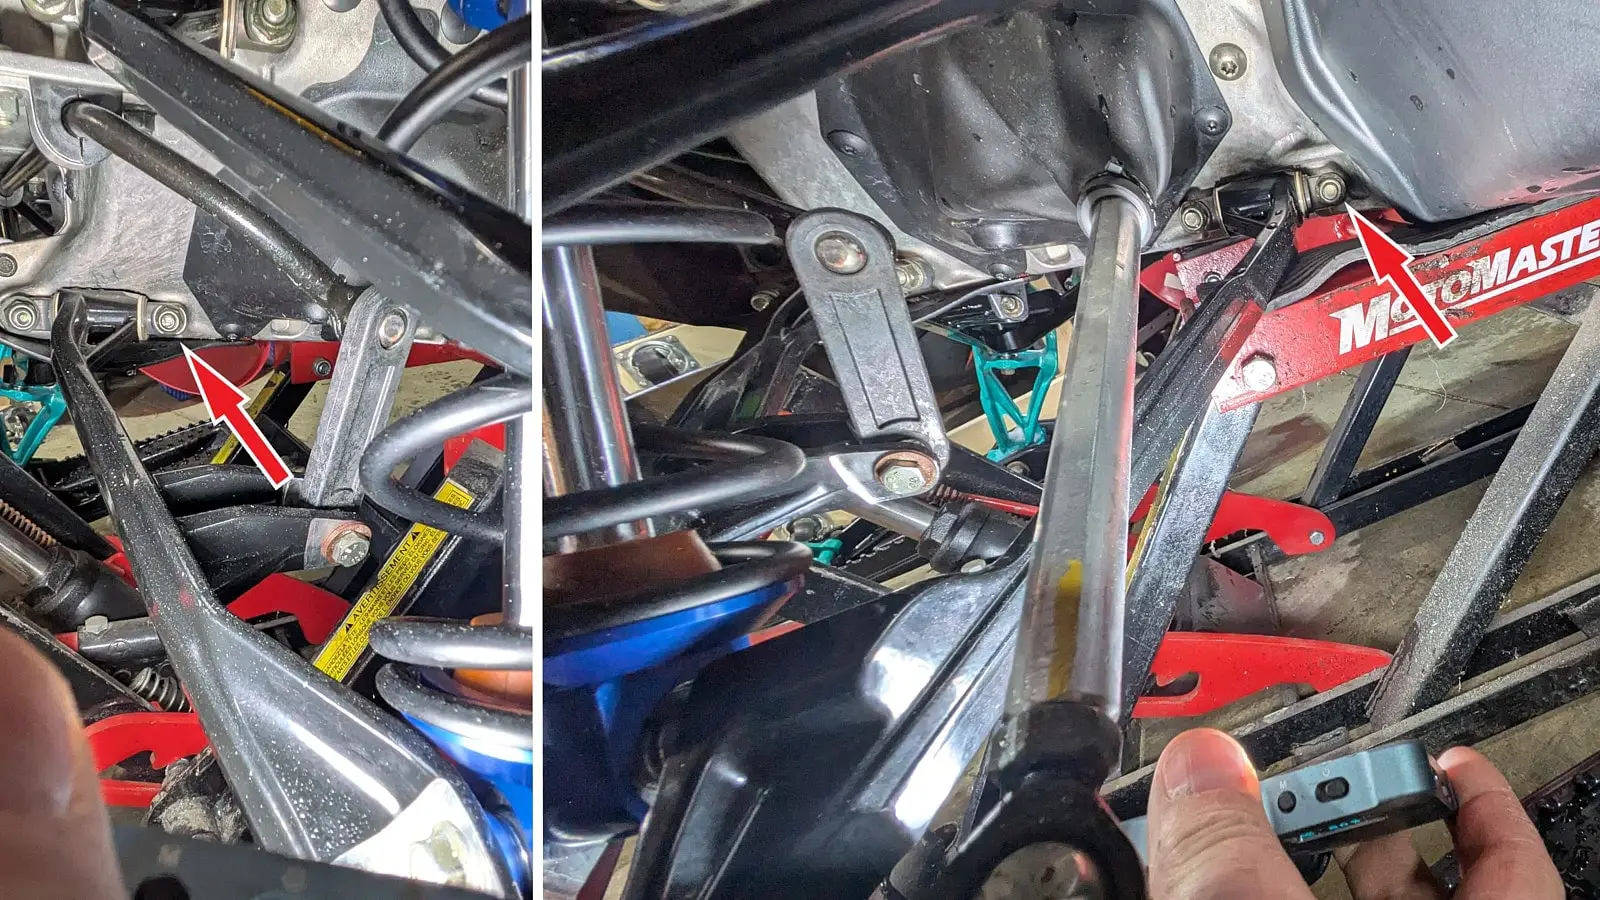
Step 4: Remove the Upper Suspension Arm
Tools Required
- Ratchet wrench and 6″ extension
- 13 mm socket (long)
Instructions
- First, locate the four (4) retaining nuts on the suspension arm.
- Unscrew the nuts.
- Then, remove the suspension arm and set it aside to recognize it when transferring the mounting pins to the new B-PWR suspension arms.
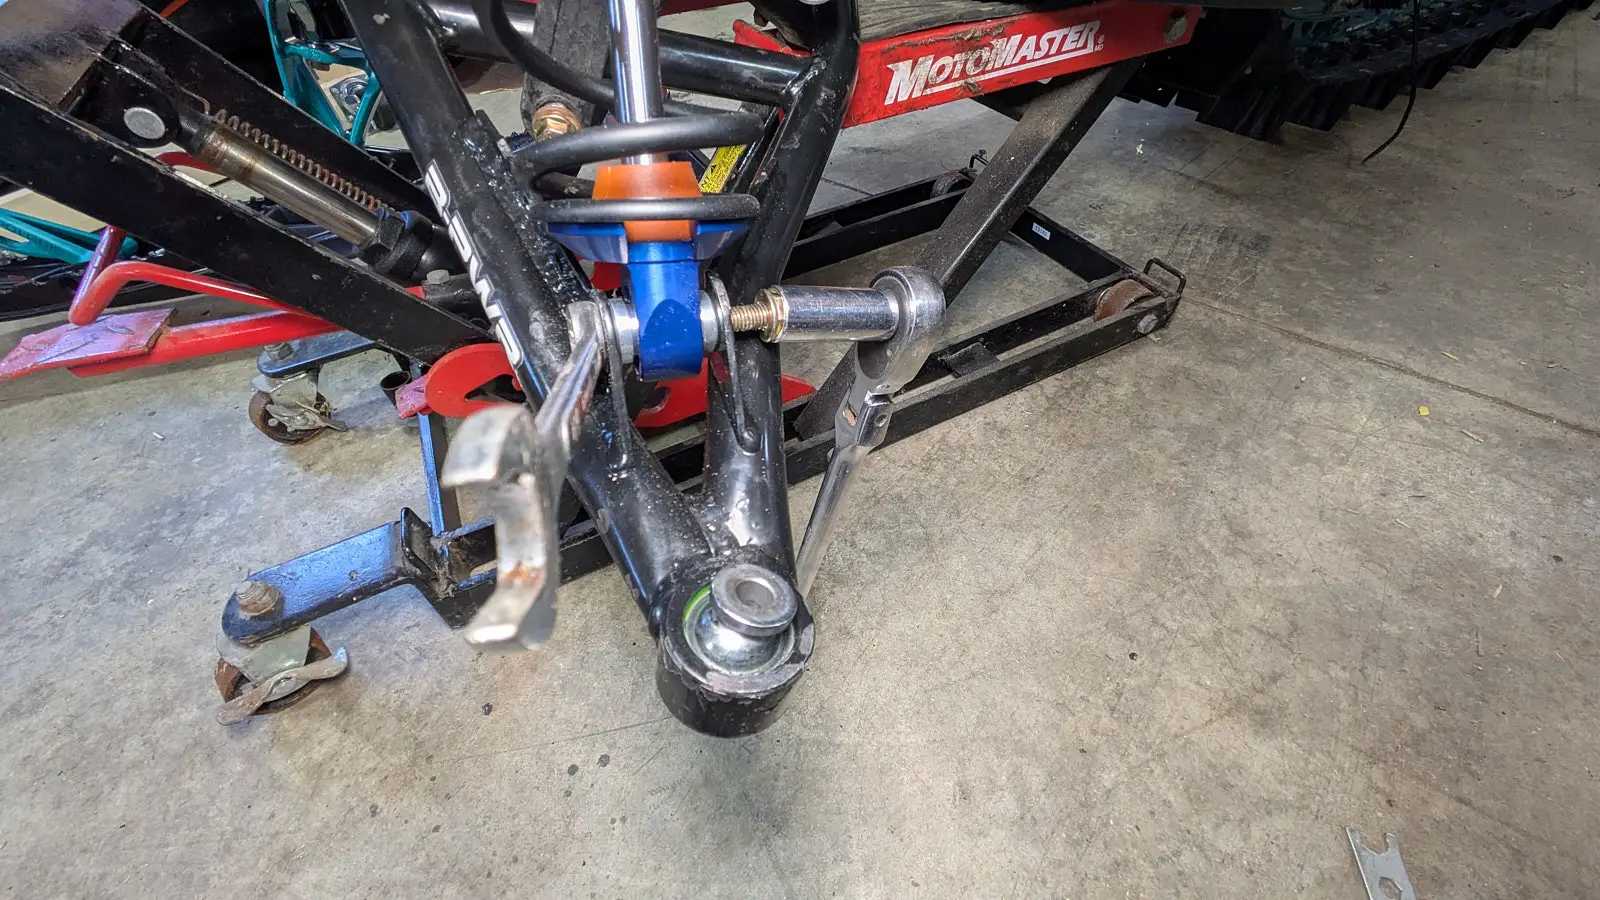
Step 5: Remove the Lower Suspension Arm
Tools Required
- Two (2) ratchet wrenches and 4″ and 6″ extensions
- 13 mm socket (long)
- Two (2) 15 mm sockets (one long)
Instructions
- First, locate the three (3) retaining nuts on the suspension arm.
- Unscrew the nuts with a 13 mm socket.
- Locate the 15 mm bolt and nut holding the suspension arm (the one most forward on the snowmobile).
- Prepare two (2) ratchet wrenches and one (1) 4″ extension with two (2) 15 mm sockets (one long and one short). Place a socket on each side and unscrew.
- Set them aside, as you will need them later.
Step 6: Remove the Steering Rods
Tools Required
- 11/16 and 5/8 wrenches
- Torx T27 socket
- Cotter pin removal tool
Instructions
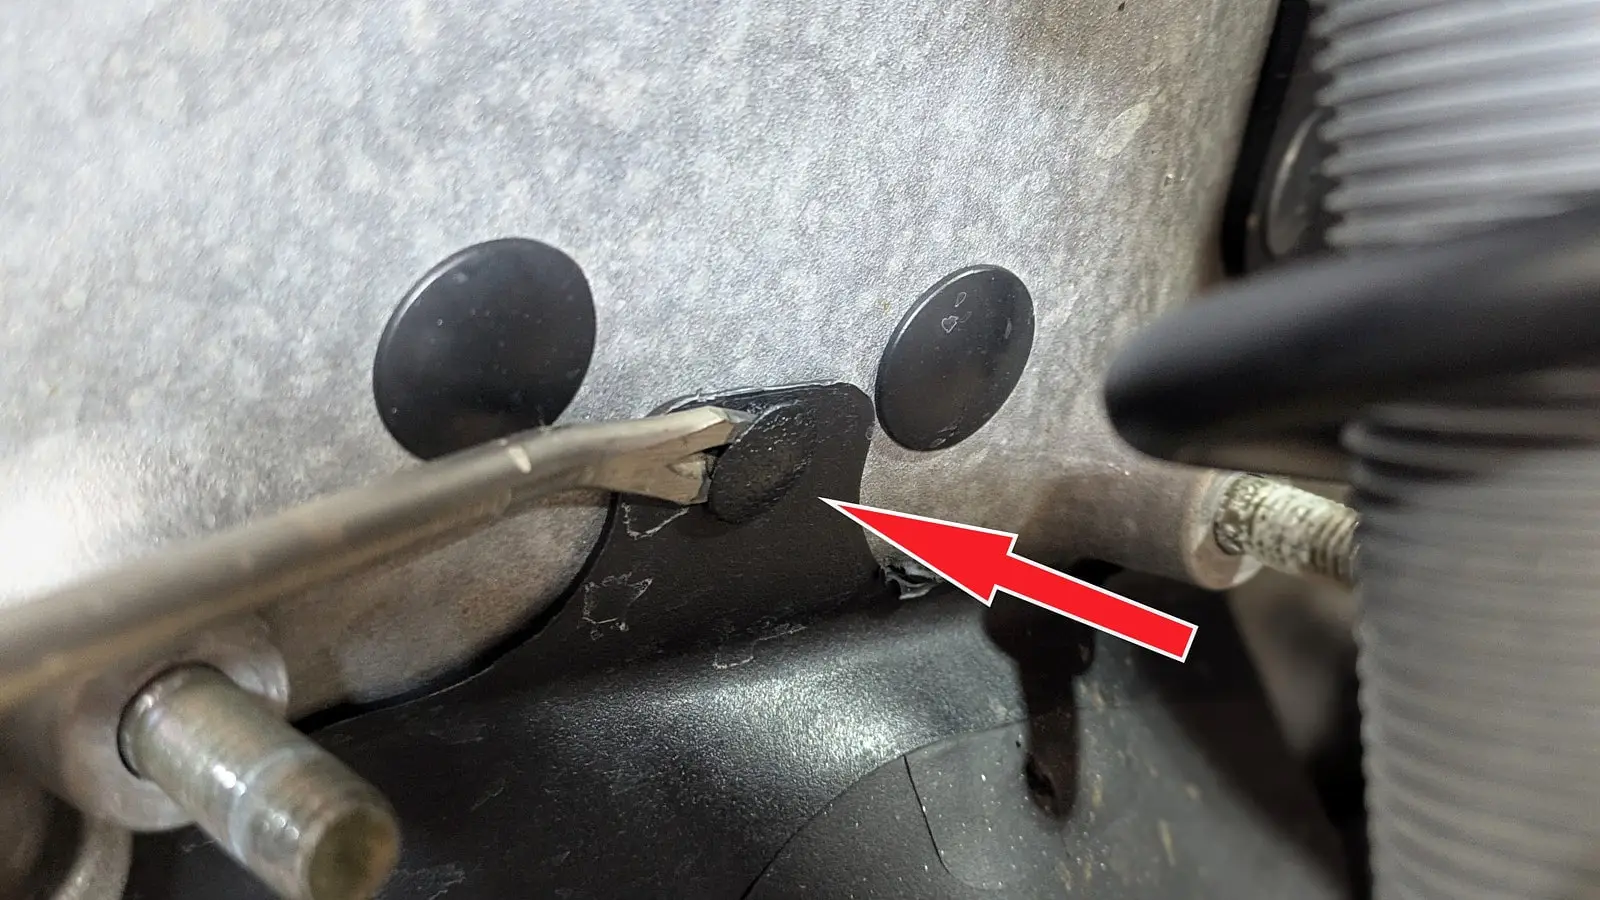
- First, locate the steering boot and the two (2) Torx screws on each side.
- Remove the two (2) screws using the Torx T27 socket and set them aside.
- At the top of the boot, remove the plastic cotter pin with the cotter pin removal tool.
- Unlock the ball joint nuts at each end of the steering rods. Note that one nut on each side will be reverse-threaded. If it doesn’t unscrew, try “screwing to unscrew”. You will need the 11/16” and 5/8” wrenches.
- Finally, unscrew the steering rod and set it aside.
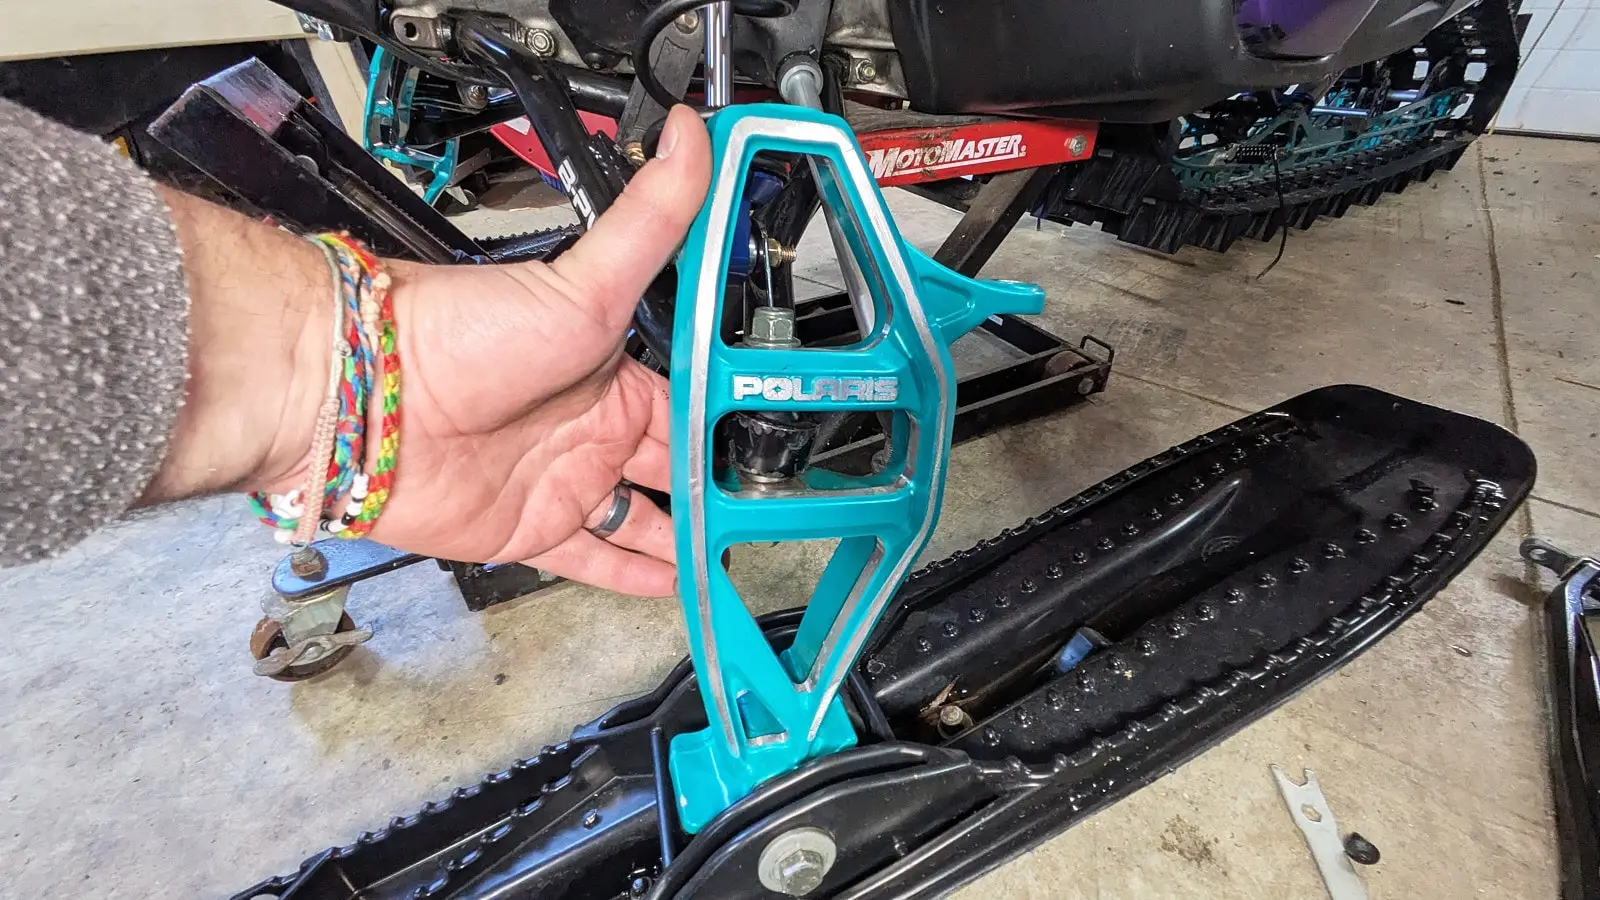
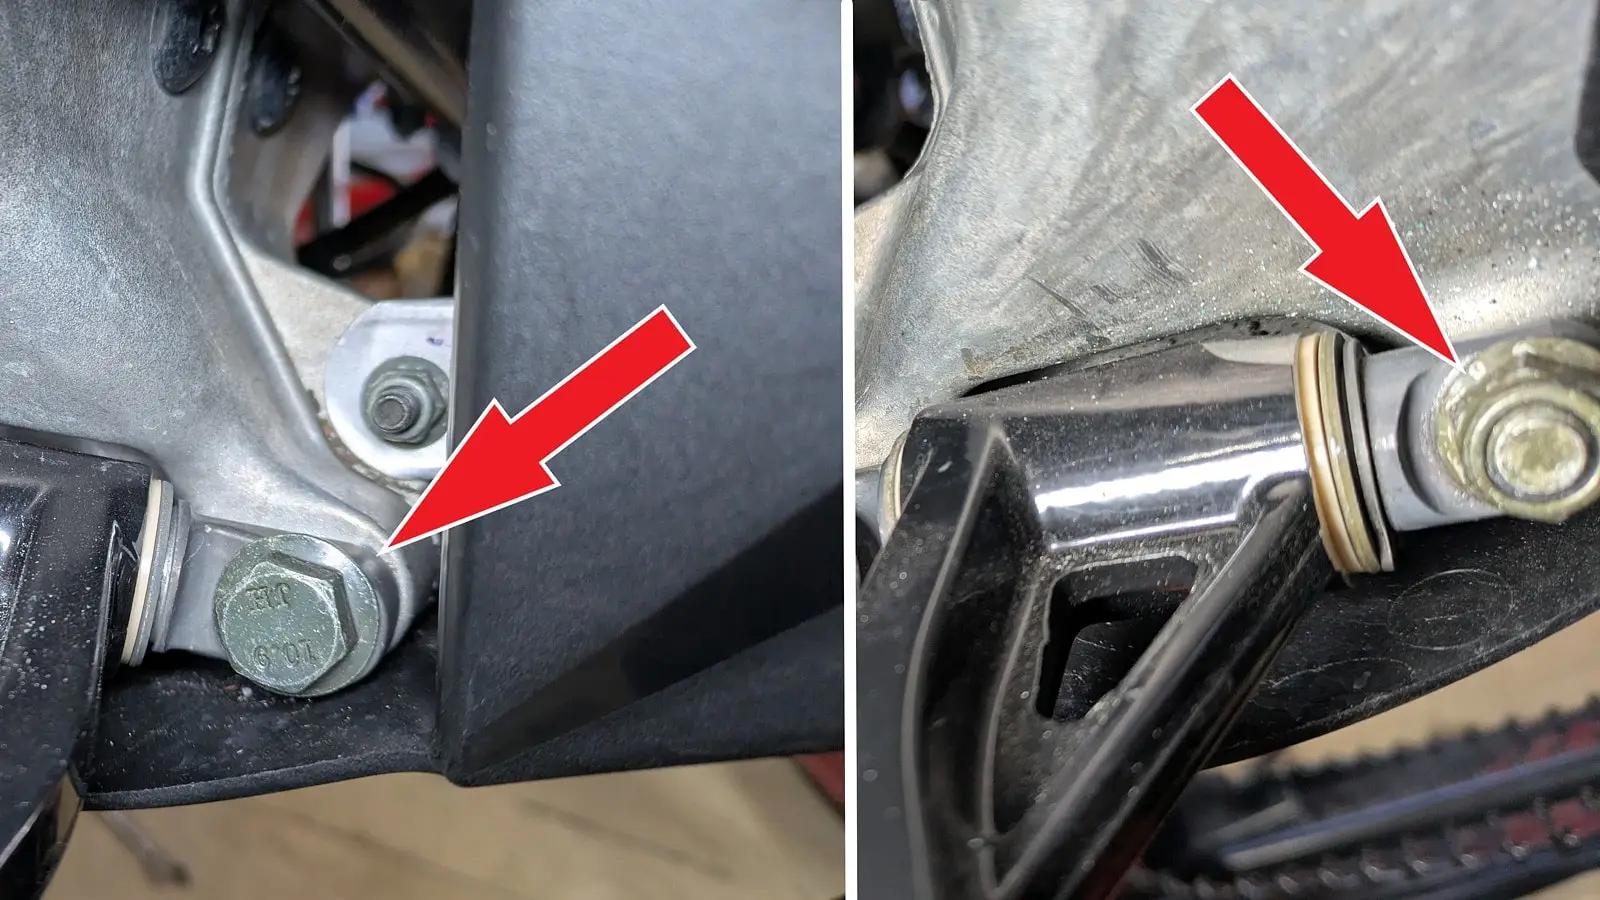
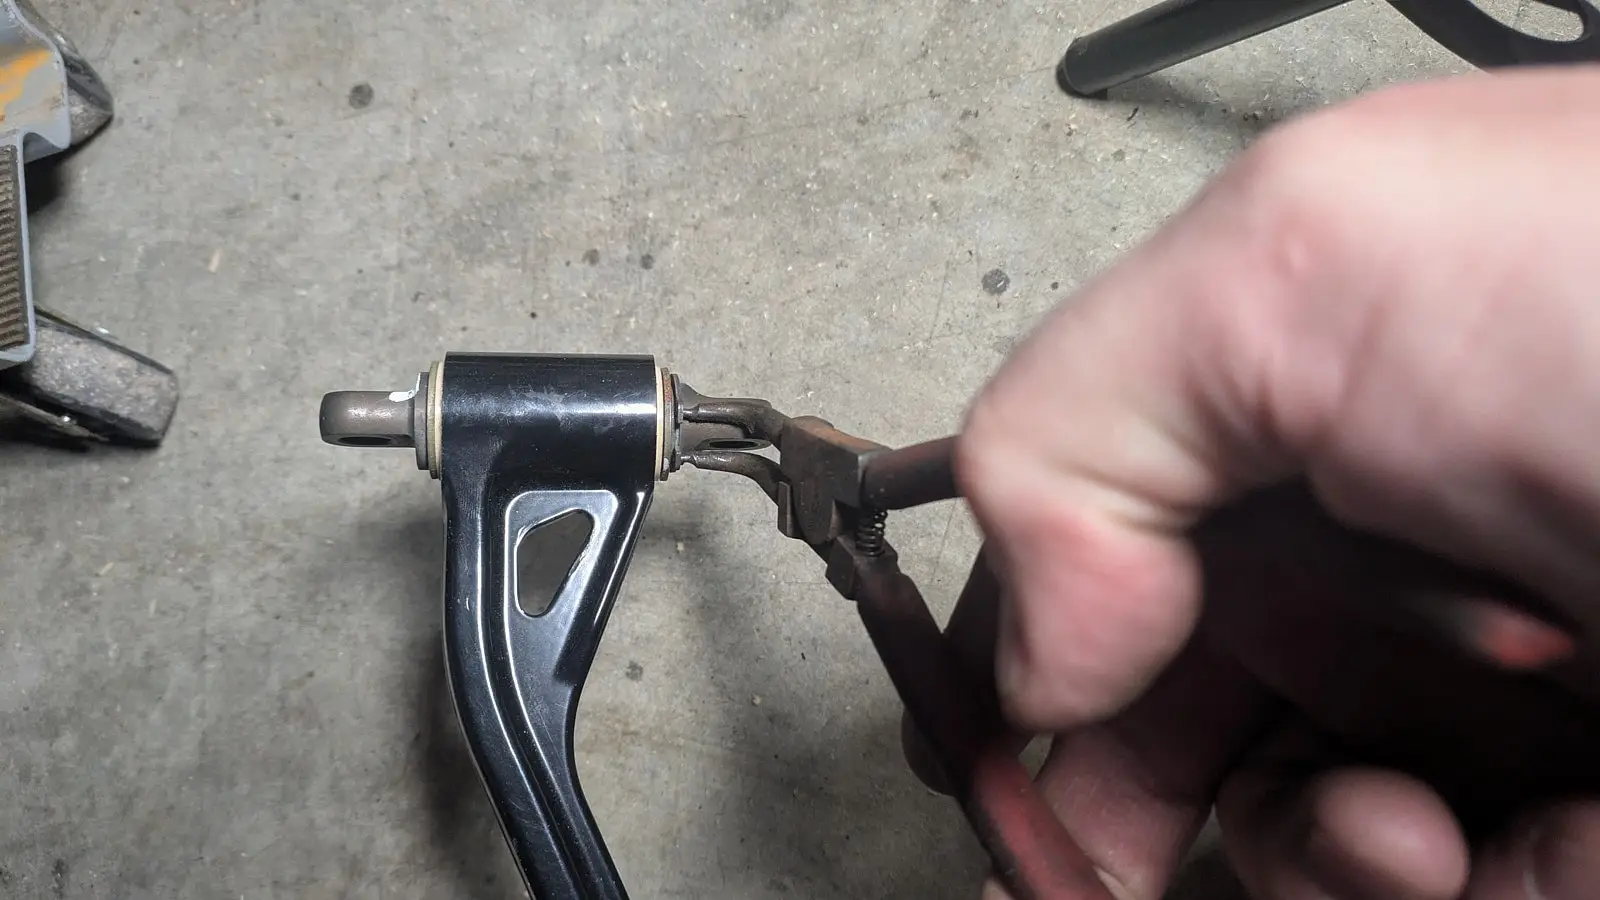
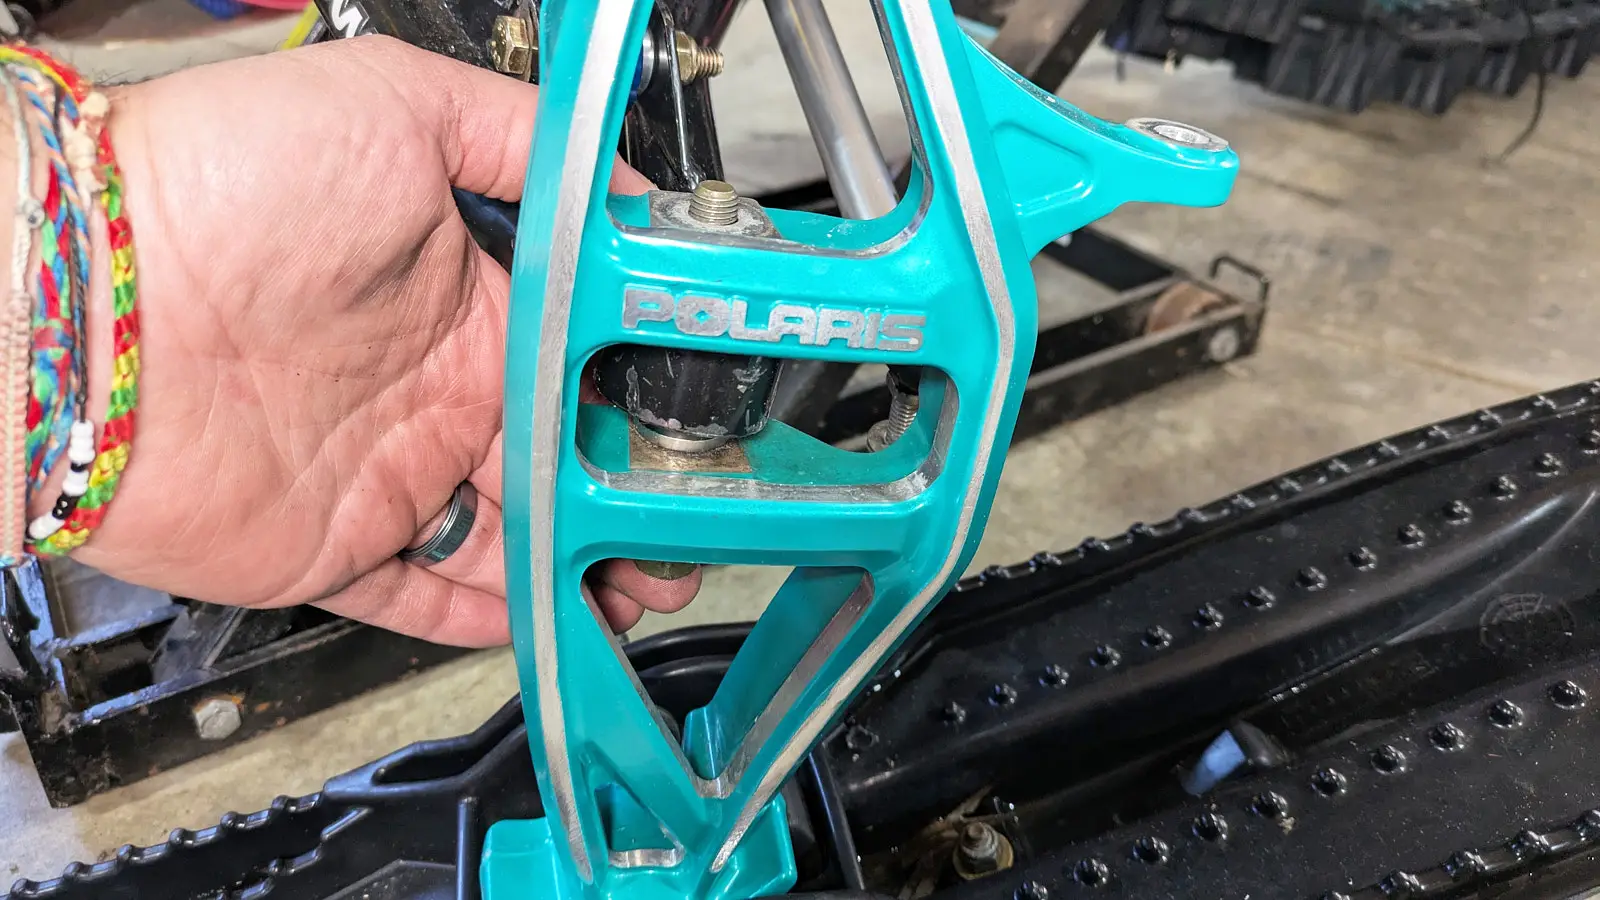
Step 7: Transfer Pivots to the New Suspension Arms
Tools Required
- Snap ring pliers
- Brake parts cleaner
- Low-temperature or all-purpose grease (if needed)
- Rag
- Safety glasses
Instructions
- First, place the suspension arms to identify their positions.
- Proceed with this step one piece at a time.
- Using the snap ring pliers, remove the snap ring from a pivot.
- Remove the spacer washer, pivot, and the other washer. Clean with brake parts cleaner.If your B-PWR suspension arms do not have bushings inside the pivot holes, retrieve them from the original arms.
- Clean the bushings with a rag and brake parts cleaner.
- Before reassembling the bushings and pivots, apply a thin layer of low-temperature or all-purpose grease. This will protect the parts from friction, wear, and corrosion.
- For reassembly, follow the same steps as disassembly but in reverse order.
- Repeat these steps for all pivots.
Step 8: Reassembly (*Follow Manufacturer’s Torque Specifications)
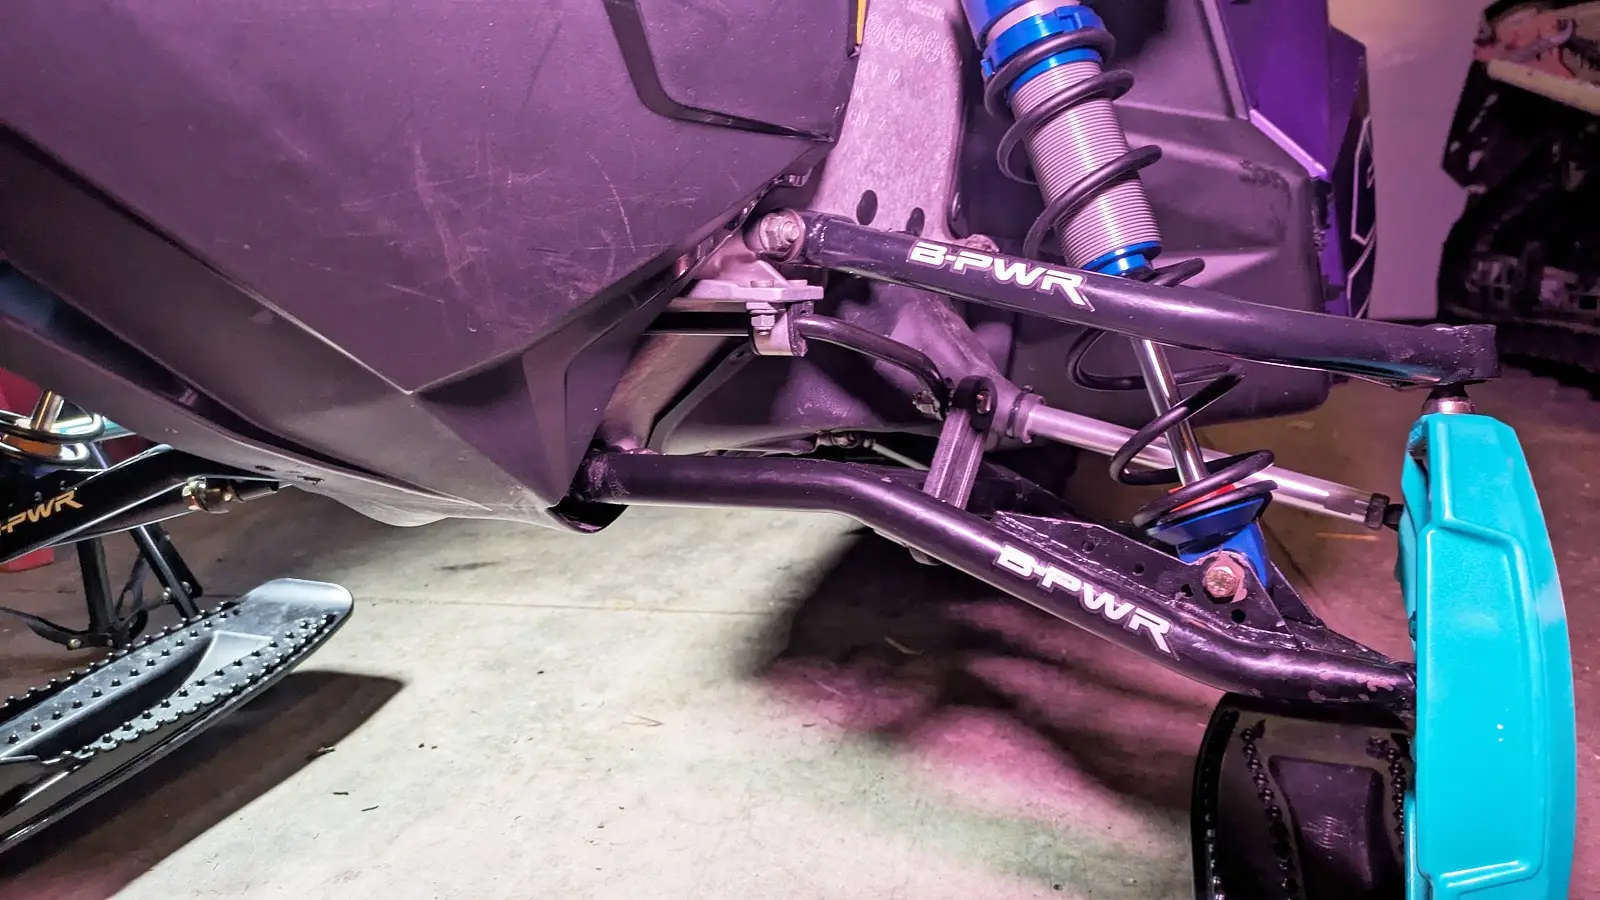
Installation of Lower B-PWR Suspension Arms
Tools Required
- Two (2) ratchet wrenches and 4″ and 6″ extensions
- 13 mm socket (long)
- Two (2) 15 mm sockets (one long)
Instructions
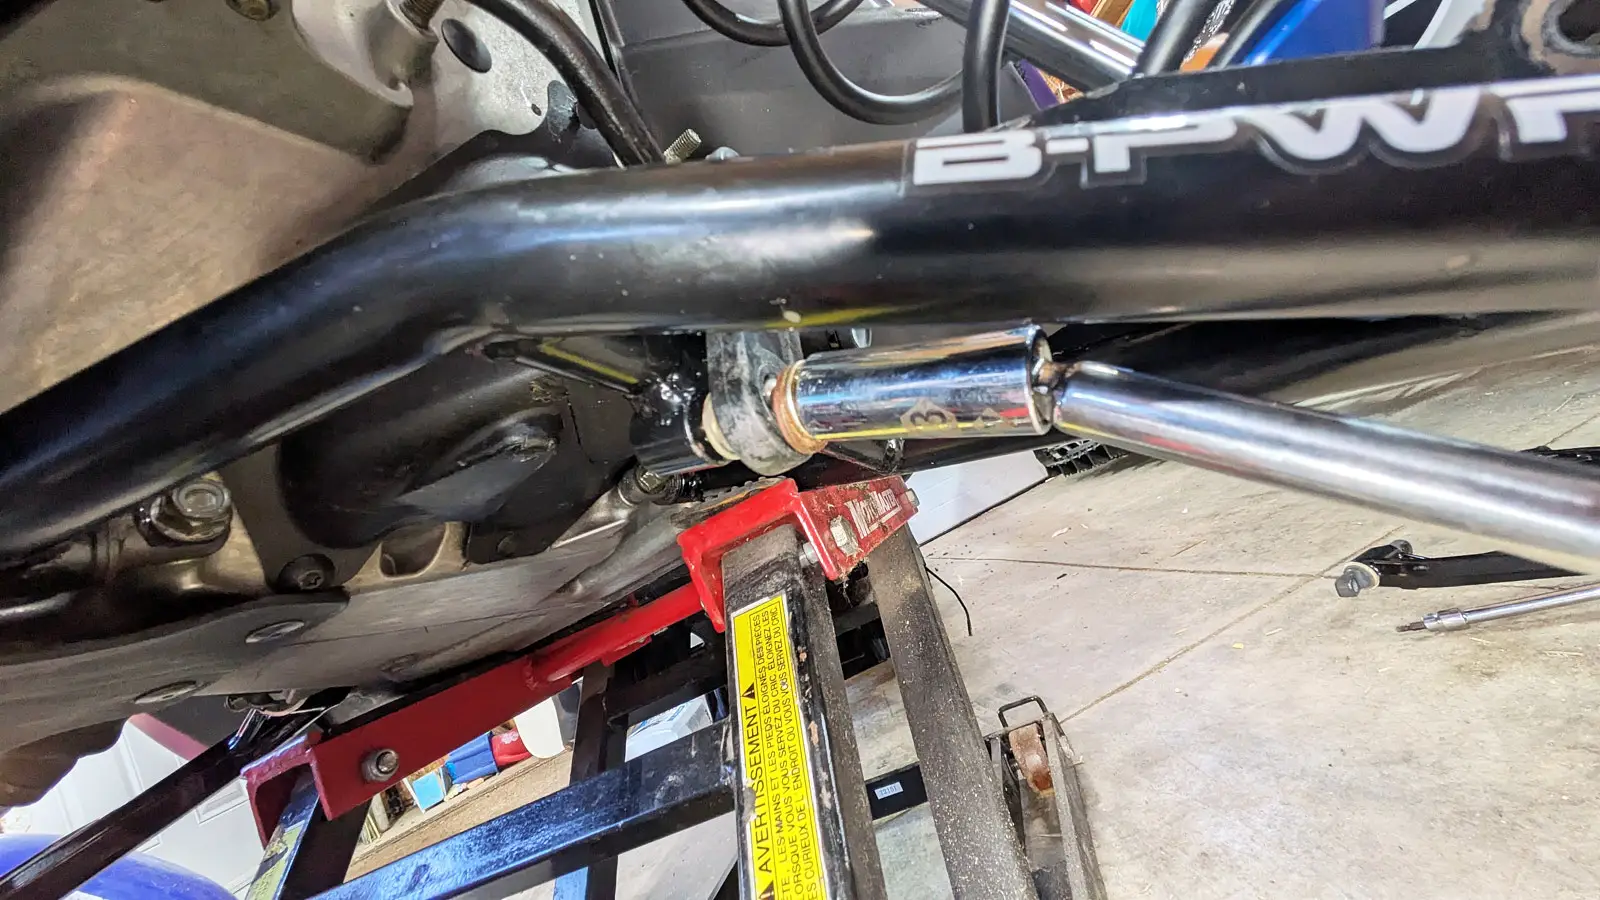
- First, install the lower suspension arms. Leave the bolts and nuts loose while installing the large nut and bolt.
- Once both lower arms are installed, proceed with the final tightening.
Step 9: Install the Steering Rod
Tools Required
- 11/16″ and 5/8″ wrenches
- Torx T27 socket
Instructions
- Insert the steering rod so that it screws in the same direction as the ball joint on the snowmobile’s end. Count the number of turns screwed in.

- Install the outer ball joint. Ensure you screw in the same number of turns as the first.
- Let the steering rods hang.
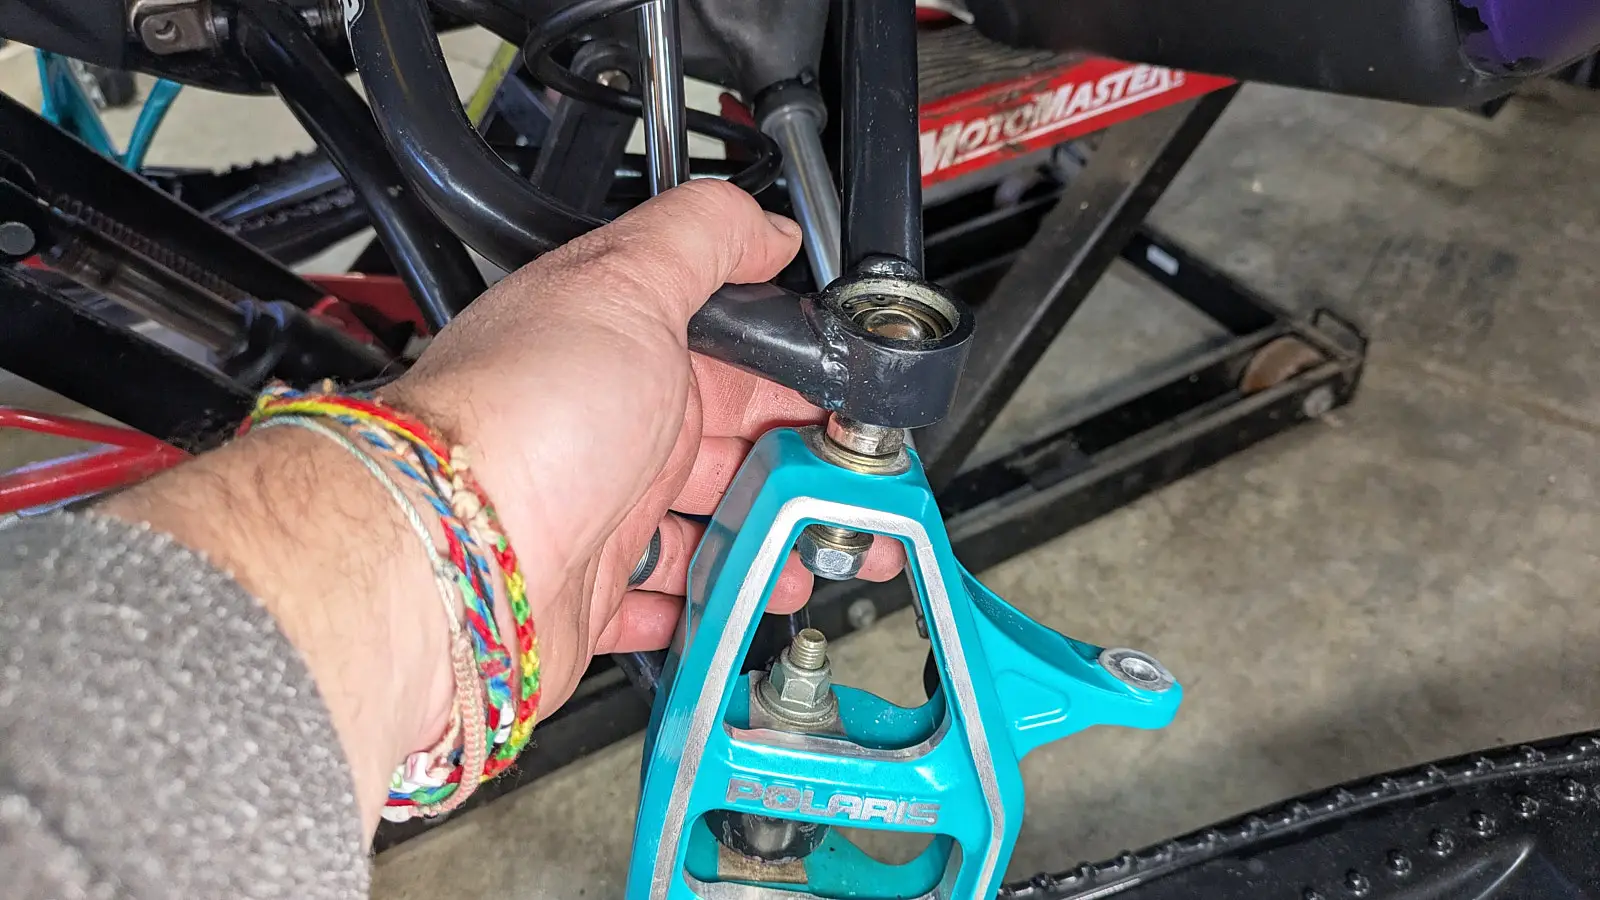
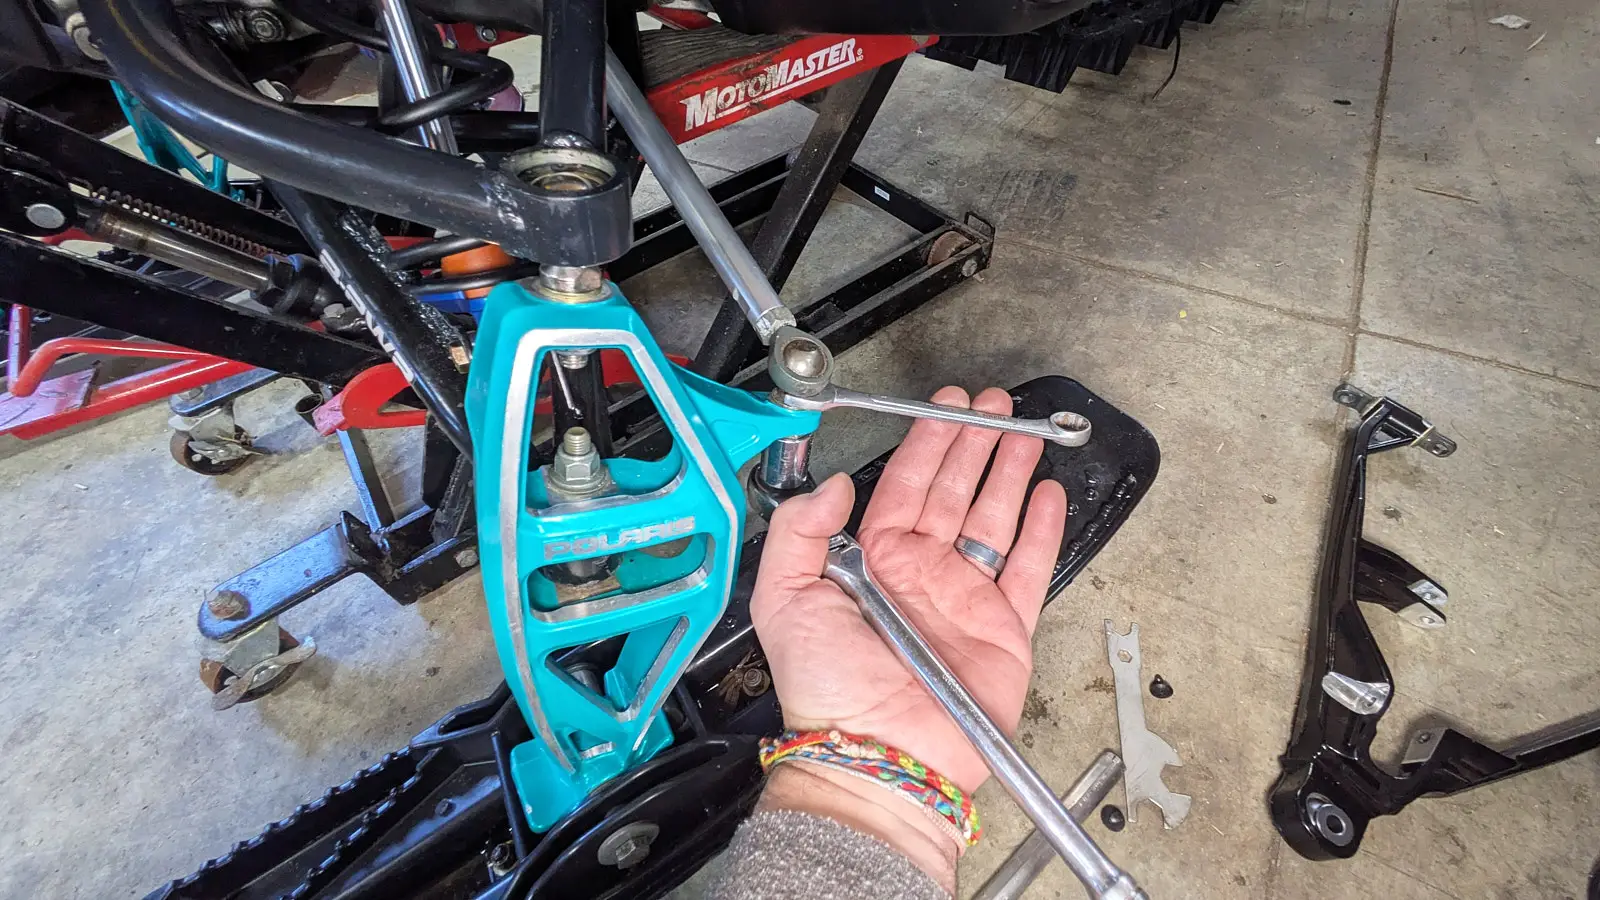
Step 10: Install the Upper B-PWR Suspension Arm
Tools Required
- Ratchet wrench and 6″ extension
- 13 mm socket (long)
Instructions
- First, place the upper suspension arm.
- Install the four (4) nuts.
- Tighten according to the manufacturer’s recommendations using the ratchet wrench and 13 mm socket.
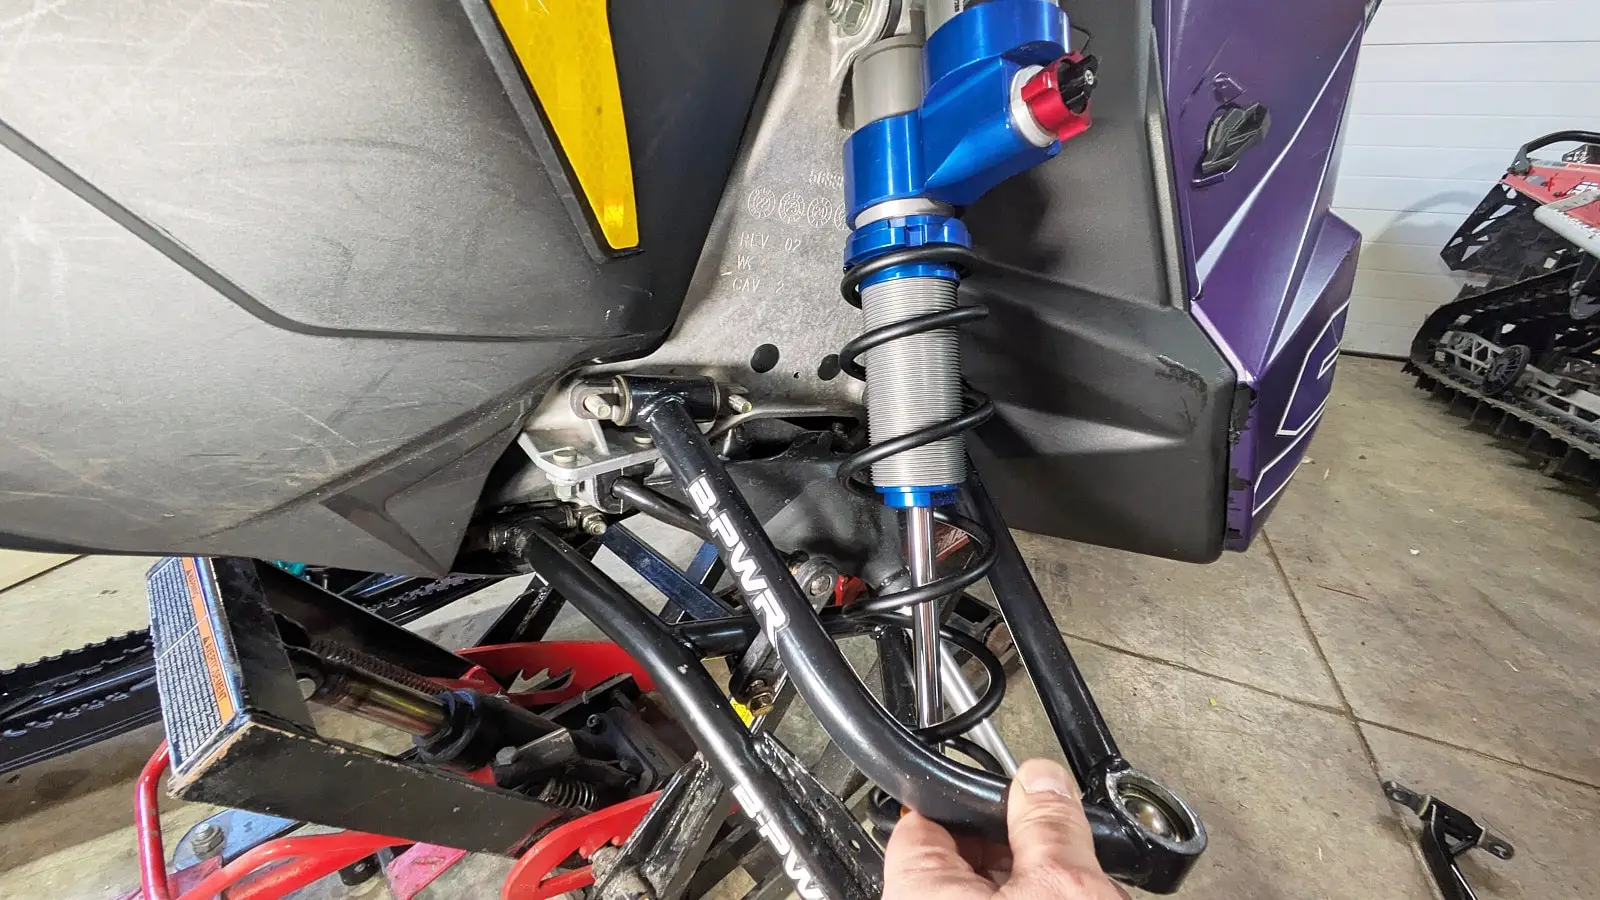
Step 11: Couple the Stabilizer Bar and Shock Absorber
Tools and Materials Required
- Ratchet wrench
- 13 mm socket
- 13 mm wrench
- One (1) M8 x 40 mm bolt, included in your kit (required for the stabilizer bar)
- One (1) M8 x 55 mm bolt, included in your kit (required for the shock absorber)
- Two (2) M8 washers, included in your kit (required for the shock absorber)
- One (1) M8 nylon lock nut, included in your kit (required for the shock absorber)
Instructions
- Install the stabilizer bar on the right lower suspension arm using an M8 x 40 mm bolt. It should be oriented toward the shock absorber.
- Place the shock absorber.
- Install the shock absorber on the right lower suspension arm.
- Use the M8 x 55 mm bolt, two (2) M8 washers, and one (1) M8 nylon lock nut. Tighten according to the manufacturer’s recommendations using the ratchet wrench and 13 mm socket.
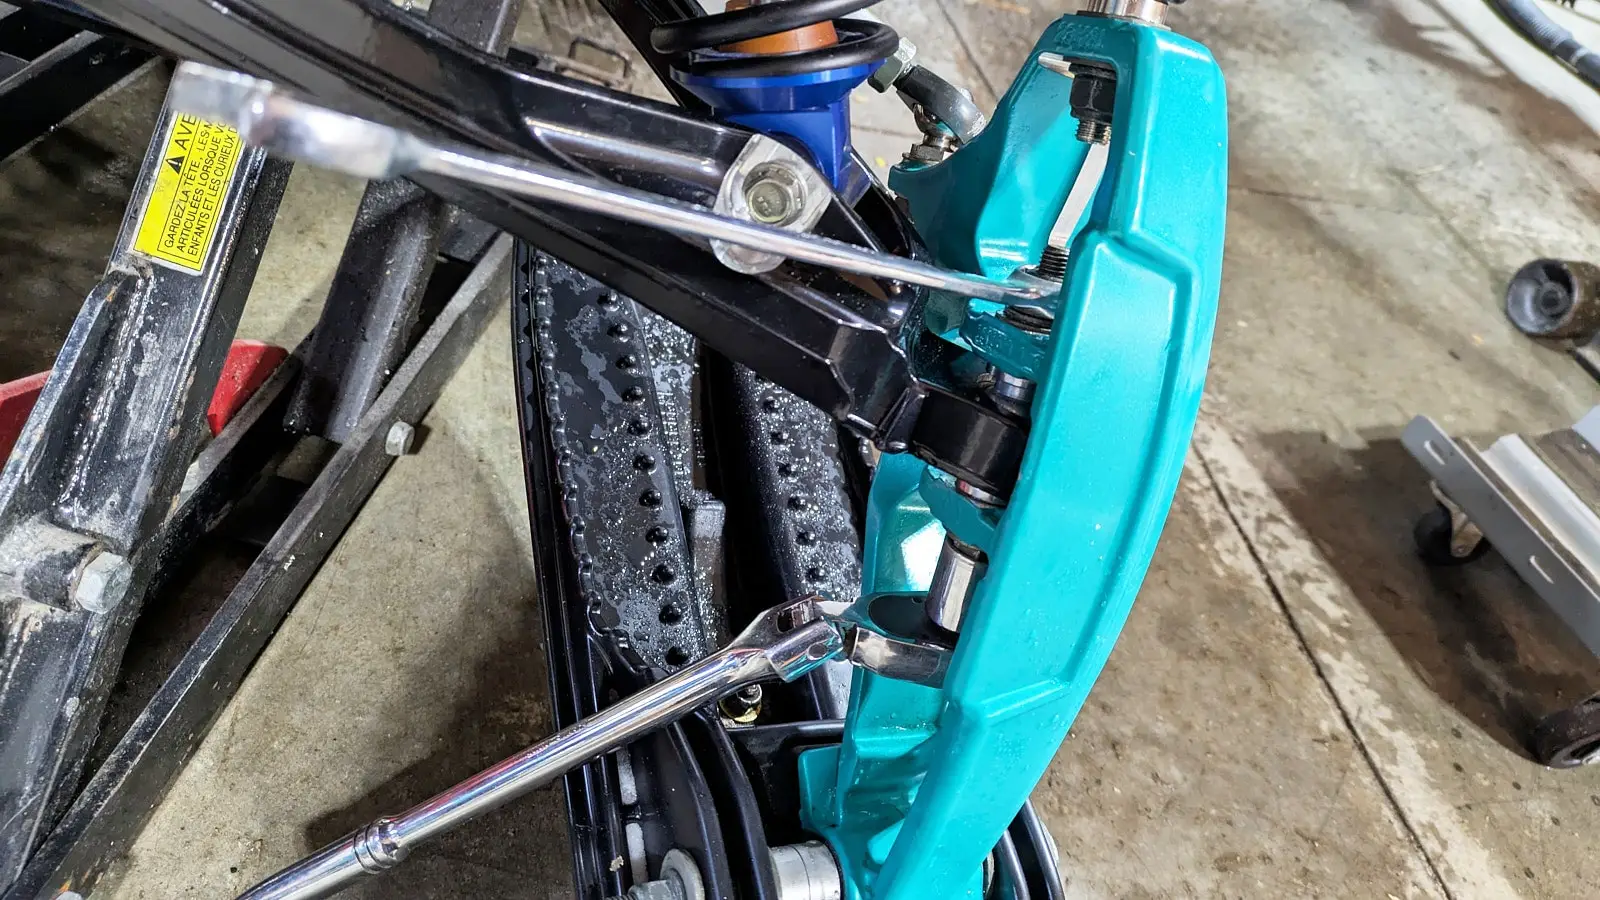
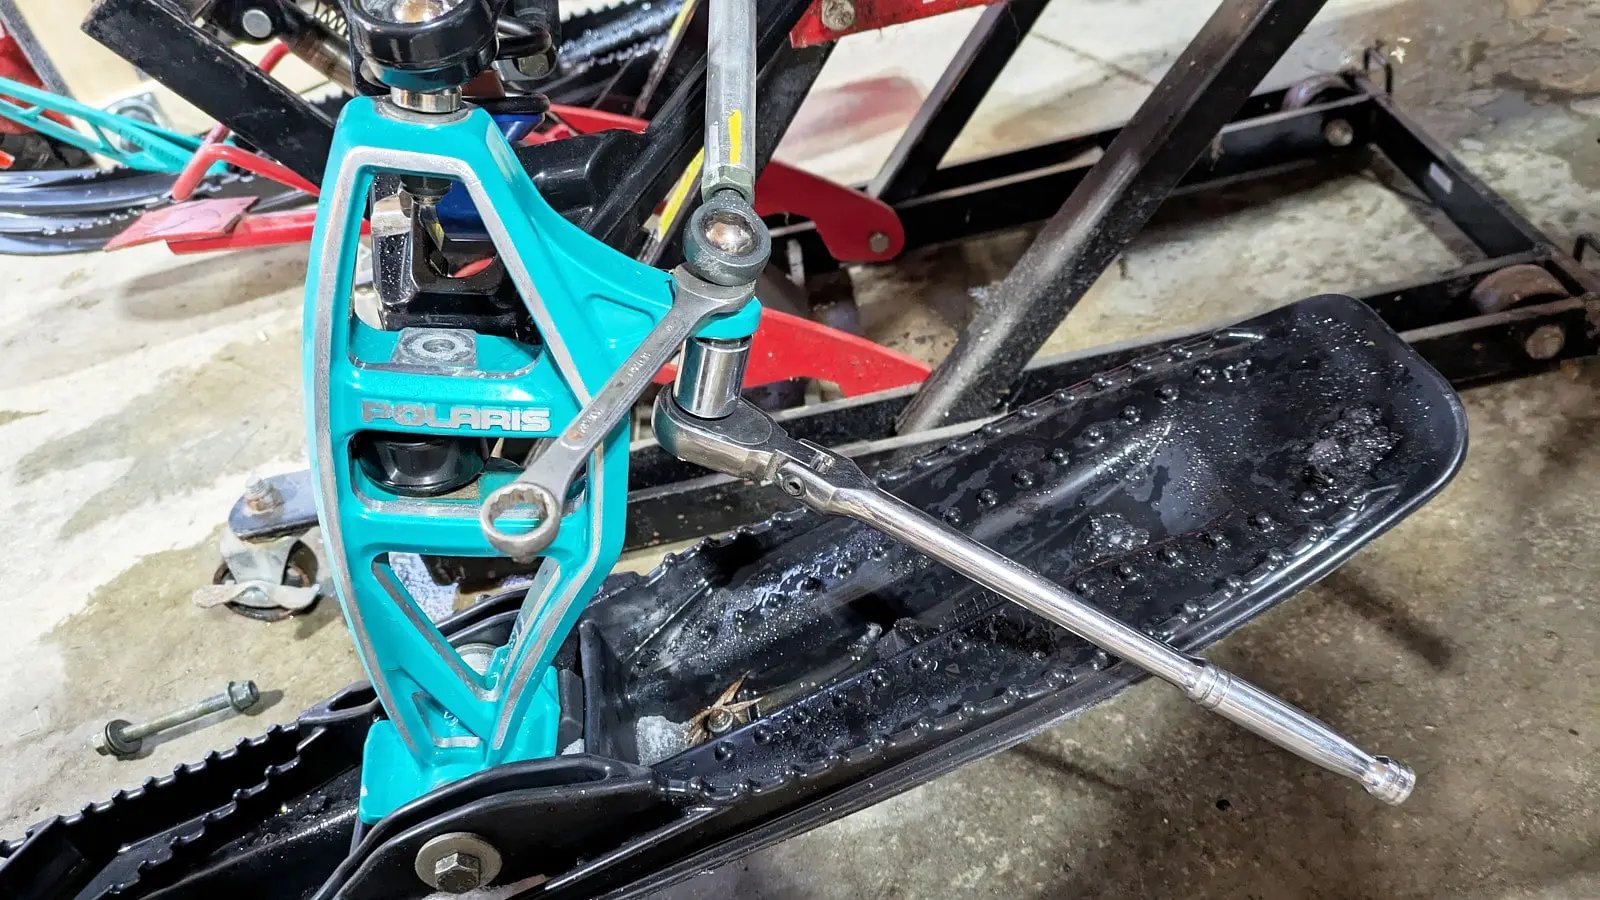
Step 12: Install the Ski Support (Spindle)
Tools Required
- 15 mm socket
- 13 mm, 15 mm, and 17 mm wrenches
- Ratchet wrenches
- One (1) M10 nylon lock nut
Instructions
- First, insert the lower suspension arm into the centre of the ski support. Insert the bolt, washers, and nut you removed earlier. Use the ratchet wrenches, 15 mm socket, and 15 mm wrench.
- For the steering ball joint installation, first reattach the washers on each side of the ski support, then insert the ball joint followed by the nut. Use the ratchet wrenches and 15 mm socket on the nut and insert the 13 mm wrench under the ball joint. Tighten firmly.
- Next, install the upper arm using a washer on each side of the support. Install the M10 nylon lock nut. For tightening, lock the ball joint with a 15 mm wrench and tighten with a 17 mm wrench.
- Finally, attach the outer steering ball joint using the 13 mm wrench and a 15 mm socket.
Step 13: Lock the Steering Rods and Reattach the Boot After Alignment
Finally, ensure you perform a ski alignment. This will allow you to lock the nuts on the steering rods. Consult your vehicle’s user manual for details on the alignment procedure.
Reattach the boot, firmly press the plastic cotter pin into its hole, and reinstall the two (2) Torx screws.
IMPORTANT: Always follow the manufacturer’s torque specifications.
In Conclusion
Replacing your snowmobile’s original suspension arms with B-PWR arms offers significant advantages in terms of performance, durability, and aesthetics. It’s a wise investment if you’re looking to optimize your riding experience. I want to clarify that the original components are acceptable for standard, non-excessive use. But you’ll appreciate this upgrade if, like me, you’re hard on the mechanics or lack talent. Imagine cancelling a snowmobile trip due to a breakdown; it could cost more than new suspension arms.
B-PWR suspension arms are designed to withstand impacts while having precise break points. Indeed, a suspension arm that’s too rigid can damage the snowmobile’s structure. B-PWR engineers have thought of everything! So, in case of an impact, the shock is distributed through the arm’s structure. If the impact is too severe, the upper arm joint will give way. The upper attachment can be replaced for a fraction of the cost and is easy to carry with a tool kit.
Thank you to Polaris and B-PWR for their collaboration on this article.
————————
Continue Reading
End-of-Season Maintenance of your Snowmobile