Choosing the right studs for your snowmobile track can make a huge difference. In this simple and easy-to-follow guide, I’ll introduce you to the different types of traction products. Learn about their benefits and how to install them yourself with ease.
Safety, control, and riding sensation are among the top priorities for snowmobilers. Mother Nature, true to her unpredictable ways, gives us unpredictable Quebec winters. Every season brings new challenges. Snow conditions can change quickly, and trails often become hard packed and icy. This inevitably affects the stability and control of your snowmobile. Among the various ways to increase traction, adding studs to your track remains the most popular choice.
Why Should I Install Traction Products on My Snowmobile?
To fully unleash your snowmobile’s potential, you first need to be able to transfer its power to the ground. You could have the most powerful machine in the world, but it becomes useless if you can’t control it.
Safety is another key reason to consider using snow studs. The ability to stop or accelerate at any moment on the trail is essential for your safety. It’s reassuring to know that your snowmobile will respond as expected in any situation. That’s why traction control products are considered an essential upgrade.
Pro Tip:
I highly recommend adding tunnel protectors when using traction products. These help preserve the heat exchangers (radiators) in case of contact.
What Kind of Studs Is Best for Me?
As you may already know, some snowmobile tracks come with small built-in studs in the lugs. A great example is the popular Ice Ripper XT from Camso. In most cases, these help, but not significantly.
Some manufacturers, such as IGRIP, offer specialized screw-in studs that you can install directly into the rubber lugs. Don’t worry—they include the tool needed for proper installation. Warning: You will still need to pre-drill before installing them. These screw-in track studs are an interesting compromise for riders who want improved traction without breaking the bank. Expect to spend between CA$400 and CA$600.
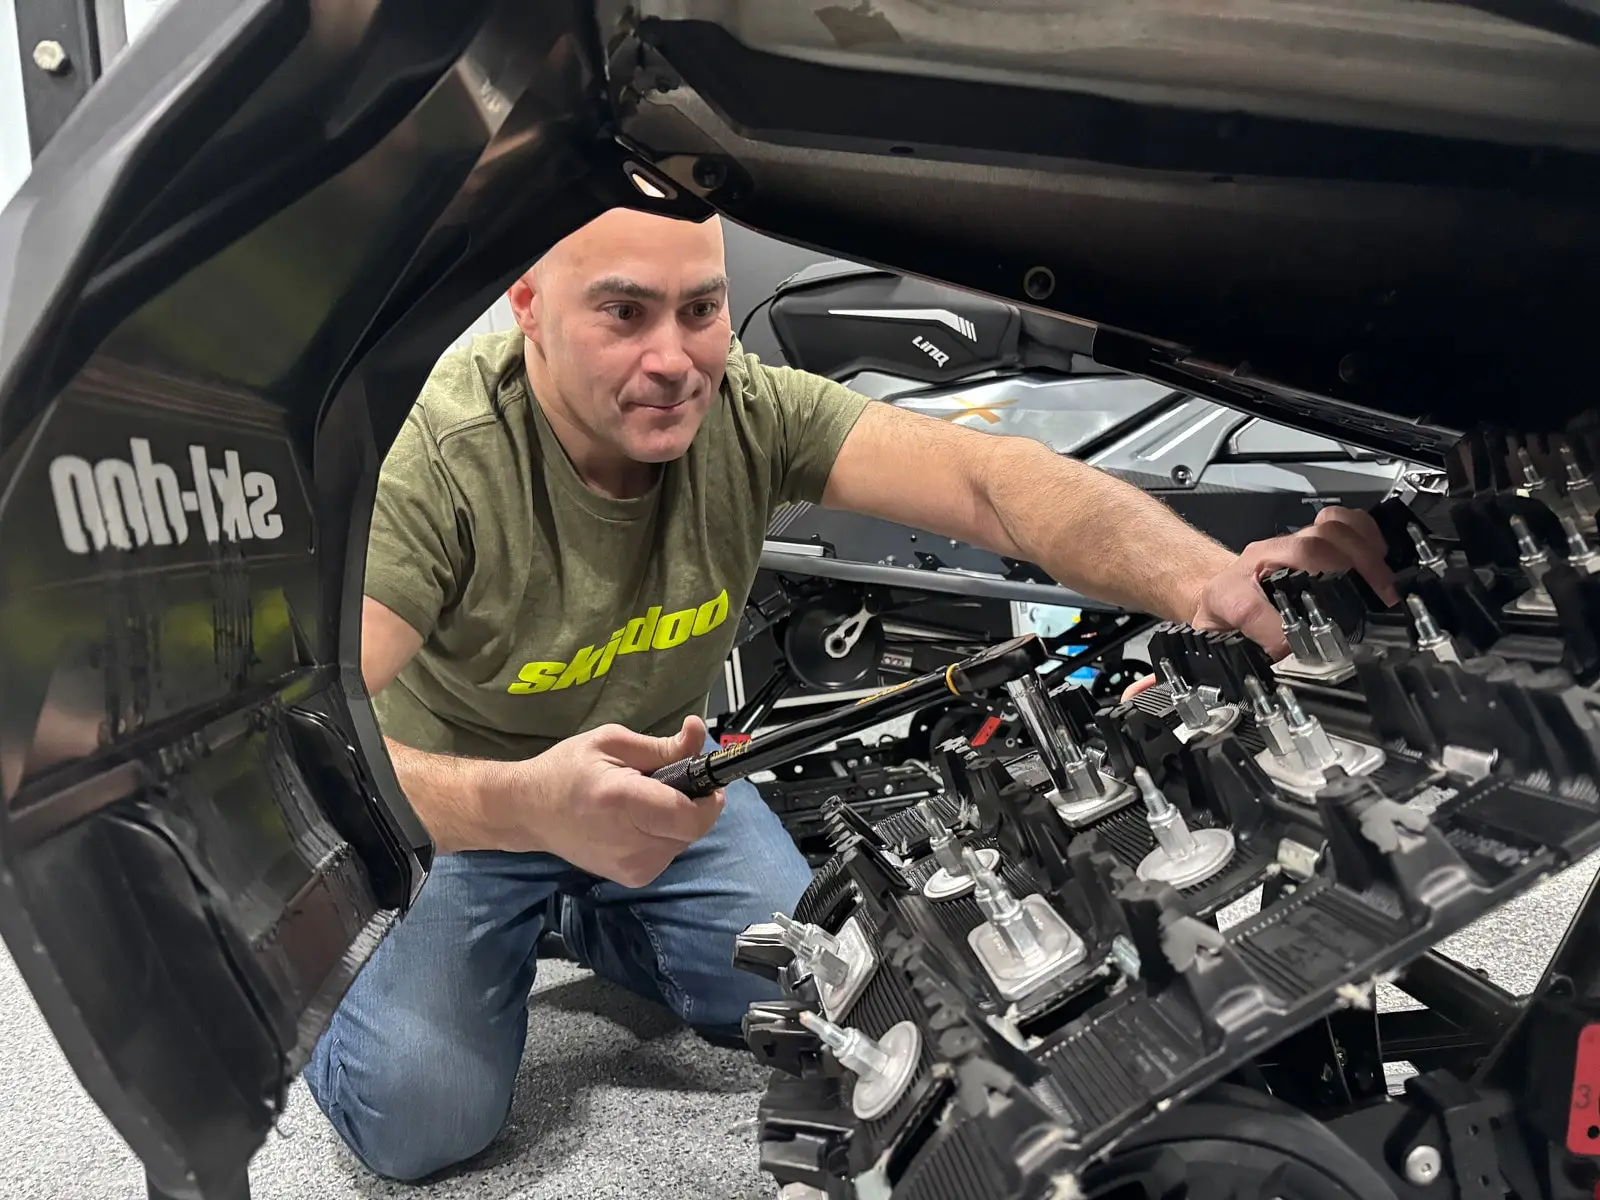
For those seeking ultimate control, the third option is adding studs that resemble nails with a mushroom-shaped head. These are mounted at the base of the track and held in place mechanically with a system of plates and nuts. This type of stud setup can easily cost up to CA$1,000.
I’m Going All in! But How Do I Choose the Right Studs for My Track?
Let’s set aside racing applications and focus on models designed for trail riding.
The type and number of studs depend on several factors. These include the number of plies in your track, its length, lug height, and intended use. Remember: the sharper the stud, the more grip it provides—but the shorter its lifespan.
Studs for single-ply tracks have a shorter shoulder, a wider head, and a longer nut. These features allow them to achieve the same retention strength as those used in two-ply tracks. Studs designed for two-ply tracks should never be used in single-ply tracks, and vice versa.
To avoid making mistakes, I rely on the Woody’s Hookup Traction Guide available on their website. I simply enter my snowmobile’s details, and the guide automatically suggests the best options. It’s quick, easy, and hassle-free. I figure they’ve already tested multiple setups—so why not just trust them?
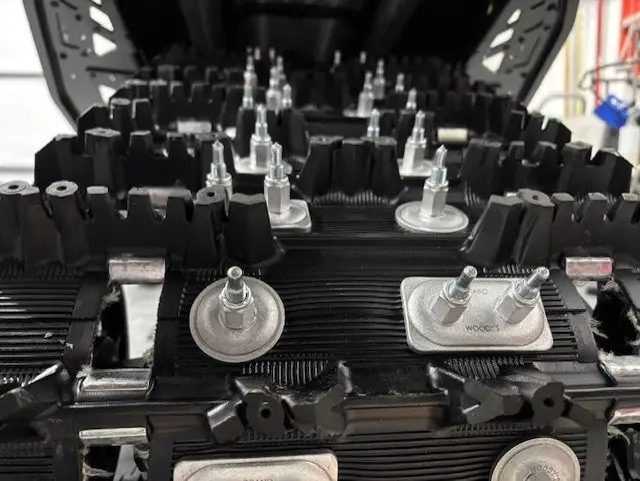
For example, my partner rides a Ski-Doo MXZ X-RS with a 129-inch track. The Woody’s Traction Guide suggested two setups: the “Trail & Safety” option with 90 studs and the “Maximum Performance” option with 135 studs. Since I know Véro’s riding style well, it was obvious to me that the second option was the way to go.
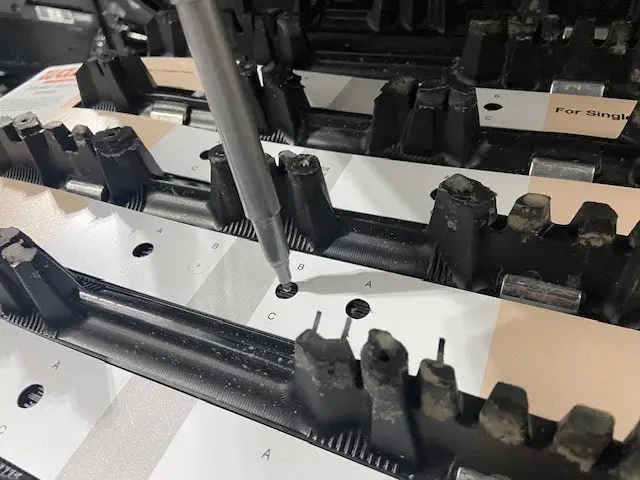
Step 1: Marking and Drilling Your Pattern
Another great feature of the Woody’s Hookup Traction Guide is that it also suggests various complementary products that truly make installation easier. For instance, their drill bit and stud template ensure a smooth, hassle-free job. I strongly recommend both—they’re inexpensive and will make you look like a pro!
First, I placed the template on the track and marked the stud locations using a contrasting colour marker. And that’s it.
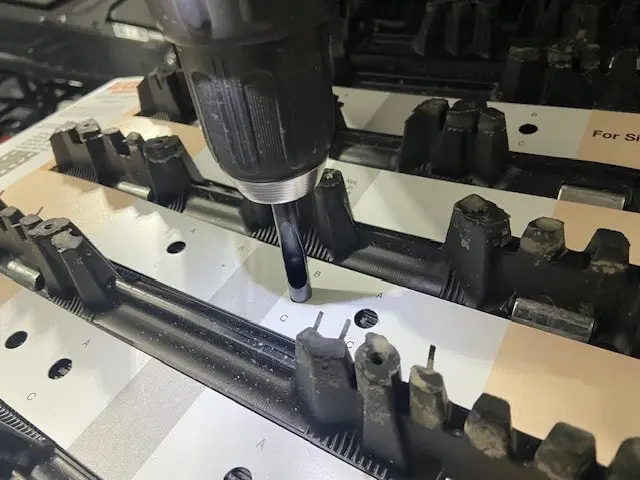
After marking the entire track, I move on to drilling. I use the special drill bit for this step. Of course, I make sure to avoid contacting the wheels or other suspension components. This process requires minimal effort, and the holes turn out clean.
Step 2: Installing the Studs
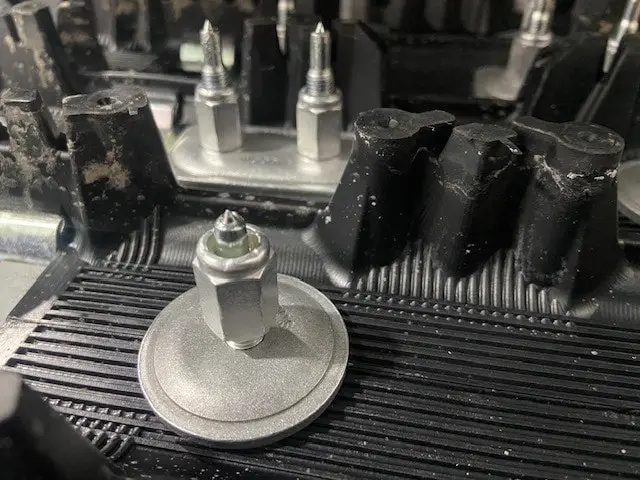
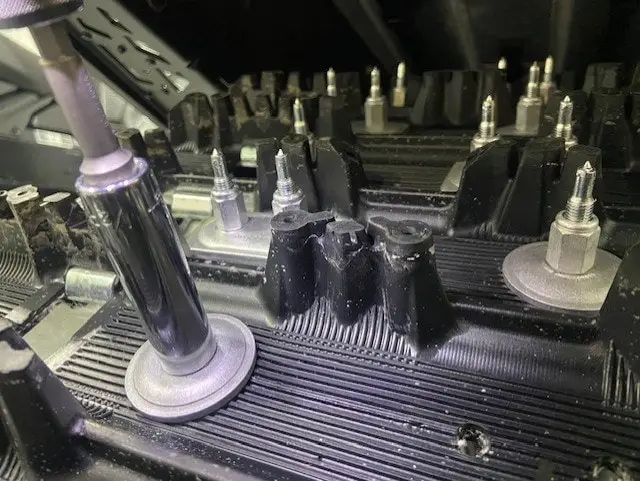
First, I inserted the stud into the drilled hole from inside the track.
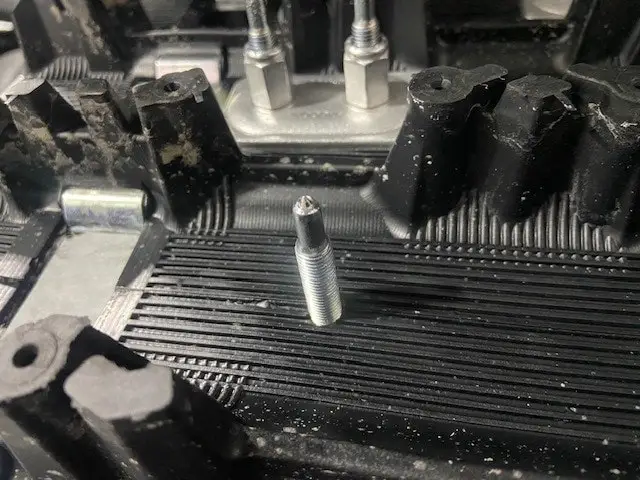
Next, I install the backer plate on the outside and tighten the nut. There’s no need to use thread-locking agents like Loctite, as these nuts have built-in nylon locking features.
Pro Tip Just for You:
There’s a small hexagonal hole behind the head of the stud. Simply insert an appropriately sized L-shaped hex key to hold the stud in place and prevent it from spinning while tightening the nut.
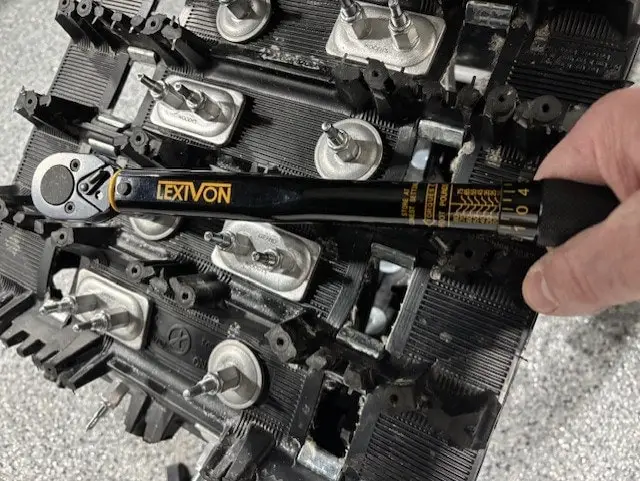
Step 3: Final Tightening
For optimal safety, I perform a final check with a torque wrench. This step is crucial to ensure all nuts are evenly and correctly fastened. It’s essential to follow the manufacturer’s recommended torque specifications: 30 lb-ft for single-ply tracks and 15 lb-ft for two-ply tracks.
Preventive Maintenance
Over time, especially early on, the stud heads tend to sink deeper into the rubber track. This can make it seem like some nuts are loosening when they actually aren’t. To minimize the risk of losing studs and to ensure they function properly, I check the torque of each stud with a torque wrench every 500 km to 800 km. This simple preventive step can mean the difference between an enjoyable ride and one that ends abruptly because a stud punctured the radiator.
Conclusion
In summary, choosing the right snow studs depends on your specific needs, budget, and trail-riding goals. Whether you opt for a balanced setup or a more aggressive one, the key is to ensure better grip and optimal control. If installation seems overwhelming, your dealer or a specialized shop will be happy to help you get the most out of your snowmobile. What truly matters is enjoying every moment on the snow while riding with confidence and safety.
—— — — —
Keep Reading
Complete and practical guide for preseason trailer maintenance
Practical Guide for New Snowmobilers : Get Ready to Experience Winter Like Never Before!
Preparing Your Snowmobile for Winter: A Complete 6-Step Guide