How to make a snowmobile ramp
The purchase of a new snowmobile often requires several small logistics details that we seem to forget when we take possession of our machine. Transporting the snowmobile is one crucial detail especially when we use it a lot.
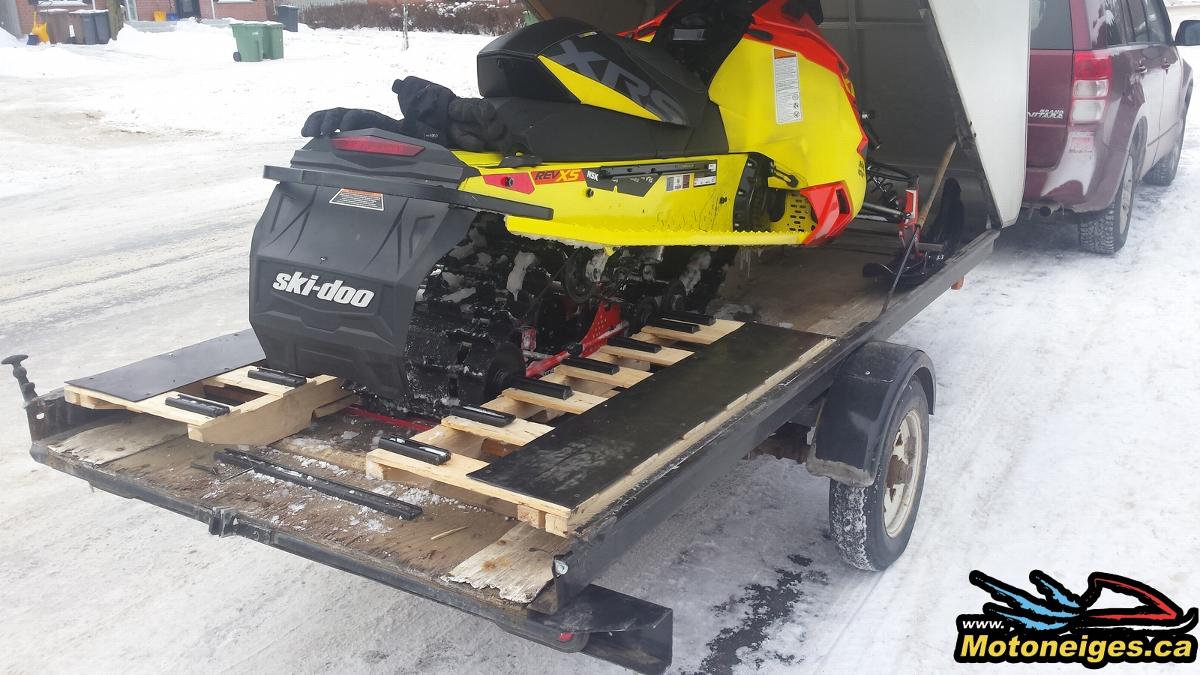
The construction of a simple ramp, that is adapted and efficient, can really facilitate the loading of your snowmobile. Because I made several tests and mistakes during the design and construction of my ramp, I wanted to guide you before you go on with your project.
The reason that led me to build a ramp adapted to my needs, was to fixed small details that became a major irritant. Simply getting dirty and wet to unblock the pivot mechanism, which is underneath the trailer, made me bitter. I was wasting time and energy, using the mechanism has about 6 different steps before the snowmobile is loaded into the trailer. Honestly what is better than to be in your vehicle as quickly as possible after a cold day? As well, I had to break the ice introduced into the mechanisms, which lengthened the execution time.
First, my recommendation is to know your needs and to make a list of what you already have to minimize the time and costs. I used two wooden pallets that I simply reinforced and modified. It is also very important to know the height of the trailer or truck in order to respect the cutting angles so that the skis of the snowmobile easily slide on the ramp/trailer and ramp/ground.


Also, plan the transportation of the ramps. For lightness, the combination of pine wood and aluminum makes a solid, light and durable ramp. I built my ramp wide enough to fit between the sides of my trailer and the track. The dimensions of each of them were 17.5 "wide and 50" long and fit well with my trailer which is 21 "high and 51" wide inside. Therefore, 15 "of track width, plus 2 times 17.5" = 50 ". You will also have to think about blocking the ramps on the trailer so that they do not move during your descents or ascents. I used a simple 7/16 screw through the end of the ramp and trailer.
In addition, you will need to think about the traction required to raise or lower the sled. The element that ensures this traction is made of simple pieces of old runners that I cut 6 inches long. I drilled and beveled them to hide the end of the screw heads.


Here is a non-exhaustive list of what you will need:
- A circular saw
- A drill
- Wood screw
- Bolts
- Nuts
- Drill bit
- Nylon sheet trimmings cut
- 2 aluminium plates
- 2 pieces of aluminum
- Old runners
- 2 wooden pallets

In conclusion, it will only take you a few hours in your basement or garage, but it will save you a lot of inconvenience during the winter season. All you have to do is let your imagination and creativity run wild in the making of your ramp, which will accommodate you for years to come.


