Table of contents
Toggle- A Rebuild by SledMagazine.com – Part 2 : The 670 2-Cylinder Rotax Engine
- Surprise After Surprise
- Electrical problem
- More electrical problem
- One of the new connectors
- Cracked engine support
- Motor support once welded
- The bad engine in punishment in its corner!
- Original piston
- New piston
- Cleaned exhaust valves
- The perforated injection oil conduit
- Four small rings to be gently removed
- Assembly of the oil pump with a new tube
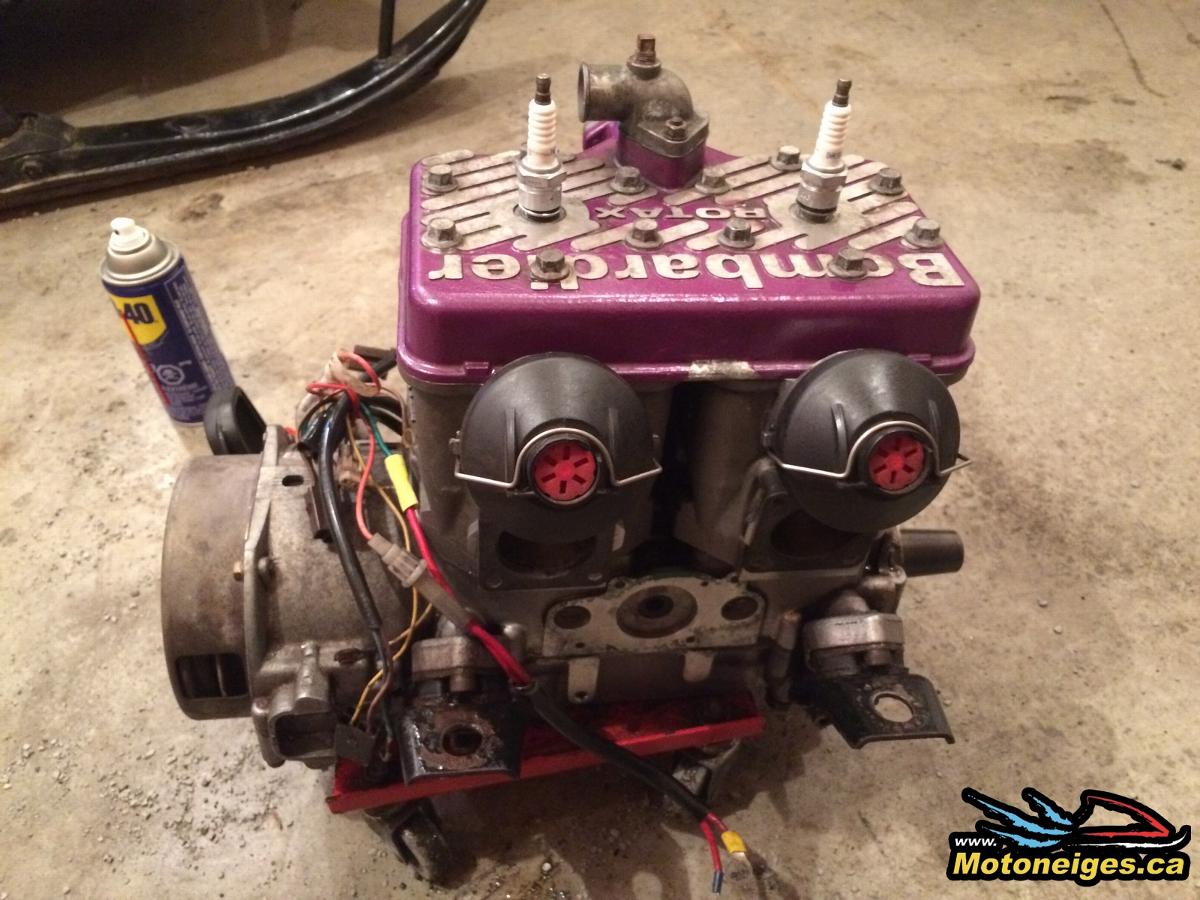
- Engine before final assembly, which will be done by a mechanic
- A good cleaning
- Assembly of the Rotary Valve
- Installation of the oil pump
- Installation of the water pump and new gasket
- The assembly is finally completed
- [[YT]]
- The first start !
A Rebuild by SledMagazine.com – Part 2 : The 670 2-Cylinder Rotax Engine

Rotax Formula Mach 1 engine 1994
When I bought the snowmobile, I was told that the engine repairs are only minor according to the preliminary evaluation. So, I was looking forward to starting and to have a closer look at the modifications needed. Curiously, when the engine was running, the rotary valve stayed fixed and did not rotate. It wasn’t looking very good. We had to remove the shaft from the rotary valve and found that the central gear was destroyed. After doing some research, we were able to replace this gear easily and inexpensively. The last inspection was to make sure the shaft was still straight and undamaged from the engine failure. Unfortunately, once again, the test results were negative.

Destroyed gear and the tests for the rotary valve shaft
It was not just a matter of changing the gear, everything now had to be changed. I had to turn to the used market because the bill to replace the gear and the complete shaft was quite high. After a few calls, I was finally able to find a damaged entire base, but with the rotary valve shaft in good condition. So, this being done, nothing could stop us anymore, that’s what we thought…
Once again, fate was against us. After the failure of the rotary valve shaft, the other crankshaft transfer gear had moved from its original position. This was the worst-case scenario because not only did the complete engine have to be open, but the crankshaft itself had to be redesigned and repaired. At this point, I wondered if it would not be better to find a functional used engine and put it back in the chassis. After careful examination, we opted for rebuilding the original engine completely. First, this engine was only manufactured for one year, and it will probably be difficult to find, and I wanted to keep the snowmobile as firmly as possible from the original. Moreover, buying a used engine doesn’t guarantee its proper functioning in the short and medium term…

The damaged shaft
Surprise After Surprise
When the engine was extracted from the chassis, there were still many surprises. First, in terms of electricity, it was a complete nightmare. There had undoubtedly been many experimental homemade modifications throughout the years. With several wires stripped and some connectors completely melted, a quick visit to my local Ski-Doo dealer with an extensive list of new electrical connectors in hand was enough to solve this other problem. Also, when I carefully examined one of the engine supports, I noticed that it was completely cracked. This project will probably never end. 2-3 welds later, we are back on the pre-established plan! At this point, I decided to change the two pistons and the complete gasket kit and clean the RAVE exhaust valves. This way, I would have peace of mind when using it, and this engine will serve me for several more years.

Electrical problem

More electrical problem

One of the new connectors

Cracked engine support

Motor support once welded

The bad engine in punishment in its corner!

Original piston

New piston

Cleaned exhaust valves
Before putting it all together, I asked myself one question! What was the problem with the engine at the beginning? Why had he died that way? With all the investment to rebuild the engine, it would be regrettable to cause further damage after the first ride! The carburetors were inspected and cleaned. All the carburetor parts were checked. The rubbers on the carburetors were tested to ensure that the engine did not suck air and so changed the air/gas ratio… After all routine inspections, a potential problem emerged. A tiny piece that could have gone unnoticed and caused more catastrophic damage if we had missed it. After inspection, the injection oil lines were cracked and leaking. As a result, the engine could not be adequately lubricated. Two small new ducts and four tightened rings, and we were off to a better start. By the way, it is imperative to use the right type of fuel and oil line. With experience, using low-quality ducts will only last for one season and will have to be replaced again. It will be dry without any flexibility and will tend to crack very easily. Been there done that!

The perforated injection oil conduit

Four small rings to be gently removed

Assembly of the oil pump with a new tube
Now it’s time to assemble it all again! To refresh the engine’s look, a small sandblasting session and body shop wash session were part of the plan. It is easier to work in a clean environment and easier to identify a potential leak if everything is dry before restarting the beast. After a couple of hours to put the puzzle back together and back pain, the engine was back in the snowmobile! This engine should now have 150 lbs of compression on each cylinder and transmit about 115 HP! Finally, what was supposed to be a simple repair has unfortunately ended up with a complete rebuild of the engine. It was a good challenge, next!


