DSW Graphic is a business of lettering and design of advertising banner located in Sherbrooke. It began with lettering of all types. Since 5 years, the company is a leader in sled wraps. Thanks to its online boutique, DSW Graphic produces and ships 40 to 50 graphic kits per week during winter. Customers from all over the world contact the company to customize their snowmobile.
A graphic kit is no more, no less than a kit of stickers installed to replace the original manufacturer stickers. Snowmobilers of all ages and types ask for it to make their machine unique and distinctive.
Last January, I met Mr Éric Lamy Pothier, one of the owners of DSW Graphic. He let me see the printing and preparation of my own sled wrap. During that time, he shared with me all his tips so that I could learn more in this matter.

Materials
First, a wide range of finishes are available to customize a vehicle. The most popular, with rather a shiny look, is called “gloss”. Because snowmobiles are often severely tested, this finish is chosen for its ease of care. However, other textures are available such as mat aspect, pierced, reflective, mirror, metallized, chrome, etc…
There are many types of manufacturing vinyl. Besides the cost, what differentiates each one and influences its quality, is the glue used by the manufacturer. Some brands are so sticky that risks of damage during installation are increased. Éric prefers an american brand renowned for its long-term adhesion and ease of installation.
Of course, there are many quality levels to check. For example, the product must be adapted to the surface it covers. Snowmobiles are built with porous plastics and smooth plastics. So, the glue must meet these conditions. Beware of white glues that can sometimes be of bad quality.
No matter the selected brand, almost all materials are now made of ecological ink and with UV protection.
Preparation and installation
Here are few steps to take prior to installation of a graphic kit. Firstly, printing. Then, the kit is shipped to be laminated where a thin layer of self-adhesive vinyl is applied. This is a crucial step because it determines the durability and anti-scratch protection. Finally, cutting is made along marks printed on the first step.
Then, many hours are needed to prepare adequately the vehicle. All original stickers are removed with a heat gun. Afterwards, the snowmobile is cleaned with a pressure washer and we let it dry out and warm up. It is essential that there is absolutely no trace left of glue or residue to maximize the adhesion of the new stickers. To do so, it is better to decontaminate all the vehicle with alcohol.
Many customers decide to install the graphic kit by themselves. At DSW Graphic’s, the client receives a detailed installation guide. However, a professional installer will offer some guarantee against damage during installation. Many lettering specialists offer this service all over the Province of Québec. Personally, I contacted Mr Steeve St-Pierre at Dino Concept’s in Québec City.
The sled wraps are designed to last 5 to 6 years. Of course, it depends on the care given to the vehicle. Also, it can be easily removed with a heat gun, if needed.

Before

After
Cost
Graphic kits are available at many places. Lettering specialists usually employ computer graphics designers who proceed to customization as you wish. Pre-designed kits are also offered on many web sites and at most recreational vehicle dealers’.
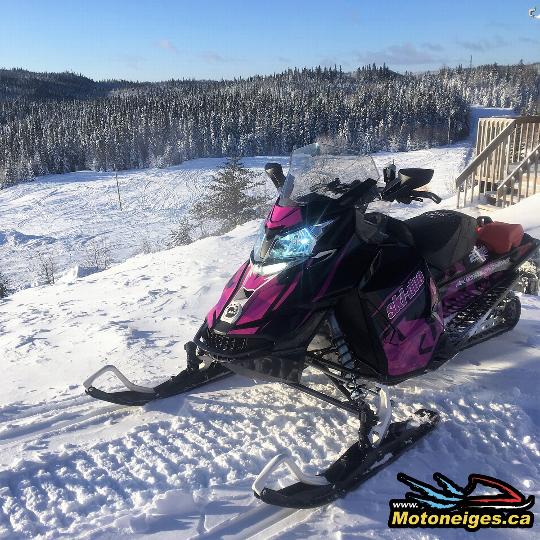
Many factors determine the cost of a snowmobile customization. For example, the type of kit chosen will influence the total price. For a kit including the hood and side panels only, prices may vary from 150 $ to 250 $. If you choose a complete snowmobile wrap, as seen on this picture, it will cost about 325 $. These are the prices for pre-designed models you will choose in your supplier‘s catalog. However, if you decide to create it yourself, you will choose the personalized design service. Be ready to pay an additional amount up to 150 $. The installation price is more variable, an average of 125 $ to 250 $.
Depending on the look you will give to your machine, you may have to change some parts. Effectively, the graphic kit does not totally cover the color on which it is set. So, you will have to choose a graphic kit that matches the existing colors or else, to buy new ones at your dealer’s. You should know however that this will greatly increase the cost of your project.
To conclude, I am very satisfied with the result provided by the customization of my BRP MXZ Blizzard 900 ACE. I would like to thank Mr Éric Lamy Pothier from DSW Graphic for the printing of my graphic kit and for his precious advices, and Mr Steeve St-Pierre from Dino Concept for its installation.

For more details :